


10
TASCAM SS-R1/SS-R05
name in the home screen.
When editing a name, this key switches the type of
character (uppercase/lowercase).
You can adjust the display contrast by holding down
this key and turning the
MULTI JOG
dial.
w
CALL key
When you press this key, the SS-R1/
SS-R05 will search for the call point (the point at
which playback was most recently started from the
pause condition), and will enter pause mode (see “Call
function” on page 30).
When editing a name, this key inserts a space.
e
STOP key
When you press this key while playing
back or recording, playback or recording will stop.
Pressing this key while stopped or while selecting a
track will cancel the track selection.
Pressing this key while stopped in program mode will
clear all programs.
Pressing this key while editing will cancel the editing
operation.
r
PLAY key
While stopped or paused, press this key to
start playback.
While in the record-ready condition, press this key to
start recording.
The key will light during playback or recording.
t
READY key
While stopped or playing back, press this
key to enter the pause condition.
While recording, press this key to enter record-ready
mode.
y
RECORD (TRK INC) key
While stopped, press this
key to enter record-ready mode.
While recording, press this key to increment the track
number.
The key will light when in recording mode.
If you press this key when a CompactFlash card is not
inserted, the input monitor will be activated, and the
selected input signal will be output. The key will blink
while input monitor is active.
u
KEYBOARD connector
You can connect a PS/2
keyboard here.
Set the UTILITY menu KEYBOARD setting appro-
priately for the type of keyboard you’ve connected (see
“Specifying the keyboard type” on page 60).
i
PITCH knob
Turn this knob to adjust the pitch
(playback speed). (See “Pitch control play” on page 26.)
You can press this knob to turn pitch control on/off.
By holding down this knob you can access pitch step
switch mode.
o
PHONES knob, PHONES jack
You can connect
stereo headphones to the
PHONES
jack.
Use the
PHONES
knob to adjust the headphone
volume.
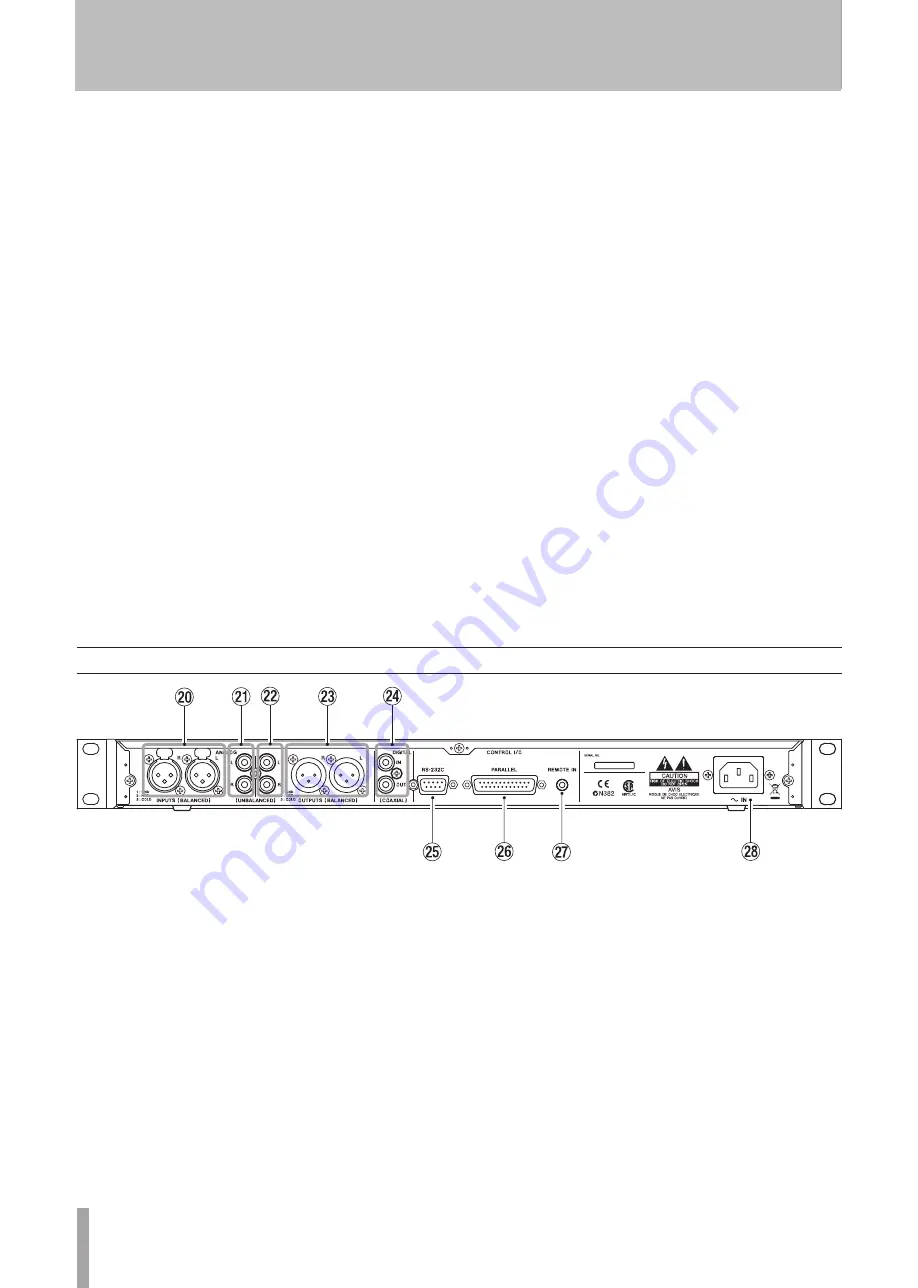
Rear panel
p
ANALOG INPUTS L/R (BALANCED) jacks (SS-R1
only)
These are analog input jacks (XLR balanced).
The nominal input level is +4 dBu.
(1: GND 2: HOT 3: COLD)
a
ANALOG INPUTS L/R (UNBALANCED) jacks
These are analog input jacks (RCA pin jacks).
The nominal input level is -10 dBV.
s
ANALOG OUTPUTS L/R (UNBALANCED) jacks
These are analog output jacks (RCA pin jacks).
The nominal output level is -10 dBV.
d
ANALOG OUTPUTS L/R (BALANCED) jacks
(SS-R1 only)
These are analog output jacks (XLR
balanced).
The nominal output level is +4 dBu.
(1: GND 2: HOT 3: COLD)
f
DIGITAL IN/OUT (COAXIAL) jacks
These are
digital input/output jacks compatible with IEC60958-3
(S/PDIF).
g
CONTROL I/O (RS-232C) connector (SS-R1 only)
This is a D-sub 9-pin RS-232C connector for control I/
O. You can connect it to an external computer or other
device (see “Using the RS-232C connector” on page
63).
h
CONTROL I/O (PARALLEL) connector (SS-R1
only)
This is a D-sub 25-pin parallel connector for
control I/O. You can connect it to an external controller
such as the RC-SS20 (optional). For the pin wiring,
refer to “Control connection” on page 8.
j
REMOTE IN connector
Connect the RC-SS1 dedi-
cated remote here.
k
AC IN connector
Connect the included power cable
here.
2 − Controls and connectors


