


3. MAINTENANCE
Tapflo sanitary pump series
27
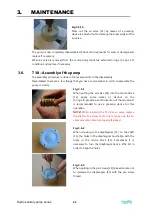
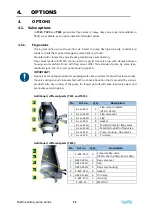
c)
Threaded air valve
– T225 from s/n 0803-… until 1105-… and
T425 from s/n 0801-… until 1105-…
Fig. 3.7.13
Carefully unscrew both air valve end caps by means of a
mounting tool.
Fig. 3.7.14
Push out by hand the air valve shaft and piston.
Fig. 3.7.15
To push out the cylinder, use the other side of the
mounting tool. Use a pressing device to remove the air
valve cylinder from the centre body.
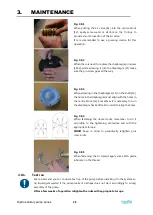
The pump is now completely disassembled. Check all components for wear or damage and
replace if necessary.
When air valve is removed from the centre body check the external O-rings (6 x pos. 30)
condition and replace if necessary.
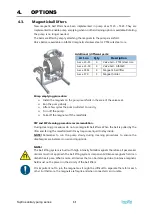
3.8.
T80-T425 – assembly of the pump
The assembly procedure is done in the reverse order to the disassembly.
Nevertheless there are a few things that you have to remember in order to assemble the
pump correctly.