1.
INSTALLATION
IOM manual CTX centrifugal pumps
10
1.9.
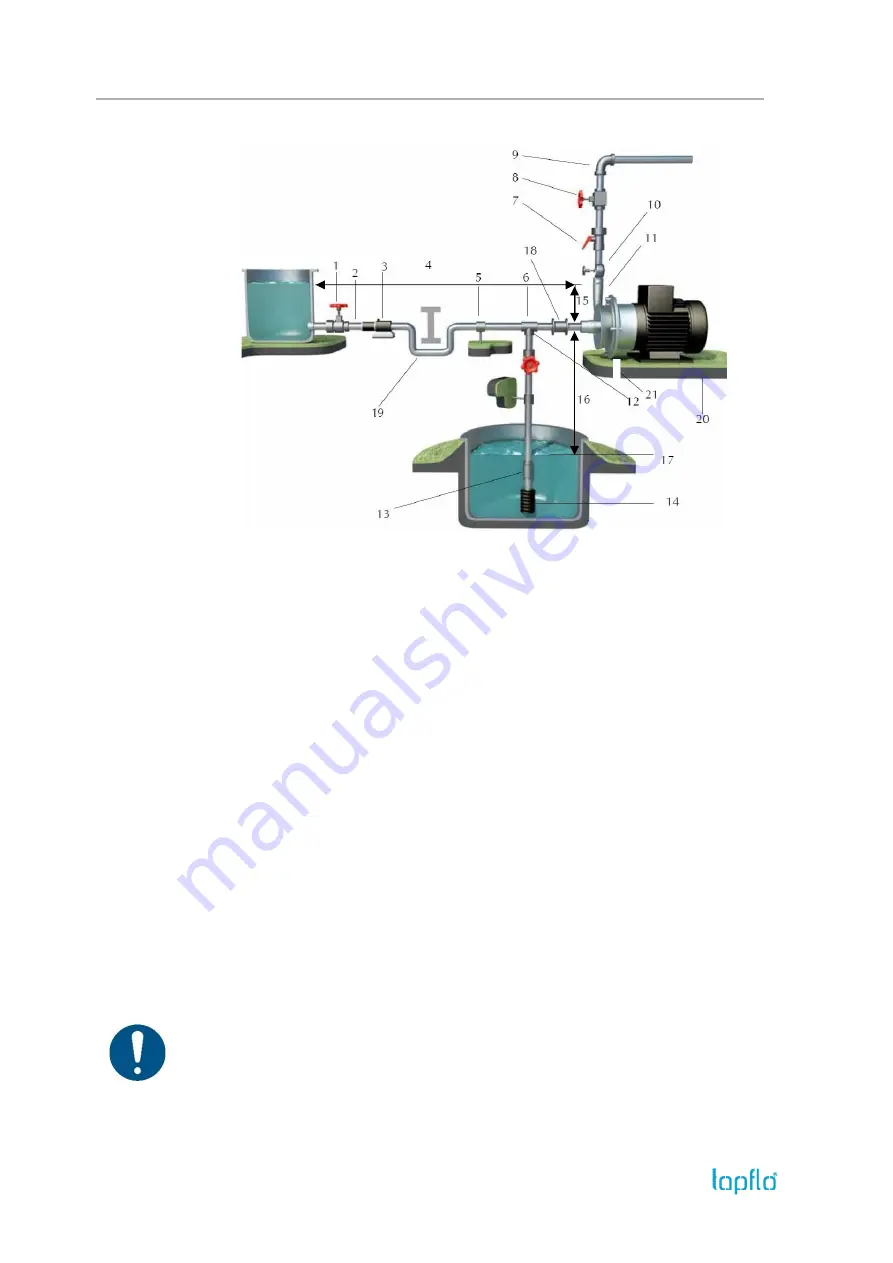
Example of installation
1)
YES: Gate valve (may also be near pump in case of long piping)
2)
With positive head: tilt of piping towards pump
3)
YES: line strainer if particles are present
4)
NO: air pockets
–
the circuit must be short and straight
5)
YES: pipe fastening
6)
Suction line as short and direct as possible
7)
YES: attachment for gauge or safety pressure switch
8)
YES: adjusting gate valve on outlet
9)
Bends placed after valves and instruments not closer to the pump inlet than five times the piping diameter
10)
YES: attachment for gauge or safety pressure switch
11)
NO: elbow joints (and other parts) on the pump (discharge and suction lines)
12)
With negative suction lift: tilt of piping towards suction tank
13)
YES: check valve (with negative suction lift)
14)
YES: strainer if particles are present
15)
Suction head varies according to flow in order to prevent windage
16)
Suction head
17)
Immersion depth
18)
YES: expansion joint (indispensable with long pipes or hot liquids) and/or anti-vibration facility during
discharge and suction; anchored near to pump
19)
YES: overcoming obstacles at lower depths
20)
Fix the pump by the fixing holes provided: the supports must be level
21)
YES: drainage channel around base
1.10.
Instruments
In order to ensure a proper control of the performance and the conditions of the installed
pump, we recommend using the following instruments:
- a pressure-vacuum gauge on the suction piping;
- a pressure gauge on the discharge piping.


