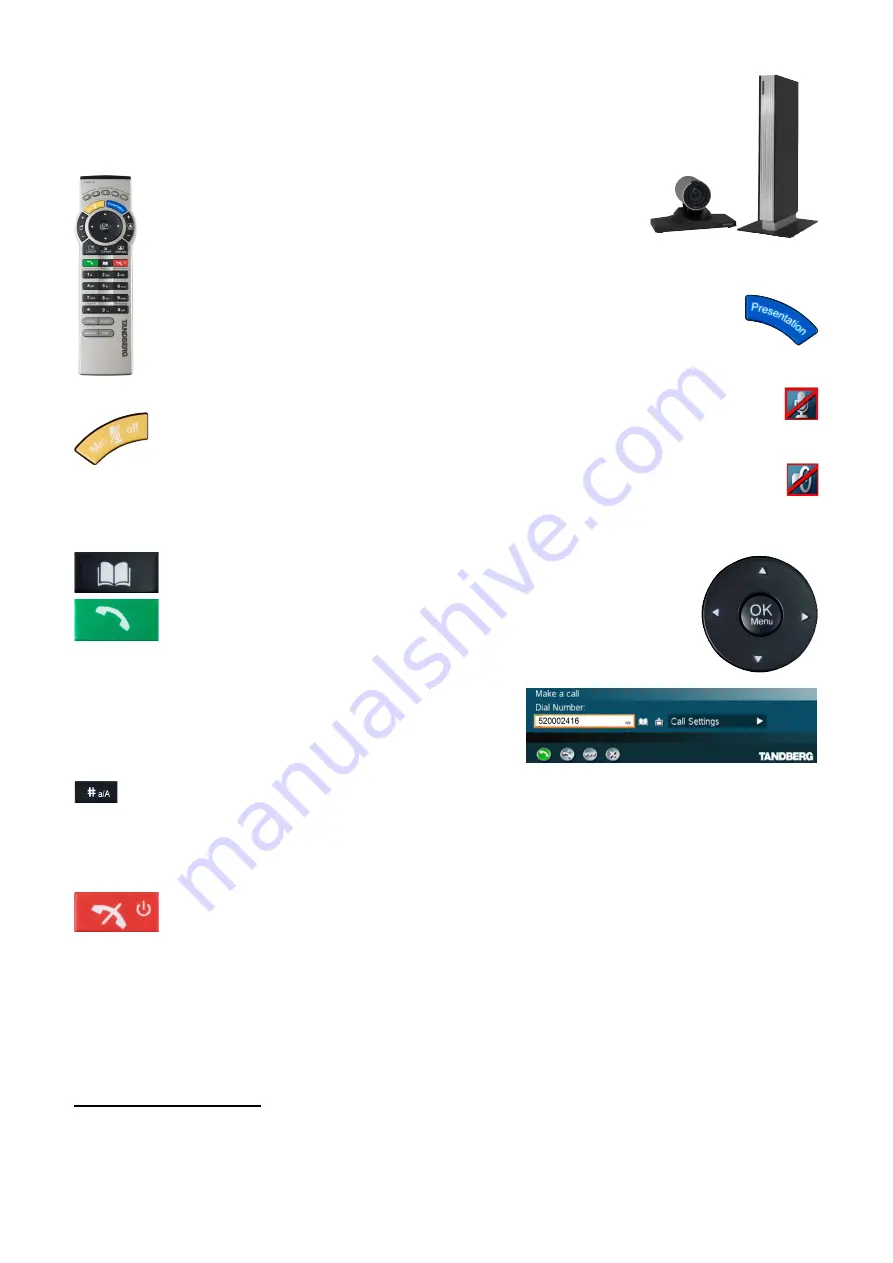
Tandberg MXP video conference systems
(v1.0)
Basics
– Check the monitor/projector is on – waggling the Tandberg remote turns on the
main VC unit
. If you don’t see a picture on the screen then the
screen/projector is probably off. Turning on the screen can be
controlled by either pressing the power button on the screen's own
remote or by pressing a button at the bottom right hand corner of
the screen. You will not need the screen's remote again until you wish to turn the screen off.
You should now see a view of your own room. If you don’t, you may need to press the blue
‘Presentation’ button on the Tandberg remote control to switch to the camera
view. Now follow the camera positioning guidelines, overleaf in the etiquette
section. There's a simple troubleshooting guide overleaf too.
Being Called
– If you're expecting to be called you need do nothing else. The system will
automatically answer however your microphone will be muted. You'll see a crossed
out microphone icon on screen whenever your microphone's muted. To be heard press the
yellow mic button on the remote. N.B. If you can't hear the remote site but they can hear
you ask them to press their mute button. If that doesn't work try the volume button on
your remote. If it's at its lowest you'll see another icon.
Calling Others
– The easiest way to call others is by using the system’s directories. Use the remote’s
book-like directory button to view your directories, navigate to the directory
you require, click OK to open the directory then scroll down to the room
you want to call. Once you’ve found and highlighted the contact you
wish, use the green call button to connect. Most systems you’re dialling
will auto-answer but their microphones will be muted.
If your need to call a system
without
a directory entry, point your remote at the camera
and start entering the number you've been given on the
remote. You'll see the number you're entering appear in the
dialling box
. (You can delete a miss-typed number using the
cancel key.) When you've typed in the full number press the
green call button to connect.
Should you need to enter a pass-code or extension press the # button (bottom right of keypad)
to enter tones then type in the extension or code.
If you’ve been given an ISDN number (it looks just like a normal phone number e.g. 0131 200 2416)
then you may need to add the prefix
9
to the front to gain an outside line.
Once you’ve finished any call please remember to hang-up so others can call you or to ensure you’re
not an uninvited guest to a subsequent conference call. The button to use is the one
which looks like a red telephone hand-set. You'll be prompted to end the call so press it
again if you're sure. Ensuring the screen/projector is turned off too is much appreciated.
Want to call more than one VC unit?
– To have a meeting of three or more locations means you’ll
have to
book a virtual meeting room
(a.k.a bridge/MCU) first. Please email your requests to the
required bridging service as far in advance of the call as you can. A week’s notice is good! Block
bookings can also be made. You will then be emailed your connection details. Some regions provide
permanent dial-in meeting rooms whilst others dial out to your system at the allotted time. Please
ensure you have dial-in details of the room you're to be using in case you become disconnected.
1
You know the VC unit is on if there's a green light visible at the left hand side of the camera base.
2 If you don't you’ll need to press the green connect button to view the dialling box then use the up arrow on
the central circular button to get into the dialling area. Now use the numbered buttons on the remote to enter
the desired number. Press the green call button to connect.


