Jul 07
45 PPM Laser Printer User Guide
1-7
Installation Procedure
Installation Procedure
This section describes how to install the printer.
Removing the Tape
When the printer is first taken out of the packaging box, the covers of the printer are taped as
shown on page 2. Remove all of the tapes.
There is tape securing the paper trays, the paper support and the fuser locking instructions.
Remove the fuser locking device by pushing the tabs as shown on the instructions at the rear
of the printer.
Install any optional accessories next. See chapter 6.
Installing the Toner Cartridge
The Toner Cartridge supplied with the Installation Kit provides approximately 10,000 pages of
print with 5% coverage. There are two alternatives available for replacement Toner cartridges. They
allow printing of approximately 10,000 or 17,000 pages under the above conditions. When install-
ing the Toner Cartridge, take note of the following points:
Do not subject it to direct sunlight or strong light.
Do not touch the surface of the photosensitive drum. Do not stand or place the Toner Car-
tridge upside down. The drum might get damaged.
1.
Open the top cover.
2.
Take the Toner Cartridge out of the box and shake it 7 to 8 times as shown in the diagram.
Summary of Contents for 9045N
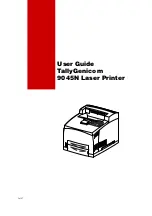
Page 1: ...Jul 07 User Guide TallyGenicom 9045N Laser Printer...
Page 29: ...Jul 07 45 PPM Laser Printer User Guide 2 3 Printing a Configuration Summary...
Page 120: ...Jul 07 4 26 45 PPM Laser Printer User Guide When Moving the Printer...
Page 127: ...Jul 07 45 PPM Laser Printer User Guide 5 7 At the Fuser Unit 6 Open and close the top cover...


