User Manual
Model: PSS210
Please read all the safety and operating instructions carefully before using this product.
Talent 10" Portable PA Package
5CH Mixer With Bluetooth MP3 Player
PSS210
10" PORTABLE PA PACKAGE
5CH MIXER WITH BLUETOOTH MP3
VOLUME
VOLUME
MADE IN CHINA
DELAY
FX VOL
FX
FX
FX
FX
5-Year Limited Warranty
See talentaudio.com for details
© Talent Sound & Lighting
TM
4
Last Revised: 12/5/2017
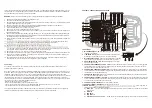
12. MP3/BT/CD/AUX SELECTOR:
Leave this button in the up position for MP3/Bluetooth playback; depress the button
for CD/AUX playback.
13. LEFT/RIGHT LINE OUTPUT:
Use these RCA jacks to send your L/R mix to outboard equipment such as a recorder
14. LEFT/RIGHT LINE OUTPUT:
Use these 1/4" jacks to send your L/R mix to outboard equipment such as a recorder or
15. POWER INDICATOR:
The “POWER” LED will be lit when power is engaged and the unit is on.
16. PROTECT INDICATOR:
circuit. If this LED is lit, turn off the unit, unplug the power cord, and correct the fault condition. If the LED remains lit,
contact an authorized service center.
17. CD INPUT:
Use these RCA jacks to connect a line level device such as a CD player.
18. AUX INPUT:
Use this stereo 3.5 mm jack to connect a line level device such as a cell phone, tablet, or laptop computer.
19. MP3/BT/CD/AUX LEVEL CONTROL:
Level control for the CD/AUX channel; turn this knob all the way to the left be-
fore connecting anything to the channel, then gradually turn it to the right to increase the output level of the individual
channel after all connections have been made.
20. MASTER OUTPUT LEVEL:
This knob controls the overall level of output to your speakers. To increase the level, turn
the knob to the right. To decrease the level, turn the knob to the left.
IMPORTANT:
Turn this knob all the way to the left before powering up or connecting anything to the mixer. After all con-
nections are made, turn the mixer on and turn this knob to about one third volume (10 o’ clock position). Gradually turn it
to the right to increase the volume of the overall output only after all channels have been adjusted to appropriate levels.
21. HEADPHONE JACK:
Use this stereo 3.5 mm jack to connect headphones for monitoring.
22. HEADPHONE LEVEL CONTROL:
This knob controls the overall level of output to your headphones. To increase the
level, turn the knob to the right. To decrease the level, turn the knob to the left.
23. MASTER EFFECTS LEVEL:
This knob controls the overall level of effects sent to the channels. To increase the level,
turn the knob to the right. To decrease the level, turn the knob to the left.
24. DELAY LEVEL:
This knob controls the delay time of the DELAY effect. To increase the time, turn the knob to the right.
To decrease the time, turn the knob to the left.
25. OUTPUT LEVEL METER:
These LEDs allow you to visually monitor the overall output level at a glance.
26. CLIP INDICATORS:
The “CLIP” LEDs will be lit when the output signal is being overdriven. This should be avoided,
and/or individual channel levels so that the CLIP indicators light up only infrequently, if at all.
27. LEFT SPEAKER OUTPUT:
Connect the LEFT speaker to this jack using the included speaker cable. Do NOT con-
nect a powered speaker or any other type of device to this jack.
28. RIGHT SPEAKER OUTPUT:
Connect the RIGHT speaker to this jack using the included speaker cable. Do NOT
connect a powered speaker or any other type of device to this jack.
SIDE PANEL
1. IEC POWER CABLE RECEPTACLE:
Connect the included AC power cable here. Do NOT attempt to defeat the
ground pin. Disconnect the cable when replacing the fuse, just below the cable receptacle.
2. POWER SWITCH:
This switch is used to turn the unit on or off.
3. AC MAINS SELECTOR:
Use this switch to select the appropriate AC MAINS power for your location; 110VAC @
60Hz, or 220VAC @ 50 Hz.


