


25
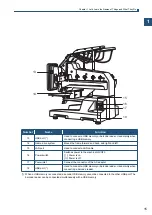
Chapter 2 Getting Ready to Embroider
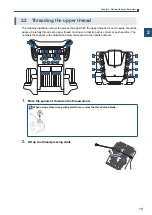
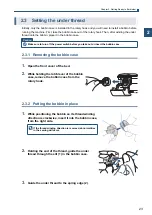
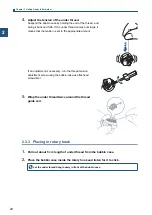
2
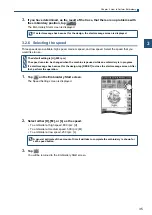
3.
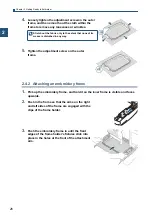
Close the front cover of the bed.
There are two sizes of embroidery frames available, one large, one small.
Select the appropriate one to use depending on the size of the design.
Note that you must change the settings for the frame on the operation panel whenever you change the
embroidery frame.
At the default setting, the machine is set to use [Tubular 1] (large embroidery frame providing an
embroidery area that has length of 200 mm and a width of 300 mm).
2.4.1 Mounting the fabric on the embroidery frame
In order to ensure that the embroidery finish will look good, it is important to correctly stretch out the
fabric over the embroidery frame.
To carry out this work, the embroidery frame should be placed on a table or other level surface.
1.
Loosen the adjustment screw on the outer frame.
2.
Position the fabric on top of the outer frame.
3.
Place the inner frame and push it in.
2.4 Setting up the embroidery frame
With highly stretchable fabrics, such as those used for T-
shirts and knits, backing or plastic material should be
spread out underneath the fabric before mounting it on
the frame.