9
1.4 Configuration and operation
After installation and connection and prior to the
meeting, the recorder should be configured through the
dialog menu and button. The term “interface” used
hereinafter means the information displayed on the
LCD as the user interface.
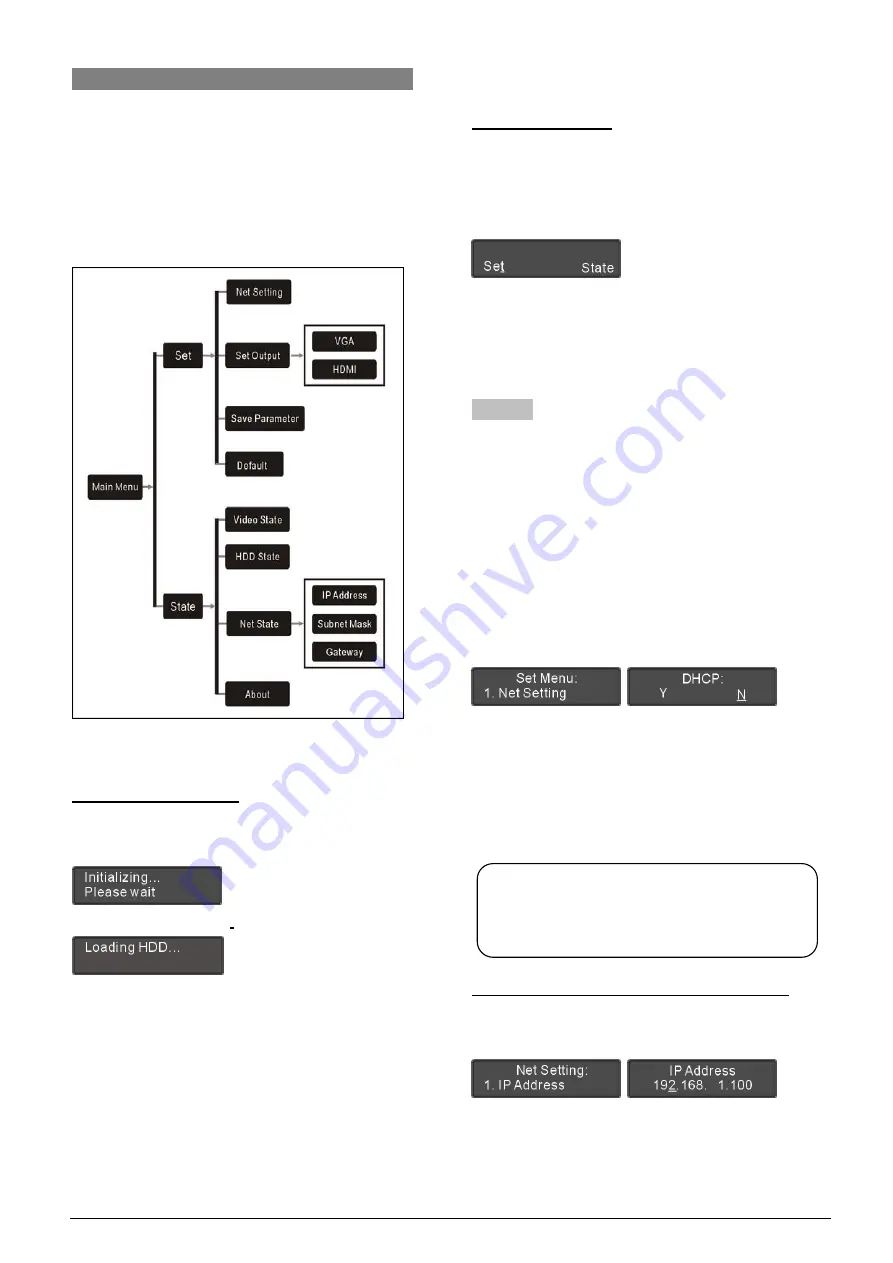
The menu structure is shown in the following figure:
Figure 1.9 LCD menu structure of the recorder
A) Starting initialization
Switch on to STANDBY status, and then press the
“STANDBY” button, the recorder will start initialization:
Loading harddisk(s) after
initialization:
B
)
LCD main menu
When the initialization is finished, the main menu will
be displayed on the LCD:
“Set”
“State”
■
Press the “MENU” button to go to the
corresponding submenu;
■
Use the “
Õ
/
Ö
” button to switch from term to term.
1.4.1 Set
Select “Set” and Press the “MENU” button under main
menu will go to the set menu, which includes four menu
items:
“1. Net Setting”
“2. Set Output”
“3.
Save Parameter”
“4.
Default”
1. Net Setting
Use the “
Õ
/
Ö
” button to enable DHCP or not;
If “Y” is selected, it stands for obtain a dynamic IP
address automatically, use the “MENU” button to
save and return to the upper level menu;
If “N” is selected, it stands for set a static IP address
manually, use the “MENU” button to go to step a).
a). Setup unique “IP Address” for the recorder:
1).
Select “IP Address” and press the “MENU” button
to go to setup IP address interface:
2).
Use the “
Õ
/
Ö
” button to switch between the four
numbers;
3).
Use the “MENU” button to edit selected number;
4).
Use the “
Õ
/
Ö
” button to decrease/increase the
Note:
)
If current setting is changed, please reboot
the recorder.


