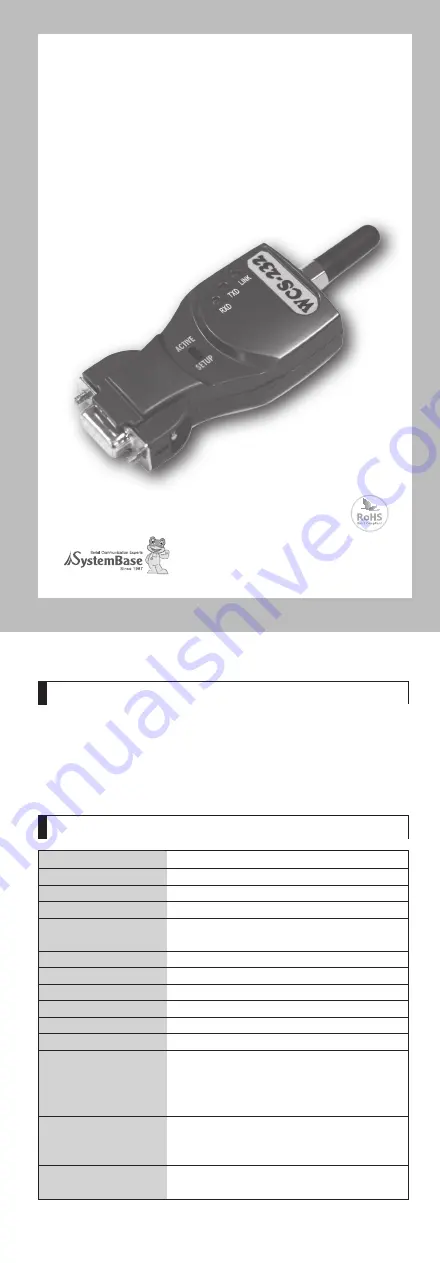
1. Introduction
WCS-232 v4.0 converts RS-232 serial signals to Bluetooth
RF signals.
■
Product box contains
- Blutooth to Serial Converter 2EA - User Manual
- A/C Power Supply (9V DC) 2EA - USB Power Cable 2EA
2. Specifications
3. Architecture
1) External View
2) Mode Switch
SETUP ACTIVE : Active Mode
SETUP ACTIVE : Setup Mode
3) LED
- LINK : Turns red when power is supplied
Turns green when remotely linked with the other party
- TxD : Turns green when data is transmitting (turns on faintly
only if linked)
- RxD : Turns red when data is receiving
4) Connector
4. Installation Procedures
1) Connection
There is no need to install additional programs in your
computer or communication devices to use the WCS-232 v4.0.
Connect the WCS-232 v4.0 to a serial port at your computer or
communication device and supply it with power. Then you can
easily access it as if you were using the existing serial port.
WCS-232 v4.0 can be powered by the following methods: DC
power supply, PC USB port through USB cable or DB9 pin
connector (available only if special serial ports are used).
A Bluetooth connection between two devices using the WCS-
232 v4.0 is automatically established when both WCS-232
v4.0 are powered on. After that, LINK LED turns red and you
are free to use the WCS-232 v4.0.
2) Environment Setting
Since WCS-232 v4.0 are connected onto the serial port of
your PC or communication device, you should specify the
serial port environment information (Baud rate, data bits,
parity bit, stop bit, flow control, etc.) and the RF connection
(device name, operating mode, target address, etc.) for
mutual communication.
RF connection setting is required only if you communicate
with other manufacturer’s Bluetooth devices instead of the
WCS-232 v4.0 or change the initial setting.
For environment setting, please use “Hyper terminal” included
in your Windows’ operating system.
5. Operating Environment Setting
1) Procedures
WCS-232 v4.0 can set baud rate, parity, stop bit, device name,
target adapter and operating mode using Hyper Terminal.
①
Connect one WCS-232 v4.0 to the PC serial port and power it on.
②
Run Windows’ Hyper Terminal program.
③
Whenever you change environment setting, you must Set
baud rate, data bits, parity and stop bit to 9600-8-NONE-1
(Initial Factory Setting) at Hyper Terminal.
④
Select setup mode at the WCS-232 v4.0 mode switch.
Then software version information will be displayed
⑤
Set up serial port. < Refer to 2)Serial Settings >
⑥
Setup RF connection. < Refer to 3)RF Connection Setting >
⑦
After completing the setting, be sure to execute ‘X’
command and save, and then the Mode Switch to ‘Active’.
■
Reference:
If you enter ‘?’, the list for all commands is displayed, and if
‘?<command>’, how to use the requested command is
displayed. All commands should be typed with capital letter.
All commands and setting values are case-sensitive.
2) Serial Settings
■
Example of Baud Rate Setting (9600 bps
19200 bps)
①
Type ‘B’.
②
Type ‘4’ to select 19200 bps.
③
The set value is shown on the screen again. (All the same
in the next procedures)
■
Example of Flow Control Setting (None
Hardware)
①
Type ‘F’.
②
Type ‘1’ to use hardware flow control.
■
Example of Stop Bit Setting (1 bit
2 bits)
①
Type ‘S’.
②
Type ‘1’ to change a stop bit to 2 bits.
■
Example of Parity Bit Setting (None
Even)
①
Type ‘P’.
②
Type ‘2’ to change to even parity.
3) RF Connection Settings
This is necessary only if you communicate with other
manufacturer’s Bluetooth devices instead of the WCS-232
v4.0 or change the initial settings.
■
Example of Target Address Setting
(00:00:00:00:00:00
00:02:78:01:EF:BC)
①
Type ‘A’.
②
Type the target address to be changed. You have to enter
the 12-digit hexadecimal address. After t yping
“00027801EFBC”, press ‘Enter’ key.
■
Example of Connection Mode Setting (WAIT COMMAND
WAIT)
①
First, enter ‘M’ to display the way to use the requested
command. To set the connection mode at Wait mode, the
input value shall be ‘1’.
②
Type ‘M’.
③
Type ‘1’.
■
Example of Device Name Setting(WCS-232 v4.0
WCS-232)
①
Type ‘N’.
②
Enter the desire device name(In this example, WCS-232)
and press ‘Enter’ key (however, up to 30 alphanumeric
characters possible).
■
Example of Setting PIN
①
Type ‘E’.
②
Enter the desire PIN value and press ‘Enter’ key. (However,
up to 16 alphanumeric characters possible)
■
Example of Setting Low Power Mode
①
Enter ‘K.’ If you want to set up a low power mode, enter ‘E’,
or if not, enter ‘D’.
■
Display Device Information
①
Type ‘V’.
②
All current information is displayed. At this time, verify that
the values are identical to the ones you have once set.
■
WCS-232 v4.0 Pair Setting
The following example showing how to set up the destination
WCS-232 v4.0 address.
Wireless/Serial(RS232) Converter
WCS-232 v4.0
User Manual
2nd Edition
Model Name
WCS-232 v4.0
Type Bluetooth-Serial(
RS232) Converter
Distance Nom.
100m up to 1000m using Patch Antenna
Voltage
5V ~ 12V/DC (Polarity : Independent)
Wireless interface
Bluetooth Specification Version 2.0+EDR
Class1
Frequency bandwidth
2402 ~ 2480 MHz
Radio mode
Frequency Hopping
Channels
7
Modulation
GFSK
Current
Max 80mA, Min 2mA
Temperature
-20 ~ 70 °C
SAT-G01R : +1dBi Stub Antenna
Antenna
DAT-G01R : +3dBi Dipole Antenna(optional)
DAT5-G01R : +5dBi Dipole Antenna(optional)
PAT-G01R : +9dBi Patch Antenna(optional)
1200 bps-115.2 Kbps Full Duple
x
8 Data bits
Serial communication
- Odd, Even, No Parit
- 1, 2 Stop bits
Flow Control
RTS/CTS ON/OFF possible,
DTR/DSR/DCD Loop Back connected
DB-9 Connector Pin-Layout
DTR RxD
GND TxD DCD
VCC RTS
CTS DSR
LINK
TXD
RXD
RS-232 Side (DB9)
Female Connector
Antenna
ACTIVE MODE
Mode Switch
SETUP MODE
Software version
Adapter address
Target adapter address
COM port setting
Factory default setting
Device name
Authentication
2011. 6. 3
16F Daerung Post Tower-1, 212-8, Guro-dong, Seoul, Korea
Tel : 82-2-855-0501 Fax : 82-2-855-0580
www.sysbas.com [email protected]


