


8
Chapter 1: Before You Start
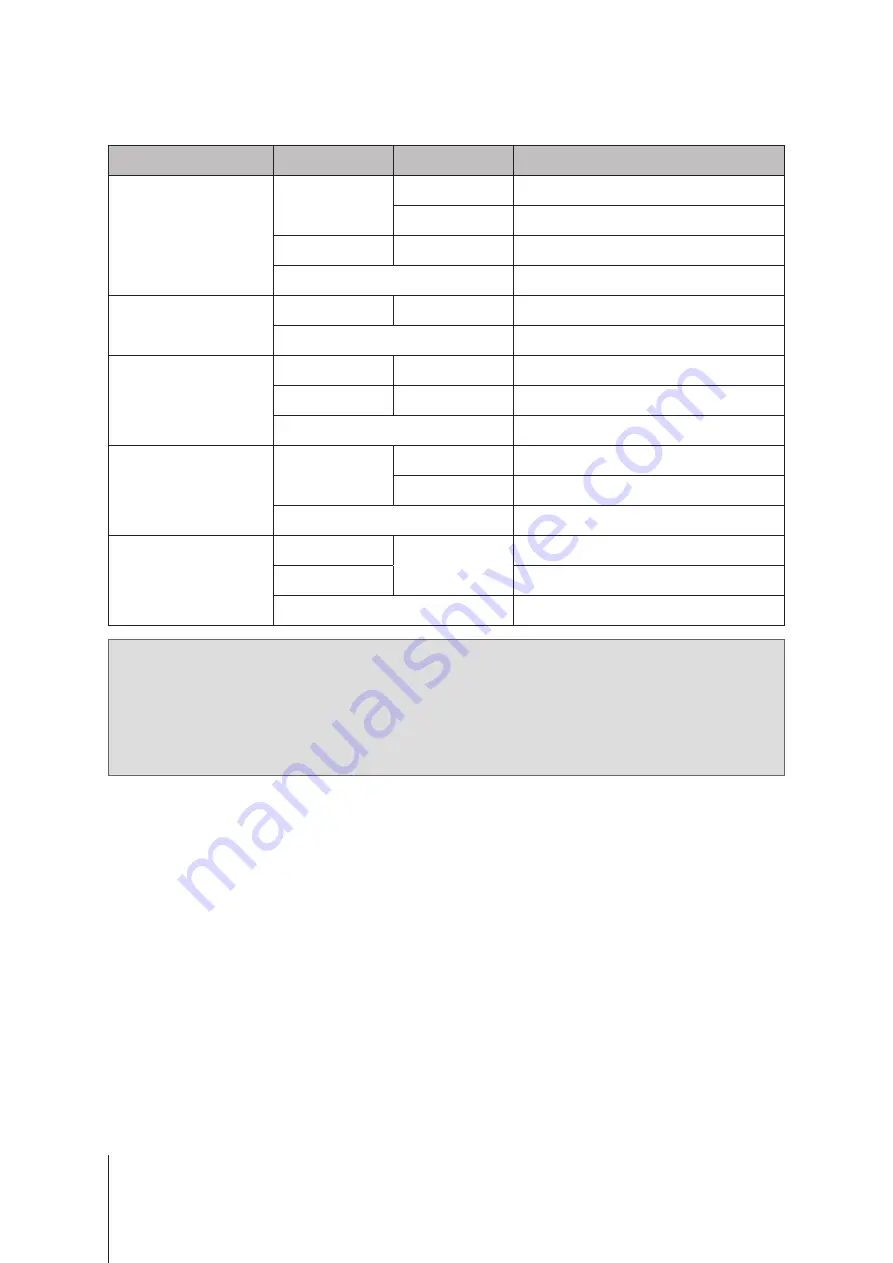
Other LED Indicators
LED Indicator
Color
Status
Description
DRIVE status
Green
Static
Drive ready and idle
Blinking
Accessing drive
Red
Static
Drive error/Port disabled
1
Off
No internal Drive
ALERT
Orange
Blinking
System error
2
Off
System normal
PSU Indicator
Green
Static
Power supply unit normal
Orange
Static
Power supply unit fail/No power supply
Off
Power supply unit off
Rear 1GbE LAN
(on left side of jack)
Green
Static
Network connected
Blinking
Network active
Off
No network
Rear 1GbE LAN
(on right side of jack)
Green
Static
1 Gbps connected
Orange
100 Mbps connected
Off
10 Mbps connected/No network
Note:
1
Please try to restart your Synology NAS or re-insert the drives, then run the HDD/SSD manufacturer's
diagnostic tool to check the health status of the drives. If you can sign in to DSM, please run the built-in
S.M.A.R.T. test to scan the drives. If the problem remains unresolved, please contact Synology Technical
Support for help.
2
If the
ALERT LED
continuously blinks orange, this indicates there are system errors such as fan failure,
system overheating, or volume degrade. Please sign in to DSM for detailed information.
Summary of Contents for RS2821RP+
Page 1: ...Synology NAS RS2821RP Hardware Installation Guide...
Page 32: ...A VCCI A...


