14
Chapter 2: Hardware Setup
To make sure FS6400 recognizes the new memory capacity:
1
Log in to DSM as
admin
or a user belonging to the
administrators
group.
2
Check
Total Physical Memory
in
Control Panel
>
Info Center
.
To remove the RAM Module:
1
Follow step 1 and 2 of the
To install the RAM module
section to shut down your FS6400, disconnect the
cables, and then remove the rear top cover.
2
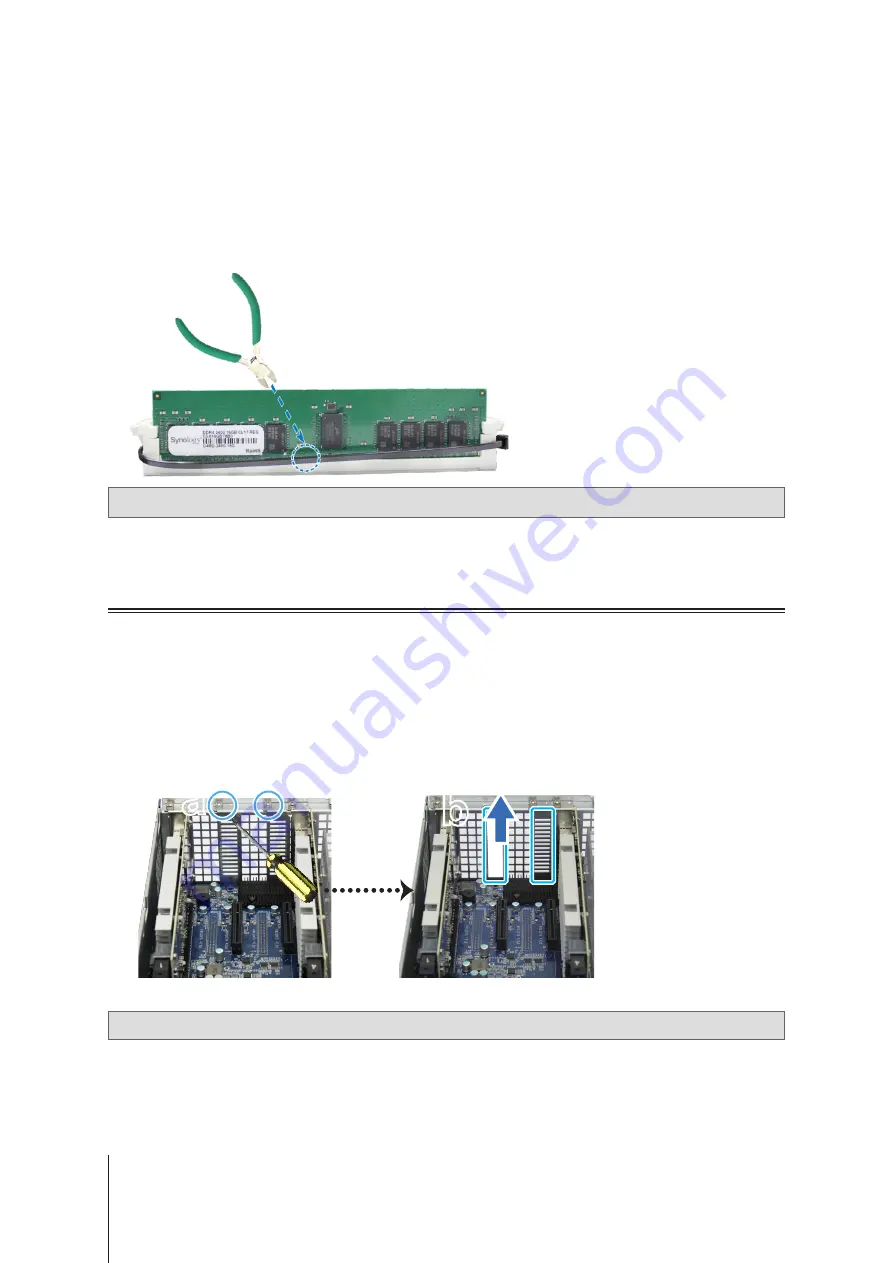
Cut the cable tie before removing the memory module. (The pre-installed memory module is cable-tied to
prevent loosening during delivery.)
Note:
Avoid touching any components of the motherboard when you cut the cable tie.
3
Disengage the memory retaining clips by pushing them outwards, and the module will pop out of the slot.
4
Follow step 4 of the
To install the RAM module
section to put back the top cover.
Install PCle Add-in Cards
FS6400 provides two PCIe x8 slot for optional add-in card expansion, allowing network interface cards to be
installed.
To install the network interface cards:
1
Shut down your FS6400. Disconnect all cables connected to your FS6400 to prevent any possible damages.
2
Open the FS6400 by following step 2 of the
To install the RAM module
section.
3
Install the network interface card.
a
Remove the screw that secures the expansion slot’s cover.
b
Lift the expansion slot’s cover.
a
b
c
Align the card’s connector with the expansion slot, and insert the card into the slot.
Note:
Make sure the connector is fully inserted. Otherwise, the add-in card might not be able to function properly.
Summary of Contents for NAS FS6400
Page 1: ...Hardware Installation Guide Synology NAS FS6400...
Page 32: ...A VCCI A...


