background image

SYM                                                                    5. REMOVAL OF ENGINE 

5-3


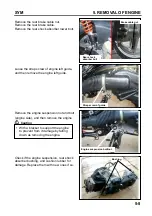
ENGINE REMOVAL 

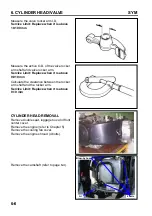
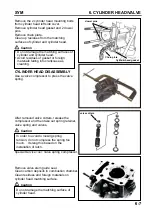
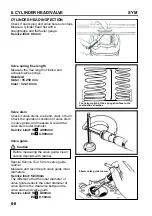
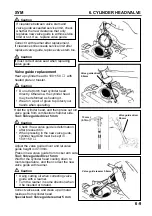
Open the seat. 
Remove the luggage box assembly (4 
bolts ). 
Remove the body cover . 
Remove the power connector of auto by- 
start. 
Remove the generator wire and pulse 
generator connector. 


Remove the starter motor wire on the Starter 
magnetic switch. 


Remove the spark plug. 


Spark plug 

Starter magnetic switch

Auto by-start 

connector


Generator

connector

pulse generator 

connector


Summary of Contents for ALA125CC

Page 1: ...ment damages may result if procedures are not followed Engine oil Limits to use SAE 10W 30 API SH CD class oil Warranty will not cover the damage that caused by not apply with the limited engine oil G...

Page 2: ...e serious burns so be careful do not be spray on your eyes or skin If you get battery acid on your skin flush it off immediately with water If you get battery acid in your eyes flush it off immediatel...

Page 3: ...tion to O rings or oil seals because most cleaning agents have an adverse effect on them Never bend or twist a control cable to prevent stiff control and premature worn out Rubber parts may become det...

Page 4: ...fill the groove with grease install the oil seal with the name of the manufacturer facing outside check the shaft on which the oil seal is to be installed for smoothness and for burrs that may damage...

Page 5: ...o remove the battery negative cable firstly Notre tools like open end wrench do not contact with body to prevent from circuit short and create spark After service completed make sure all connection po...

Page 6: ...ly Check if any wire loose Check if the connector is covered by the twin connector boot completely and secured properly Before terminal connection check if the boot is crack or the terminal is loose I...

Page 7: ...her pull too tight nor have excessive slack Protect wires or wire harnesses with electrical tape or tube if they contact a sharp edge or corner Thoroughly clean the surface where tape is to be applied...

Page 8: ...adjacent or surrounding parts in all steering positions Before operating a test instrument operator should read the operation manual of the instrument And then conduct test in accordance with the inst...

Page 9: ...EAR Type 4 STROKE ENGINE OHC Clutch Auto centrifugal clutch Installation and arrangement Vertical below center incline 80 Deceleration equipment Transmission C V T Fuel Required Unleaded gasoline Spee...

Page 10: ...lts 4 6 0 8 1 2 Right crankcase cover bolts 10 6 0 8 1 2 Flywheel nut 1 12 5 0 6 0 Shroud A B tapping screws 3 5 0 8 1 2 Cooling fan bolts 4 6 0 8 1 2 Cooling fan cover 2 6 0 8 1 2 Transmission Gear b...

Page 11: ...t brake disc mounting bolts 4 10 4 0 4 5 Front brake clipper mounting bolts 2 10 3 1 3 5 Drum brake arm bolts front rear 2 6 0 8 1 2 Engine suspension bolts 2 10 4 5 5 5 On frame side Engine connectio...

Page 12: ...the hose with air Dry spark plug Wet spark plug Blowing in normal Blowing clogged 1 No fuel in fuel tank 2 Check if the pipes fuel tank to carburetor and intake vacuum are clogged 3 Float valve clogg...

Page 13: ...ion No knock Knock 1 Air cleaner clogged 2 Poor fuel supply 3 Lines in fuel tank evaporation system clogged 4 Exhaust pipe clogged 5 Fuel level too low in carburetor 6 Fuel nozzle clogged in carbureto...

Page 14: ...el cup Check if carburetor clogged 1 Incorrect ignition timing malfunction of CDI or AC alternator 1 Rich mixture loosen the screw 2 Lean mixture tighten the screw 1 Poor heat insulation gasket 2 Carb...

Page 15: ...on 2 Driving disk damaged 3 Driving pulley spring broken 4 Clutch ling broken 5 Driving slide shaft gear groove broken 6 Transmission gear damaged Engine running and misfire as motorcycle initial forw...

Page 16: ...RMATION TROUBLE DIAGNOSIS SYM 1 16 LUBRICATION POINTS Acceleration cable Front rear brake lever pivot Steering shaft bearing Speedometer gear Front wheel bearing Side stand shaft Main stand shaft Rear...

Page 17: ...ERATION 10 2 A C GENERATOR REMOVAL 10 3 RIGHT CRANKCASE COVER REMOVAL 10 4 STARTING CLUTCH 10 5 RIGHT CRANKCASE COVER INSTALLATION 10 8 MOUNTED COIL SET INSTALLATION 10 8 FLY WHEEL INSTALLATION 10 8 M...

Page 18: ...cedures and precaution items of starter motor Specification Unit mm Item Service Limit ID of starting driven gear 32 060 OD of starting clutch cover 27 940 Torque value Flywheel nut 5 0 6 0kgf m Exhau...

Page 19: ...ts 2 nuts Remove the fan shroud 4 bolts Remove the fan 4 bolts Hold the flywheel with the universal fixture Remove the 10mm nut on the flywheel Special Service Tools Universal Fixture Flywheel Cooling...

Page 20: ...ssembly Caution RIGHT CRANKCASE COVER REMOVAL Remove the right crankcase cover 6 bolts Remove setting pin and gasket Remove the gasket or foreign materials on the connection surfaces of both the cover...

Page 21: ...the starting driven gear Remove starting clutch starting reduction gear and shaft Starting Clutch Inspection Install the starting clutch onto the starting driven gear Hold the starting clutch and tur...

Page 22: ...re the OD of the starting reduction gear Service Limit ID 9 94 mm or above Disassembly Remove the hex blots 3 bolts inside the starting clutch Separate the clutch body and the clutch cover Remove the...

Page 23: ...riven gear onto the starting clutch Hold the starting driven gear with the universal fixture Tighten the 22mm anti loosen lock nut and gasket Caution Special service tools Anti loosen lock nut socket...

Page 24: ...hten the cable guide 2 bolts Torque 0 8 1 2kgf m Tie the wire harness hose onto the indent of crankcase Caution Install A C generator connector and pulse generator connector FLYWHEEL INSTALLATION Make...

Page 25: ...G CLUTCH 10 9 Install the cooling fan 4 bolts Install the cooling fan shroud 4 bolts Install the exhaust muffler 2 bolts 2 nuts Add some engine oil according the specified quantity Cooling fan Exhaust...

Page 26: ...ANKSHAFT 11 1 MECHANISM DIAGRAM 11 1 OPERATIONAL PRECAUTIONS 11 2 TROUBLE DIAGNOSIS 11 2 DISASSEMBLY OF CRANKCASE 11 3 CRANKSHAFT INSPECTION 11 5 ASSEMBLY OF CRANKCASE 11 6 MECHANISM DIAGRAM 0 8 1 2 k...

Page 27: ...laced Specification Unit mm Item Standard Limit Left right clearance of the big end of the connecting rod 0 100 0 350 0 550 Radial clearance of the big end of the connecting rod 0 000 0 008 0 050 Run...

Page 28: ...the crankcase Drive the screw of the crankcase remover set into the crankcase and then separate the left and the right crankcases Remove the cam chain Caution Special Service Tools Crankcase remover...

Page 29: ...ins 2 Scrape gasket residues off the crankcase contact surface Caution Remove oil seal from the left crankcase Do not damage contact surface of the crankcase Soap the gasket residues into solvent and...

Page 30: ...cal directions Service limit 0 05 mm Place the crankshaft onto a V block and measure run out of the crankshaft with dial gauge Service limit 0 10 mm Bearing Inspection Rotate the bearing with fingers...

Page 31: ...crankcase gasket Install the right crankcase and tighten the crankcase bolts 2 bolts Torque value 0 8 1 2 kgf m Install the cam chain tensioner Install a new O ring onto the mounting bolt of the chain...

Page 32: ...11 7 Apply with some grease onto the oil seal lip and then install it onto the left crankcase Press fit the oil seal to specified position with the oil seal installer 25x37x6 Special service tools the...

Page 33: ...R COVER 12 9 LUGGAGE BOX 12 9 FLOOR PANEL 12 9 Front center cover Frame number cover Left body cover Inner box Double Seat Rear carrier Luggage box Floor panel Front cover Under cover Rear fender Rear...

Page 34: ...he buckles on the guards with slot on the covers Make sure that each hook is properly installed during the assembly Never compact forcefully or hammer the guard and the covers during assembly Battery...

Page 35: ...e cover and the rear handle cover Remove the mounting screws 4 screws between the front handle cover and the rear handle cover Remove the headlight connector Remove the front handle cover Remove the f...

Page 36: ...r handle cover and meter Remove the left right handle switch connectors Remove the rear handle cover Installation Install according to the reverse procedure of removal FRONT COVER Removal Remove the 1...

Page 37: ...OVER Removal Remove the 1 2 mounting screws between the left right side cover and the floor panel Remove the 1 2 mounting screws between the left right side cover and the frame Remove the 2 2 mounting...

Page 38: ...he 6 mounting screws of front cover from the inner box Remove the 1 2 mounting screws of front spoiler from the inner box Remove the 1 2 mounting screws of front spoiler from the inner box Remove the...

Page 39: ...A Installation Install the inner box A and the front inner box B according to the reverse procedure of removal BODY COVER REAR FENDER Removal Open the seat Remove the luggage box 6 bolts Remove the re...

Page 40: ...dy cover and the floor panel Remove the 1 mounting screw between the body cover and front center cover Remove the 2 mounting bolts of the rear fender Remove the left right body cover Remove the rear f...

Page 41: ...er Installation Install the cover according to the reverse procedure of removal LUGGAGE BOX Removal Open the seat Remove the 6 bolts from the luggage box Remove the luggage box and the double seat Rem...

Page 42: ...nter cover mounting screw Remove the 1 2 screws between the body cover and the floor panel Remove the 1 2 screws between the left right side cover and the floor panel Remove the floor panel Installati...

Page 43: ...INTENANCE INFORMATION 13 4 TROUBLE DIAGNOSIS 13 5 HYDRAULIC BRAKE SYSTEM INSPECTION 13 6 BRAKE FLUID REPLACEMENT AIR BLEED 13 7 BRAKE CALIPER 13 8 BRAKE DISC 13 9 BRAKE MASTER CYLINDER 13 9 DRUM BRAKE...

Page 44: ...13 BRAKE SYM 13 2 MECHANISM DIAGRAM Front Drum Brake System 0 8 1 2 kgf m 11 0 13 0 kgf m 2 8 3 2 kgf m...

Page 45: ...SYM 13 BRAKE 13 3 MECHANISM DIAGRAM Rear Drum Brake System 0 8 1 2 kgf m 0 8 1 2 kgf m...

Page 46: ...tandard Limit The thickness of front brake 3 50 2 00 Front brake disc eccentricity 0 15 0 30 Master cylinder inner diameter 25 40 ID of front rear brake drums 130 00 131 00 OD of front brake disc 130...

Page 47: ...brake lining disc 2 Poor wheel alignment 3 Deformed or warped brake disc Brake noise 1 Dirty lining 2 Deformed brake disc 3 Poor brake caliper installation 4 Imbalance brake disc or wheel DRUM BRAKE...

Page 48: ...rake fluid WELLRUN DOT 3 brake fluid CAUTION Brake Fluid Add Turn the handlebar to let the master cylinder in horizontal position before removed the master cylinder cap Place a rag onto painting plast...

Page 49: ...bubble is in brake system or not If brake is still soft please bleed the system as described below 1 Tightly hold the brake lever and open the drain valve around 1 4 turns and then close the valve CA...

Page 50: ...ing Compress the brake caliper at first as installation Install the inner brake lining firstly and then install the outer brake lining INSTALLATION Install the brake caliper and tighten the attaching...

Page 51: ...brake master cylinder Remove the brake hose Remove the master cylinder seat and the master cylinder Remove the rubber pad Remove the circlip Remove the piston and the spring Clean the master cylinder...

Page 52: ...ston cup and then install the cup onto the piston Install the larger end of the spring onto the master cylinder The master cup s cavity should be face inside of master cylinder when installing the mas...

Page 53: ...rque value Install the brake lever and connect leads to brake lamp switch Connect brake hoses with 2 new washes Tighten the brake hose bolt to the specified torque value Torque value 3 5 kgf m Make su...

Page 54: ...tion Measure the thickness of the brake lining at three points both ends and center If the thickness is less than specified or if it is contaminated by oil or grease replace as a set Service limit Fro...

Page 55: ...llation Slightly grind the brake lining surfaces with sand paper to clean the surfaces Caution BRAKE PANEL Removal Remove the brake arm bolt and then remove the brake arm wear indicator brake return s...

Page 56: ...er gear of wear indicator and the mark on the brake arm with the indent gear of brake cam and then install it Tighten the bolts and nuts to specified torque Torque 0 8 1 2 kgf m REAR BRAKE PANEL Apply...

Page 57: ...RAM 14 1 PRECAUTIONS IN OPERATION 14 2 TROUBLE DIAGNOSIS 14 2 STEERING HANDLE 14 3 FRONT WHEEL 14 4 FRONT SHOCK ABSORBER 14 9 FRONT FORK STEERING COLUMN 14 9 MECHANISM DIAGRAM 3 1 3 5kgf m 1 0 2 0kgf...

Page 58: ...nut 2 4 3 0kgf m Tools Special service tools Steering column wrench Bearing remover Inner type bearing remover Attachment 32 35 mm Attachment 42 47 mm Steering column nut wrench Steering column top c...

Page 59: ...ts of the brake master cylinder and then take out the master cylinder and the split ring Caution Remove acceleration handlebar screw and then remove the handlebar acceleration cable and handlebar cove...

Page 60: ...rts when installing the acceleration handlebar seat acceleration handlebar and acceleration cable FRONT WHEEL Removal Disc Brake type Support body bottom and lift front wheel free of ground Remove the...

Page 61: ...hen remove the front brake panel and the front wheel Inspection Wheel axle Set the axle in V blocks and measure the run out Service limit 0 2 mm Wheel Rim Place the wheel onto a rotated bracket Turn t...

Page 62: ...race of bearing with fingers The bearing should be turn smoothly Also check if the outer collar is tightly connected to the wheel hub If the bearing do not turn smoothly or if they are too loose in th...

Page 63: ...side of the dust seal and then install the seal and the front wheel side collar Installation Drum Brake Apply with some grease on the speedometer driving gear and then install washer driving gear into...

Page 64: ...right shock absorber side Install the wheel axle nut and tighten it to specified torque value Torque value 11 0 13 0kgf m Connect the speedometer cable to the speedometer gear box Drum Brake Install...

Page 65: ...stall the shock absorbers according to the reverse procedure of removal Align the shock absorber top edge with the top end level of the front fork when installing the front shock absorber onto the fro...

Page 66: ...with the top bearing seat no clearance Note return 1 2 turn and then tighten the top cone race to specified torque tighten the race around 1 4 3 8 turn more Torque value 0 2 0 3kgf m Caution Install...

Page 67: ...5 1 MECHANISM DIAGRAM 15 1 PRECAUTIONS IN OPERATION 15 2 TROUBLE DIAGNOSIS 15 2 EXHAUST MUFFLER 15 3 REAR WHEEL 15 3 REAR SHOCK ABSORBER 15 4 MECHANISM DIAGRAM 0 8 1 2kgf m 3 0 3 6kgf m 11 0 13 0kgf m...

Page 68: ...gf m Rear shock absorber lower mount bolt 2 4 3 0kgf m Exhaust muffler connection nut 1 0 1 4kgf m Exhaust muffler connection bolt 3 0 3 6kgf m TROUBLE DIAGNOSIS Rear wheel wobbling bend wheel rim poo...

Page 69: ...ion nut 1 0 1 4kgf m REAR WHEEL Inspection Measure wheel rim wobbling Service limit Radial 2 0mm Axial 2 0mm If the wheel rim wobbling out of the specification except resulted from the wheel rim defor...

Page 70: ...bolt x 1 Remove the upper nut of the rear shock absorber bolt x 1 Remove the rear shock absorber Installation Install the rear shock absorber according to the reverse procedure of removal Caution Tor...

Page 71: ...SYSTEM 16 14 METER 16 15 LIGHTS BULBS 16 17 MAIN SWITCH HORN 16 19 FUEL UNIT 16 22 MECHANISM DIAGRAM Spark plug Alternator Fuel unit Ignition coil Battery fuse box C D I Main switch REG REC Horn Resi...

Page 72: ...trolyte and then charged to prolong the battery s life span Please check electrical device according to the procedure of diagnosis chart Do not disconnect and connect the connector of electrical devic...

Page 73: ...ce 20 5W5 4 5 5 5 Resistor Resistance 20 30W7 5 7 0 8 0 Ignition System Item Specification Standard NGK CR7HSA Recommended usage Hot type NGK CR8HSA Cold type NGK CR6HSA Spark plug Spark plug gap 0 6...

Page 74: ...D I alternator is out of work Engine does not crank smoothly Primary coil circuit Poor ignition coil Poor connection of cable and connectors Poor main switch Secondary coil circuit Poor ignition coil...

Page 75: ...may indicate a short circuit Allowable current leakage Less than 1 mA Disconnect each cable one by one and take measurement of the current of each cable to locate the short circuit In the current leak...

Page 76: ...ctrolyte diluted sulfuric acid is very toxic Once it spreading on clothes skin or eyes it will cause burned or blind In case of being spread flush with great quantity of water immediately and then sen...

Page 77: ...s with clean grease Strictly keep flames away from a charging battery The charging ON OFF is controlled by the charger s switch Do not control the charging by battery jump wires Turn the charger s swi...

Page 78: ...acement battery is aged and does not have enough capacity 2 The charging voltage is normal but the current is not The replacement battery is aged and does not have enough capacity Battery used do not...

Page 79: ...resistance If the measured value is abnormal check the abnormal wire circuit If components are good it could be a poor wire circuit If all items are in good condition then replace the voltage regulato...

Page 80: ...he resistance between the yellow wire on the alternator and frame ground by multi meter Standard 0 8 0 1 20 Replace the alternator lighting coil if the measured value exceeds standard Resistor check R...

Page 81: ...on at each terminal of the harness side connector ITEM Measure at Standard at 20C Pulse Generator Blue Yellow green 50 200 Primary Black yellow green 0 21 10 Green high voltage cable w o cap 3 5K Igni...

Page 82: ...terminal black yellow and green and frame ground Press the starting motor button or starting lever to test the max primary voltage of ignition coil Connection connect terminal to green side and to bla...

Page 83: ...and the measured value is exceed standard value it means the spark plug cap is in not good Replacement Remove the ignition coil bolt to replace the ignition coil if necessary Pulse generator Caution...

Page 84: ...tive connection and starting motor wires from the starter magnetic switch large pin Remove the power control connector of the Starter magnetic switch Connect a Ohmmeter between the Starter magnetic sw...

Page 85: ...nal Remove the luggage box Remove the starting motor power wire Remove the starting motor mounting bolts and motor Starting Motor Installation Install the motor in reverse order of removal METER Remov...

Page 86: ...t the meter Caution Installation Install the meter in reverse order of removal Do not wipe the meter or headlight with organic solvent such as gasoline to prevent from damage these components High Bea...

Page 87: ...ck if the bulb has been installed properly after installation Please conduct the headlight beam adjustment job if replace the headlight bulb The headlight beam adjustment Loosen the adjustment bolt lo...

Page 88: ...in reverse order of removal Bulbs Replacement of tail light brake light rear turn signal light Remove the 2 screws of the tail light assembly Replace the bulbs of the tail light brake light 12V 5W 21W...

Page 89: ...n switch leads connector Check connector terminals for continuity color Location Black Black white Red Green Green 2 LOCK OFF ON Replacement Remove the main switch connector and fixing bolts bolts x 2...

Page 90: ...Yellow red green FREE High Low beam switch seat open color Location blue white brown white black purple seat open Horn switch color Location Black Light green FREE headlight switch starting switch tu...

Page 91: ...w wire on the brake light switch should be in continuity when operating the brake lever If the switch damaged replace it with new one Horn Remove the front cover Connect the light blue wire on the hor...

Page 92: ...on Resistance value E empty 97 5 107 5 F full 4 10 DOWN empty Connect the fuel unit to the main harness Turn the main switch ON position Move the float arm in UP DOWN and then check if the fuel unit i...

Page 93: ......

Page 94: ...TS TIGHTEN 2 15 PRECAUTIONS IN OPERATION Specification Main 5000 c c Fuel Tank Capacity auxiliary 1500 c c capacity 800 c c Engine Oil change 750 c c capacity 120 c c Transmission Gear oil change 110...

Page 95: ...stem I Code I Inspection cleaning and adjustment R Replacement C Cleaning replaced if necessary L Lubrication Have your motorcycle checked adjusted and recorded maintenance data periodically by your S...

Page 96: ...sassembly 850cc Change 750cc When checking for oil leak run the engine at idle speed for a few minutes then check oil capacity with dipstick Cleaning the oil strainer Drain oil from engine remove the...

Page 97: ...il filling bolt Torque value 1 0 1 4 kgf m Quantity 100 c c Recommended King Mate HYPOID GEAR OIL 140 Fuel System Fuel Pipe Remove luggage box rear center cover body cover and rear fender as well as f...

Page 98: ...mooth Check throttle valve cable and replace it if deteriorated twisted or damaged Lubricate the cable if operation is not smooth Measure handle bar free play in its flange part Free play 2 6 mm Adjus...

Page 99: ...ark T on the generator flywheel aligns with the mark on the crankshaft and camshaft is at TDC position also as same as level of cylinder head top end A single hole on camshaft sprocket is forward to u...

Page 100: ...sampling muffler of exhaust analyzer into the front section of exhaust pipe Adjust the air adjustment screw so that emission value in idle speed is within standard 4 Slightly accelerate the throttle v...

Page 101: ...place these components if malfunction of these parts are found SPARK PLUG Appointed spark plug A7RC Remove luggage box Remove center cover Remove spark plug cap Clean dirt around the spark plug hole R...

Page 102: ...ber or piston head DRIVING SYSTEM DRIVING BELT Remove left side cover Remove mounting bolt located under air cleaner Remove 9 bolts of the engine left crankcase Remove the left crankcase cover Check i...

Page 103: ...or leaking Replace damaged and non repairable components Tighten all nuts and bolts Rear Shock absorber Press down the rear shock absorber for several times to check its operation Check if it is scrat...

Page 104: ...e fluid contents inside the brake system hoses AIR BLEED OPERATION Connect a transparent hose to draining valve Hold the brake lever and open air bleeding valve Perform this operation alternative unti...

Page 105: ...Pry out the brake lining with a flat driver if lining be clipped Remove brake lining bolt Take out the lining Caution Never mix or use dirty brake fluid to prevent from damage brake system or reducing...

Page 106: ...Free play 10 20 mm Adjust the free play by turning the front brake adjustment nut if necessary BRAKE CONFIRAMTION Caution After brake adjustment it has to check the brake operation to make sure the f...

Page 107: ...2 51J Check if tire surface is ticked with nails stones or other materials Check if tire surface or wall for crack or damaged and replace it if necessary The tire tread depth can be checked by visual...

Page 108: ...am height in proper position Caution NUTS BOLTS TIGHTENESS Perform periodical maintenance in accord with the Periodical Maintenance Schedule Check if all bolts and nuts on the frame are tightened secu...

Page 109: ...IONS 3 2 TROUBLE DIAGNOSIS 3 2 ENGINE OIL 3 3 CLEANING ENGINE OIL STRAINER 3 3 OIL PUMP 3 4 GEAR OIL 3 7 MECHANISM DIAGRAM Valve rocker arm Camshaft Scoop lubrication Forcedly lubrication Forcedly lub...

Page 110: ...IL unit mm Items Standard Limit Inner rotor clearance 0 12 Clearance between outer rotor and body 0 12 Oil pump Clearance between rotor side and body 0 05 0 10 0 20 Torque value Engine oil drain plug...

Page 111: ...he drain bolt and tighten it Torque value 3 5 4 5 kgf m CLEANING ENGINE OIL STRAINER Remove the oil strainer cap Remove oil strainer and spring Clean oil strainer recommended using compressed air to c...

Page 112: ...ver 2 bolts and then the oil pump driving gear nut and the gear and oil pump driver chain Remove oil pump body bolts 2 bolts Oil Pump Disassembly Remove the screw on oil pump cover Disassemble the oil...

Page 113: ...nner and outer rotors Limit below 0 12 mm Check clearance between rotor side face and pump body Limit below 2 0 mm Oil Pump Re assembly Install inner and outer rotors into the pump body Align the inde...

Page 114: ...l the oil pump 2 bolts Install oil pump driver chain and drive gear Install oil pump outer cover 2 bolts Install the starting gear and the alternator Refer to chapter 10 2 bolts 2 bolts oil pump drive...

Page 115: ...el too low Standard quantity 110cc Replacement 100 cc Gear Oil Replacement Remove the gear oil filling hole bolt and its draining plug and then drain oil completely Install the draining plug and tight...

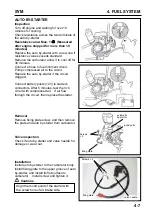
Page 116: ...UBLE DIAGNOSIS 4 3 CARBURETOR REMOVAL 4 4 VACUUM CHAMBER 4 4 AIR CUT OFF VALVE 4 6 AUTO BY STARTER 4 7 FLOAT CHAMBER 4 8 INSTALLATION OF CARBURETOR 4 9 IDLE SPEED ADJUSTMENT 4 9 FUEL TANK 4 10 AIR CLE...

Page 117: ...cial service tools Vacuum air pressure pump General service tools Fuel level gauge Gasoline is a low ignition point and explosive materials so always work in a well ventilated place and strictly prohi...

Page 118: ...ect idle speed Malfunction of carburetor Dirty fuel Intermittently misfire as acceleration Malfunction of ignition system Late ignition timing Malfunction of ignition system Malfunction of carburetor...

Page 119: ...se the clamp strip of air cleaner Release the clamp strip of carburetor isolator Take the carburetor out VACUUM CHAMBER Removal Loosen drain screw and drain out residual fuel in float chamber Remove s...

Page 120: ...to vacuum piston Cautions Install vacuum piston to carburetor body Install compress spring Install vacuum chamber cover and tighten 2 screws Do not damage vacuum diaphragm Note direction as installin...

Page 121: ...screw x 2 of the air cut off valve and its cover Remove the spring and vacuum diaphragm Check if the vacuum diaphragm for deterioration or crack Installation Install the valve as reverse order of rem...

Page 122: ...ged Connect battery posts 12V to starter s connectors After 5 minutes test the rich circuit with compressed air If air flow through the circuit then replace the starter Removal Remove fixing plate scr...

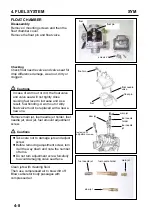
Page 123: ...ssages with compressed air In case of worn out or dirt the float valve and valve seat will not tightly close causing fuel level to increase and as a result fuel flooding A worn out or dirty float valv...

Page 124: ...volume adjustment screw and read CO reading on the analyzer CO standard value 1 0 1 5 Accelerate in gradual increments make sure both rpm and CO value are in standard values after engine running in s...

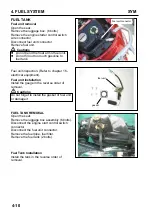
Page 125: ...he reverse order of removal Cautions FUEL TANK REMOVAL Open the seat Remove the luggage box assembly 6 bolts Disconnect the engine start control switch connector Disconnect the fuel unit connector Rem...

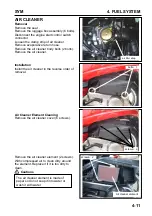
Page 126: ...lts Remove the air cleaner Installation Install the air cleaner in the reverse order of removal Air Cleaner Element Cleaning Remove the air cleaner cover 6 screws Remove the air cleaner element 2 scre...

Page 127: ...DIAGRAM 5 1 OPERATIONAL PRECAUTIONS 5 2 ENGINE REMOVAL 5 3 REMOVAL OF ENGINE SUSPENSION BUSHING 5 6 ENGINE SUSPENSION FRAME 5 7 INSTALLATION OF ENGINE 5 8 MECHANISM DIAGRAM 3 5 4 5kgf m 2 4 3 0kgf m 4...

Page 128: ...riving belt clutch and transporting disk 3 Final reduction gear mechanism Specification Specification Disassemble 850 c c Engine Oil Capacity Replacement 750 c c Disassemble 110 c c Gear Oil Capacity...

Page 129: ...the body cover Remove the power connector of auto by start Remove the generator wire and pulse generator connector Remove the starter motor wire on the Starter magnetic switch Remove the spark plug S...

Page 130: ...nd throttle valve cable from the carburetor Loose the strap screw of the air cleaner guide and then the air cleaner guide Remove the exhaust muffler Bolts 2 Nuts 2 Remove the rear wheel Nut 1 Remove t...

Page 131: ...Remove the engine suspension nut and bolt engine side and then remove the engine Caution Check if the engine suspension rear shock absorber bushing and cushion rubber for damage Replace them with new...

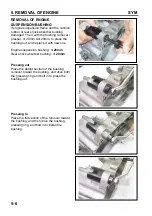
Page 132: ...ess the bushing out and replace it with new one Engine suspension bushing 28mm Rear shock absorber bushing 20mm Pressing out Place the detent section of the bushing remover toward the bushing and driv...

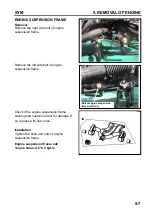
Page 133: ...ove the left side bolt of engine suspension frame Check if the engine suspension frame bushing and cushion rubber for damage If so replace with new ones Installation Tighten the bolts and nuts of engi...

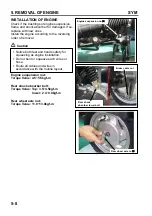
Page 134: ...e suspension nut Torque Value 4 5 5 5kgf m Rear shock absorber bolt Torque Value Top 3 5 4 5kgf m lower 2 4 3 0kgf m Rear wheel axle nut Torque Value 11 0 13 0kgf m Notice both feet and hands safety f...

Page 135: ...DER HEAD REMOVAL 6 6 CYLINDER HEAD DISASSEMBLY 6 7 CYLINDER HEAD INSPECTION 6 8 VALVE SEAT INSPECTION AND SERVICE 6 10 CYLINDER HEAD REASSEMBLY 6 12 CYLINDER HEAD INSTALLATION 6 13 CAMSHAFT INSTALLATI...

Page 136: ...5 00 4 975 4 99 OD of valve stem Exhaust 5 00 4 97 4 98 OD of Guide 5 00 5 030 Intake 0 020 0 045 0 080 Clearance between valve stem and guide Exhaust 0 030 0 057 0 100 Outer 32 56 32 26 Free length o...

Page 137: ...alve carbon Poor sealing on valve seat Improper spark plug installation 2 Cylinder head Cylinder head gasket leaking or damage Tilt or crack cylinder surface 3 Piston Piston ring worn out High compres...

Page 138: ...screwdriver to tighten the screw of camshaft chain adjuster in a clockwise motion for release adjuster Turn the flywheel in counter clockwise motion with T type wrench until the T mark on flywheel al...

Page 139: ...bearing Disassembly Of Camshaft Holder With a 5 mm bolt to screw in the cam rocker arm shaft so that take it out Remove cam rocker arm Inspection Of Camshaft Holder Check if the camshaft holder cam r...

Page 140: ...imit Replace when it is above 9 910 mm Calculate the clearance between the rocker arm shaft and the rocker arm Service Limit Replace when it is above 0 10 mm CYLINDER HEAD REMOVAL Remove double seat l...

Page 141: ...valve spring and valves Caution Special Service Tool Valve spring compressor Remove valve stem guide seal Clean carbon deposits in combustion chamber Clean residues and foreign materials on cylinder h...

Page 142: ...of valve stem in valve guide and measure record the valve stem outer diameter Service Limit IN 4 900mm EX 4 900mm Valve guide Caution Special Service Tool 5 0mm valve guide reamer Measure and record...

Page 143: ...alve seat and clean up all metal residues from cylinder head Special tool Valve guide reamer 5 mm If clearance between valve stem and valve guide exceeded service limit check whether the new clearance...

Page 144: ...lve seat chamfer cutter Use 45 valve seat chamfer cutter to cut any rough or uneven surface from valve seat Caution Use 32 cutter to cut a quarter upper part out Do not let emery enter into between va...

Page 145: ...at a seal track will be created on contact surface Caution If the contact surface too high grind the valve seat with 32 cutter Then grind the valve seat with 45 cutter to specified width If the contac...

Page 146: ...lve spring compressor to press valve spring Install valve split locks and release the valve compressor Caution Special tool valve spring compressor Tap valve stem to make valve retainer and valve stem...

Page 147: ...r arm shaft Caution With T type wrench to turn crankshaft in a clockwise motion so that the T mark on the flywheel aligns with the mark on crankcase piston is at TDC position Place the TDC marks of th...

Page 148: ...flat screwdriver turn the cam sprocket adjuster in counter clockwise motion so that the adjuster is pushed out to contact the cam chain plate tightly Apply with oil onto a new O ring and then install...

Page 149: ...1 MECHANISM DIAGRAM 7 1 PRECAUTIONS IN OPERATION 7 2 TROUBLE DIAGNOSIS 7 2 CYLINDER REMOVAL 7 3 PISTON REMOVAL 7 5 PISTON RING INSTALLATION 7 7 PISTON INSTALLATION 7 8 CYLINDER INSTALLATION 7 8 MECHAN...

Page 150: ...on skirt Clearance between piston and cylinder 0 010 0 040 0 100 Piston Piston ring ID of piston pin hole 15 002 15 008 15 040 OD of piston pin 14 994 15 000 14 980 Clearance between piston and piston...

Page 151: ...r 6 Remove 2 bolts and then take out the cam chain auto adjuster Remove cam chain plate Remove cylinder Remove cylinder gasket and lock pins Clean the residues attached onto the matching surfaces of c...

Page 152: ...tive in the cylinder Service limit 58 00mm Calculate both the real roundness the difference between X and Y motion values and the cylindrical roundness the difference in the top center or bottom posit...

Page 153: ...the carbon in piston ring grooves Install the piston rings and then measure clearance between piston ring and its grooves Service Limit Top ring replace if over 0 09mm 2nd ring replace if over 0 09mm...

Page 154: ...he inner diameter of piston pin hole Service Limit 15 04mm Calculate clearance between piston pin and its hole Service Limit 0 02mm Measure piston outer diameter Caution Service limit 52 30mm Compare...

Page 155: ...Place the openings of piston ring as diagram shown Caution Do not damage piston and piston rings as installation All marks on the piston rings must be forwarded to up side Make sure that all piston r...

Page 156: ...n installing piston into cylinder Press piston rings in one by one as installation Caution Install the cam chain plate the cylinder gasket and lock pins Install cylinder head refer to Chapter 6 Instal...

Page 157: ...MECHANISM DIAGRAM 8 1 MAINTENANCE DESCRIPTION 8 2 TROUBLE DIAGNOSIS 8 2 LEFT CRANKCASE COVER 8 3 KICK STARTER ARM 8 3 DRIVING BELT 8 4 SLIDING PULLEY 8 6 CLUTCH DRIVEN PULLEY 8 9 MECHANISM DIAGRAM 5 0...

Page 158: ...OD of driving pulley 33 965 33 985 33 940 ID of sliding pulley 34 000 34 025 34 060 ID Inner Diameter OD Outer diameter Torque value Sliding pulley nut 5 0 6 0kgf m Clutch outer nut 5 0 6 0kgf m Drivi...

Page 159: ...ged Replace it with one if poor parts found Reassembly Apply with some specified grease on the gear socket shaft Install the friction spring of driving gear onto convex part of the case Install socket...

Page 160: ...clutch at same time Inspection Check the driving belt for crack or wear Replace it if necessary Measure the width of driving belt as diagram shown Replace the driving belt if it exceed maintenance li...

Page 161: ...h universal fixture and then tighten nut to specified torque value Torque value 5 0 6 0 kgf m Caution Pull out driving pulley and then insert the driving belt into the driving pulley so that the drivi...

Page 162: ...rsal fixture and then remove driving pulley nut Remove driving pulley Remove the driving belt from the pulley Remove sliding pulley set and driving pulley hub from crankshaft Remove tilt plate Remove...

Page 163: ...sure each rollers outer diameter Replace it if exceed the service limit Service limit 19 50 mm Check the pulley hub if damaged or wear out Replace it if necessary Measure the pulley hub s outer diamet...

Page 164: ...nut Caution Hold driving pulley with universal fixture Tighten nut to specified torque Torque value 5 0 6 0 kgf m Install left crankcase cover The pulley surface has to be free of grease Clean it with...

Page 165: ...pring compressor and remove clutch and spring from driven pulley Remove socket from driven pulley Remove oil seal from driven pulley Remove guide pin guide pin roller and sliding pulley and then remov...

Page 166: ...ged or worn components Measure the outer diameter of driven surface and the inner diameter of driven pulley Replace it if exceeds service limit Service limit Outer diameter 33 94mm Inner diameter 34 0...

Page 167: ...sary Apply with grease onto setting pins Apply with grease onto setting pins But the clutch block should not be greased If so replace it Install new clutch block onto setting pin and then push to spec...

Page 168: ...he bearing Install a new inner bearing Caution Align oil seal lip with bearing and then install the new oil seal if necessary Its sealing end should be forwarded to outside as bearing installation Ins...

Page 169: ...elt spring and clutch into clutch spring compressor and press down the assembly by turning manual lever until mounting nut that can be installed Hold the compressor by bench vise and tighten the mount...

Page 170: ...S 9 2 DISASSEMBLY OF FINAL DRIVING MECHANISM 9 3 INSPECTION OF FINAL DRIVING MECHANISM 9 3 BEARING REPLACEMENT 9 4 RE ASSEMBLY OF FINAL DRIVING MECHANISM 9 6 MECHANISM DIAGRAM driving gear countershaf...

Page 171: ...ring puller Outer type bearing puller Gear box oil seal installer Gear box bearing installer Torque value Gear box cover bolts 1 8 2 2 kgf m Gear oil drain plug bolt 3 5 4 5 kgf m Gear oil filling bol...

Page 172: ...and then remove the cover and the final driving shaft Remove gasket and setting pin Remove countershaft and gear Remove final driving gear and shaft INSPECTION OF FINAL DRIVING MECHANISM Check if the...

Page 173: ...haft and gear for wear or damage BEARING REPLACEMENT Caution Remove driving shaft bearing from left crankcase using following tools Inner type bearing puller Install new driving shaft bearing into lef...

Page 174: ...ng puller Bearing protector Install a new driving shaft bearing onto gear box cover Then install the driving shaft Specified tool Press the bearing in with C type hydraulic presser or bearing installe...

Page 175: ...nto the oil seal lip of final driving shaft Install the gear box cover and 7 bolts tighten the bolts Torque 1 8 2 2 kgf m Install the clutch sliding driving pulley Install the driving pulley belt and...

Page 176: ...SERVICE MANUAL...
Page 177: ...NE REMOVAL 5 CYLINDER HEAD VALVE 6 CYLINDER PISTON 7 V TYPE BELT DRIVING SYSTEM KICK STARTER ARM 8 FINAL DRIVING MECHANISM 9 A C GENERATOR STARTING CLUTCH 10 CRANKCASE CRANKSHAFT 11 BODY COVER 12 BRAK...

Page 178: ...r brake lever Air cleaner Gear oil filling bolt Oil level Tail light Front turn signal light Fuel tank Fuel unit High Low beam Seat open turn signal horn Head light Position light Engine oil draining...

Reviews: