Sylvania SRT902A Operation Instruction Manual Download Page 1

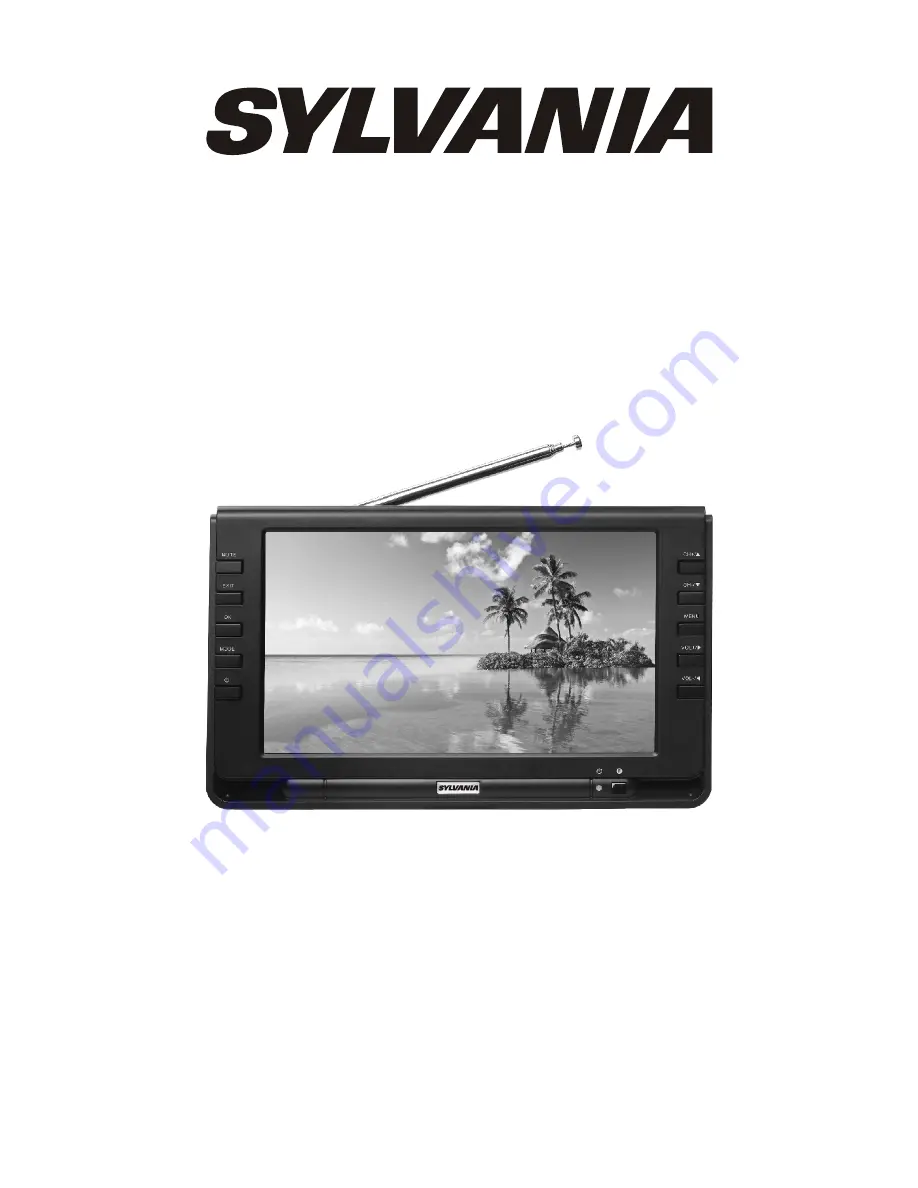
LCD Color digital TV receiver

SRT902A 

Operation 

Instruction

NOTE: THIS UNIT IS NOT MEANT TO BE USED IN A MOVING VEHICLE.  ATSC DIGITAL 
TUNERS DOES NOT RECEIVE SIGNAL WHEN IN MOTION.
This device complies with Part 15 of the FCC Rules.
Operation is subject to the following two conditions: (1) this device may not cause harmful 
interference, and (2) this device must accept any interference received, including interference 
that may cause undesired operation.

Summary of Contents for SRT902A

Page 1: ...C DIGITAL TUNERS DOES NOT RECEIVE SIGNAL WHEN IN MOTION This device complies with Part 15 of the FCC Rules Operation is subject to the following two conditions 1 this device may not cause harmful inte...

Page 2: ...Panel Buttons V Remote Controller Operation Instruction VI Basic Operation VII TV Menu Operation 7 1 TV AV Image Quality Adjustment 7 2 Sound Adjustment 7 3 Time Adjustment 7 4 Settings 7 5 Program se...

Page 3: ...eys using soft cloth with a little soft detergent on 3 Do not use polishing cloth abstergent and all types of propellants or chemical detergents like alcohol and benzene to clean your device Special N...

Page 4: ...adapter 2 AC adapter 3 75 ohm antenna conversion cable screw connector 4 Remote control 5 AAA type batteries 6 AV conversion cable 7 Telescopic antenna 8 User manual Open the package and make sure all...

Page 5: ...5 MODE Mode shift button 6 Standby button 7 TFT LCD screen 8 CH Channel Select Upward button 9 CH Channel Select Downward button 10 VOL Volume up Rightward button 12 VOL Volume down Leftward button 1...

Page 6: ...nal storage switch CH Upward selection Channel increasing 7 CH Downward selection Channel decreasing 8 MENU Menu button press to show the main menu When system enters a multilevel submenu press to ret...

Page 7: ...enu rightward if it is in the system menu Press VOL to turn down the volume Press this key to choose menu leftward if it is in the system menu 4 MENU Menu key When you press this key the main menu wil...

Page 8: ...rogram choosing key up and down direction key Press CH key to increase the channel Press this key and choose menu upward if it is in the system menu Press CH key to decrease the channel Press this key...

Page 9: ...le Align one end of the attached antenna cable plug in the antenna jack on TV set and the other end plug in the external antenna jack AV conversion cable 3 Connection of AV convert Cable Insert the ex...

Page 10: ...onfirm and return to previous list Press MENU again or press EXIT key on the remote controller to quit the sub menu list directly after the adjustment of image quality 1 There are four options of Pict...

Page 11: ...for three options of Bass Treble Balance 3 Prefer Language Set the preferred dubbing language Precautions 7 3 Time Adjustment Press MENU key to enter the menu list and then press left or right key to...

Page 12: ...P and Down Key to choose Transparency and press Left and Right Key to choose transparency level 0 25 50 75 100 7 4 4 OSD Display Time Press Left and Right key to choose different OSD display time 5 60...

Page 13: ...to setup the contents 7 5 1 TV Source Setting CATV andAir 7 5 2 Auto Scan Press VOL key to autosearch channel and the previous channels will be deleted at the same time 7 5 3 Favorite Set up your favo...

Page 14: ...ress Left Right button to select the required storage equipment then press OK to confirm A window is shown as below 12 Select the media type PHOTO MUSIC VIDEO you want through VOL VOL press OK key to...

Page 15: ...to select the corresponding function of the icon in tool bar Previous music Pause It is Play button when in pause status Stop Next music Repeat Volume Press OK first and then VOL VOL to adjust the vol...

Page 16: ...osen the right channel auto setup receiving channel again channels need to be reset in a new place No sound Whether the volume has been turned down at the bottom whether the earphone is inserted signa...

Page 17: ...al Parameter LCD screen 9 LCD Resolution 640 H RGB 234 V LCD screen scale 16 9 Capability Parameter Power Supply By AC Adaptor AC INPUT 100 240V 50 60HZ DC OUTPUT 12V 2000mA Build in battery 7 4V 2000...

Page 18: ...stand head Pict 3 Step Four Lock the fixed stand and Stand Head together as Pict 4 Step Five Loose the Stand Head s locker to move the Unit Lock easier Pict 5 6 7 Step Six Make an enough place to put...

Page 19: ...information contained therein Due to continuing improvements the features and design are subject to change without notice No repairable components exist in the machine Don t try to dismantle and impro...

Reviews: