background image

59

Base station settings

Aton CL700 IP LBA / Swisscom EN internet / A31008-M1713-F161-1-XXXX / settings_bs_hs_pabx.fm / 16.10.06

Ve

rs

ion 4,

 16

.09.

2005

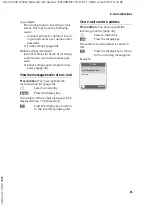
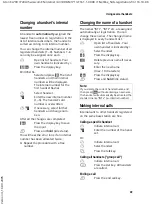
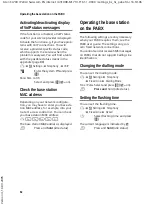
Activating/deactivating
repeater mode

With a repeater you can increase the range 

and reception strength of your base sta-

tion. You will need to activate repeater 

mode. This will terminate any calls being 

made via the base station at that time. 

Precondition

: a repeater is registered 

with the base station.

v


¢

Ð

Settings 

¢

Base


¢

Add. Features

Repeater Mode

Select and press 

§OK§

 (

½

= on).

§Yes§

Press the display key to con-

firm the security prompt.

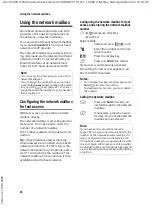
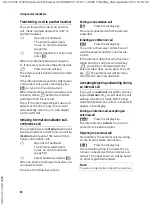
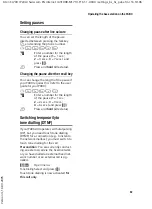
Setting the default connection

You can make settings according to 

whether you want to make calls via VoIP or 

fixed network by default.

v


¢

Ð

Settings 

¢

Telephony


¢

Default Line

VoIP

 / 

Fixed Line


Select and press 

§OK§

 (

½

= on).

When making calls:

¤

Press the talk key 

c


briefly

 if you 

want to make the call via the default 

connection. 

¤

Press and 

hold

 the talk key 

c

 if you 

want to make the call via the other con-

nection type. 

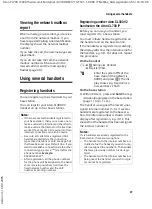
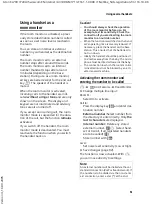
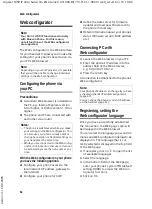
Updating the base station 
firmware

If necessary, you can update your base sta-

tion firmware.
The firmware update is downloaded 

directly from the Internet by default. The 

relevant website is preconfigured in your 

phone. 

Precondition: 

The base station is in idle status, i.e.:

u

No calls are being made via the fixed 

network or VoIP.

u

There is no internal connection 

between the registered handsets. 

u

No other handset has opened the base 

station menu. 

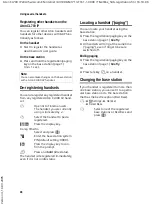
Starting the firmware update manually

v


¢

Ð

Settings 

¢

Base 

Software Update

Select and press 

§OK§

.

~

Enter the system PIN and press 

§OK§

The base station establishes a connection 

to the Internet or to the local PC. 

§Yes§

Press the display key to start 

the firmware update.

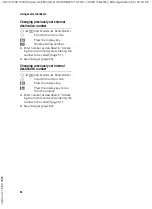
Notes:

– The firmware update can last up to 3 min-

utes.

– When updating from the Internet, checks 

are made to ensure that no newer version 

of the firmware exists. If this is not the case, 

the operation is terminated and a message 

is issued to that effect. 

Summary of Contents for Aton CL700 IP

Page 1: ...gaset Communications GmbH Desejamos que tenham bons momentos com o seu Gigaset DA Kære Kunde Gigaset Communications GmbH er retlig efterfølger til Sie mens Home and Office Communication Devices GmbH Co KG SHC som fra deres side videreførte Siemens AGs Gigaset forretninger Siemens AGs eller SHCs eventuelle forklaringer i betjeningsvejledningerne skal derfor forstås som Gigaset Communications GmbHs ...

Page 2: ...кви изложения направени от Siemens AG или SHC които се намират в ръководствата за потребителя следва да се разбират като изложения на Gigaset Communications GmbH Надяваме се да ползвате с удоволствие вашия Gigaset HU Tisztelt Vásárló A Siemens Home and Communication Devices GmbH Co KG SHC törvényes jogutódja a Gigaset Communications GmbH amely a Siemens AG Gigaset üzletágának utódja Ebből következ...

Page 3: ...1 Aton CL700 IP LBA Swisscom EN internet A31008 M1713 F161 1 XXXX cover fm 16 10 06 Aton CL700 IP User guide ...

Page 4: ...2 Aton CL700 IP LBA Swisscom EN internet A31008 M1713 F161 1 XXXX cover fm 16 10 06 ...

Page 5: ... 93 7 Swisscom Voice Portal key page 22 8 Connection socket for headset page 13 9 Microphone 10 Star key Ringer tones on off press and hold in idle status Open special characters table 11 Key 1 press and hold Calling the network mailbox 12 Talk key Accept call open last number redial list press briefly in idle status select connec tion type and start dialling press briefly press and hold after ent...

Page 6: ...rvices fixed network 23 Functions for the next call 23 Settings for all calls 23 Functions during a call 24 Functions after a call 24 Network services VoIP 25 Settings for all calls 25 Functions during a call 25 Using the directory and lists 27 Directory list 27 Opening online directories 29 Last number redial list 30 Opening lists with the message key 30 Making cost effective calls 32 Displaying ...

Page 7: ... MAC address 62 Operating the base station on the PABX 62 Changing the dialling mode 62 Setting the flashing time 62 Setting pauses 63 Switching temporarily to tone dialling DTMF 63 Web configurator 64 Configuring the phone via your PC 64 Connecting PC with Web configurator 64 Registering setting the Web configurator language 64 Logging off 65 Structure of the Web pages 65 Opening Web pages 67 Set...

Page 8: ...n unpleasant humming noise in hearing aids Do not install the base station in bathrooms or shower rooms The handset and base station are not splashproof page 83 Do not use your phone in environments where there is a risk of an explosion e g paint shops If you give your Aton CL700 IP to someone else make sure you also give them the user guide Information about disposal At the end of its service lif...

Page 9: ...device from unau thorised access page 58 u Send and receive SMS messages via the fixed network page 33 u Let your phone tell you without requiring a PC about new e mail mes sages in your mailbox page 43 u Save up to 150 numbers and names in your handset page 27 u Transfer your Outlook contacts from the PC onto your handset Or back your handset directory up on your PC u You can programme the keys o...

Page 10: ...ernet access i e you need a router that will connect your phone to the Internet First steps Pack contents The pack contains u one Aton CL700 IP base station u one Aton CL300 V2 handset u one mains adapter for the base station u one charging cradle incl mains adapter u one phone cord u one Ethernet cable LAN cable u two batteries u one battery cover u one belt clip u one quick guide u one headset S...

Page 11: ...il it clicks into place Opening the battery cover If fitted remove the belt clip Place your finger in the headset socket cavity and pull the battery cover upwards Connecting the charging cradle Connecting the charging cradle is described at the end of this user guide To charge the batteries leave the hand set in the charging cradle For questions and problems see page 83 Notes Only place the handse...

Page 12: ... on the phone have not yet been set the Time display key will appear You can use the v Ð Settings Date Time menu at a later point to enter the date and time Press Time or open the menu Change multiple line input Date Enter day month and year in 6 digit format Time Enter hours and minutes as 4 digits e g Q M 1 5 for 7 15 a m Save Press the display key The date and time are shown in the hand set s i...

Page 13: ...1 1 Internet connection Router and modem in picture or router with integrated modem 2 Aton CL700 IP base station 3 Aton CL300 V2 handset 4 PC in LAN Follow the steps in the order given below 1 Connect the base station to the fixed network phone connection 2 Connect the base station with the mains power supply 3 Connect the base station with the router Figure 1 Connecting the phone to the fixed net...

Page 14: ...ou buy a replacement phone cord from a retailer ensure that the phone jack is connected correctly You can now use your phone to make calls via the fixed network and can be reached on your fixed network number Connecting the base station with the router For Internet access you need a router connected to the Internet via a modem this may be integrated in the router 1 Side view of the base station 2 ...

Page 15: ...plete information means that the connection cannot be established messages will be displayed page 12 As soon as the handset battery is suffi ciently charged the message key f on the handset will flash around 20 minutes after you have put the handset in the charging cradle Press the message key f to start the connection assistant You will see the following display Yes Press the display key to start...

Page 16: ...will be displayed example You can now use your phone to make calls via the fixed network and the Internet Callers can reach you on your fixed network number and your VoIP number No connection to the Internet VoIP server If one of the following messages is dis played instead of the internal name after the connection assistant is closed errors have occurred u Server not accessible u Provider registr...

Page 17: ...handset v Ð Settings Telephony VoIP Provider Registr see page 60 Belt clip and headset By using a belt clip and headset you can easily make your handset a constant com panion both inside the building and in its immediate vicinity Attaching the belt clip There are notches for attaching the belt clip on the side of the handset at the same height as the display Press the belt clip onto the back of th...

Page 18: ...Example v 5 4 1 for Set handset language Scrolling through the menus Scroll to the function with the control key q press up or down and press OK 1 î Messaging 1 1 SMS An SMS mailbox general or private activated without a PIN page 33 1 1 1 New SMS page 34 1 1 2 Incoming 0 page 36 1 1 3 Outgoing 0 page 35 An SMS mailbox activated with a PIN or 2 3 mailboxes 1 1 1 Mailbox 1 1 1 1 New SMS page 34 1 1 ...

Page 19: ...ail 1 2 1 Inbox 0 page 44 1 2 2 Settings 1 2 2 1 Incoming POP3 page 43 1 2 2 2 Registration page 43 2 ê Sel Services 2 1 VoIP 2 1 6 Call Divert page 25 2 1 7 Call Waiting page 25 2 2 Fixed Line 2 2 1 Withhold No page 23 2 2 6 Call Divert page 23 2 2 7 Call Waiting page 23 Call Protection page 24 2 3 Ringback Off page 24 3 ì Alarm Clock page 57 4 í Add Features 4 3 Room Monitor page 51 1 Depends on...

Page 20: ...olour Scheme page 53 5 3 3 Contrast page 53 5 3 4 Backlight page 54 5 4 Handset 5 4 1 Language page 53 5 4 2 Auto Answer page 55 5 4 3 Register H Set page 47 5 4 4 Select Base page 48 5 4 5 Reset Handset page 57 5 5 Base 5 5 1 Calls List Type 5 5 1 1 Missed Calls page 31 5 5 1 2 All Calls 5 5 2 Music on hold page 58 5 5 3 System PIN page 58 5 5 4 Base Reset page 58 5 5 5 Add Features 5 5 5 1 Repea...

Page 21: ...ne 5 7 2 Connection Assist page 60 5 7 6 Fixed Line 5 7 6 1 Dialling Mode page 62 5 7 6 2 Recall page 62 5 7 7 VoIP 5 7 7 1 Show Stat on HS page 62 5 7 7 3 Provider Registr page 60 Home page 64 Settings IP configuration page 67 Telephony Connections page 69 Number assignment page 77 DTMF page 78 Dialing Plans page 78 Directory page 79 Messaging E Mail page 80 Miscellaneous page 81to page 82 Status...

Page 22: ... IP FixedLine IP Press the display key to select the connection type s Enter the number or select from the directory c d Press the talk or handsfree key The number will be called via the selected connection type regardless of whether the talk key was pressed briefly or pressed and held Cancelling the dialling operation You can cancel the dialling operation with the end call key a Ending a call a P...

Page 23: ...ovider supports CLIP CLI CLI Calling Line Identification number of the caller is transmitted CLIP Calling Line Identification Presentation the caller s number is displayed u You have arranged CLIP with your net work provider u The caller has arranged CLI with the network provider If the phone number is identified and the caller s number is saved in your directory the name will be displayed from th...

Page 24: ...g cradle If the handsfree key d does not light up press the key again For how to adjust the loudspeaker vol ume see page 55 Muting the handset You can deactivate the microphone in your handset during an external call Your caller will hear hold music if acti vated page 58 Muting the handset u Press the control key on the left to mute the handset Cancelling muting a Press the display key or the end ...

Page 25: ...ist of available online directories u Initiate an internal consulta tion call t Adjust loudspeaker volume for earpiece and handsfree mode Display keys The current display functions are shown in the bottom display line in reversed high lights The function of the display keys changes depending on the particular operating situation Example 1 Current display key functions are shown in the bottom displ...

Page 26: ... q and press OK Or Enter the number that is in front of the function in the menu tree page 14 The corresponding submenu the next menu level is opened Submenus The functions in the submenus are dis played as lists To access a function Scroll to the function with the control key q and press OK Or Enter the number combination that is in front of the function in the menu tree page 14 Briefly press the...

Page 27: ...ne network press the end call key a You can set the following features General call forwarding v ê Sel Services Fixed Line Call Divert Change multiple line input When Select All Calls No Answer When Busy Call No Press the display key Edit Enter the number to which the call is to be diverted and press Save You can enter a fixed network VoIP or mobile number Status Activating deactivating call forwa...

Page 28: ...nd call with active participant Options End Active Call u Conference call Call both subscribers press the dis play key Conf End the conference call toggling press display key EndConf End call with both participants Press the end call key a Accepting a waiting call Precondition Call waiting is activated page 23 Accept Press the display key Or if the caller s number is not trans ferred Options Accep...

Page 29: ...will hear the ringing tone if you are already on a call using this VoIP connection This call is announced acoustically and visually on your handset screen Calls on the fixed network connection are not signalled as call waiting They are sig nalled on other registeredhandsets to which the fixed network number has been allocated as a receiving number If no other handset is available the caller will h...

Page 30: ...ress display key EndConf End call with both participants Press the end call key a Accepting a waiting call Precondition Call waiting is activated page 23 Accept Press the display key Or if the caller s number is not trans ferred Options Accept waiting call You have the option of toggling or holding a conference call Rejecting a waiting call Options Reject waiting call Note Without CLIP a waiting c...

Page 31: ...rs Enter anniversary if required page 29 Speed Dial Select number key for speed dial Each of the keys Q and 2 to O can be assigned one number from the directory The number is then dialled by simply pressing a key page 28 Save changes page 92 Selecting entries in the directory list s Open directory list You have the following options u Use q to scroll to the entry until the required name is selecte...

Page 32: ...a handset page 28 Available Memory Display the available entries in the directory list Using speed dial keys Press and hold the required speed dial key page 27 The relevant phone number will always be dialled via the non standard connection page 59 Sending the directory list to another handset Preconditions u The sending and receiving handsets must both be registered on the same base station u The...

Page 33: ... minute for the reminder call in 4 digit format Prompt Select the type of signal for the reminder and press OK Save changes page 92 Deleting anniversaries s s Select entry page 27 View Edit Press display keys one after the other s Scroll to the Annivers line Edit Delete Save Press display keys one after the other Reminder call on an anniversary A reminder call is signalled on the handset using the...

Page 34: ...n the following lists u SMS list If several mailboxes are set up page 39 several lists will be dis played if required u Incoming e mail list The list is only shown if new messages have arrived in the mailbox for the incoming e mail server u Configuring the Network mailbox If your network provider supports this function and the network mailbox is configured for fast access page 46 u Calls list An a...

Page 35: ...es are retained when you change the list type Opening the calls list f Calls List 2 q Select entry The last incoming call is displayed in the calls list List entry New messages are on top Example of list entries u List type in header u Status of entry Bold new entry u Number or name of caller You can add the caller s number to the directory page 28 u Date and time of call if set page 8 u Type of e...

Page 36: ...ype page 18 Making cost effective calls Using the Internet VoIP is the preferred cost effective way of making calls If you make calls via the fixed network you can have the call duration displayed on your handset after the call Displaying the call duration The duration of a call is displayed u during the conversation u until about three seconds after the call has ended if you do not replace the ha...

Page 37: ...s the active send service centre However you can select any other SMS centre as the active send service centre to send a cur rent message page 40 If no SMS Service Centre is entered the SMS menu only contains the entry Settings Enter an SMS Service Centre page 40 Rules u For more than 160 characters the SMS will be sent as a linked SMS up to eight SMS messages each containing 152 or 153 characters...

Page 38: ...ress OK SMS Select and press OK Sending an SMS s Select number with area code even if you are in that area from the directory list or enter number directly For SMS to an SMS mailbox add the mailbox ID to the end of the number Options Press the display key Send Select and press OK The SMS will be sent as soon as your phone s fixed network connec tion is free Using other functions Precondition you a...

Page 39: ... PIN Outgoing 3 Select and press OK The number of the SMS messages in the list will be shown in brackets e g 3 The first list entry is displayed e g Reading or deleting individual SMS messages Open the draft message list and then q Select SMS Read Press the display key The entry will be displayed Scroll line by line using q Or Options Open menu Delete Entry Press OK The SMS is deleted Writing edit...

Page 40: ...nd press OK Fax Select and press OK s Select the number from the directory or enter it manually Enter the number with dialling code even if you are in the same area Send Press the display key The SMS will be sent as soon as your phone s fixed network connec tion is free Receiving an SMS All received SMS messages are saved in the incoming message list Linked SMS messages are displayed as one messag...

Page 41: ...ge 37 If you cannot see any text or symbols the SMS may have been written with a differ ent character set Options Press the display key Character Set Select and press OK q Select character set and press OK Text is shown in the selected character set Deleting incoming message list All new and old SMS messages in the list are deleted Open the incoming message list Options Open menu To continue see D...

Page 42: ... is sent to your mobile phone or another phone with SMS functionality You only need to set the phone number to which notification should be sent notifi cation number and the notification type Storing the notification number v î Messaging SMS Settings Notify Number Enter the number including dialling code to which the SMS is to be sent Save Press the display key a Press and hold idle status Setting...

Page 43: ...x 2 and press OK Change multiple line input On Off Activate or deactivate mailbox ID Select mailbox ID 0 9 You can only select the available numbers Protection Activate deactivate PIN protection PIN If necessary enter 4 digit PIN Save changes page 92 Active mailboxes are marked with in the mailbox list They are shown in the SMS list and can if necessary be displayed by pressing the message key f D...

Page 44: ...ies to the next SMS to be sent Thereafter the setting returns to Service Centr 1 SMS info services You can have your service provider send you certain information e g weather forecasts or lottery numbers via SMS A total of up to 10 info services can be stored You can obtain information about the info services available and their costs from your service provider Setting up ordering an info service ...

Page 45: ...g and receiving SMS on ISDN PABXs is only possible via the MSN number assigned to your base station Activating deactivating SMS function If you deactivate the SMS function you cannot send or receive SMS messages with your phone The settings which you have made for sending and receiving SMS messages e g the call numbers of the SMS centres and the entries in the incoming and draft mes sage lists are...

Page 46: ...ur mailbox page 39 3 Call forwarding is activated with When All Calls or the call forwarding All Calls is acti vated for the network mailbox Change the call forwarding The message is played back 1 The display call number service is not acti vated Ask your service provider to activate this function chargeable 2 Mobile phone operator and fixed network SMS service provider have not agreed on a cooper...

Page 47: ... check for new e mails you must save the address of your Internet service provider s incoming e mail server and the username and password for access to your mailbox on the phone Your Internet provider will supply you with this information Entering the incoming e mail server v î Messaging E mail Settings Incoming POP3 Enter the name of the incoming e mail server POP3 server max 74 charac ters Examp...

Page 48: ...e mail server The messages are displayed in the hand set s display for a few seconds Server not accessible The connection to the incoming e mail server could not be established This may have the following causes Incorrect entry for name of incom ing e mail server Temporary problems with the incoming e mail server server is down or is not connected to the Internet Check settings page 43 Try again l...

Page 49: ...ord Check settings and complete if nec essary page 43 View the message header of an e mail Precondition You have opened the incoming mail list page 44 q Select e mail entry Subject Press the display key The subject of the e mail message will be displayed max 120 characters Press the display key to return to the incoming message list View e mail sender s address Precondition You have opened the inc...

Page 50: ...ixed network Configuring the network mailbox for fast access and entering the network mailbox number v Ð Settings Voice Mail Set Key 1 Network Mailb Select and press OK on Enter the number for the net work mailbox Save Press the display key a Press and hold idle status Fast access is automatically activated The setting for fast access applies to all Aton CL300 V2 handsets Calling the network mailb...

Page 51: ...tion Within 60 secs press and hold the reg istration paging key on the base station page 1 min 1 sec The handset is assigned the lowest unas signed internal number 1 6 If several handsets are registered to the base sta tion the internal number is shown in the display after registration e g INT 2 This means that the handset has been assigned the internal number 2 Notes If there are several handsets...

Page 52: ... No Select and press OK Enter the base station system PIN default setting 0000 Yes Press the display key to con firm the prompt a Press and hold idle status The handset is de registered immediately even if it is not in idle status Locating a handset paging You can locate your handset using the base station Press the registration paging key on the base station page 1 briefly All handsets will ring ...

Page 53: ...t a Press and hold idle status You will hear the error tone if an internal number has been allocated twice Repeat the procedure with a free number Changing the name of a handset The names INT 1 INT 2 etc are assigned automatically at registration You can change these names The changed name is displayed in every handset s list u Open list of handsets Your own handset is indicated by s Select handse...

Page 54: ...xternal caller hears music on hold if activated page 58 s Select handset and press OK When an internal participant answers you can speak to them You have the following options Ending a consultation call End Press the display key You are reconnected with the external subscriber Initiating a conference call Conf Press the display key You are in a three way conference call with the external and the i...

Page 55: ...vating the room monitor and entering the number to be called v í Add Features Room Monitor Change multiple line input Room M Select On to activate Call to Press the display key Edit and enter des tination number External number Select number from the directory or enter directly Only the last 4 characters are displayed Internal number Delete any stored external number INT s select hand set or Call ...

Page 56: ...he display key X Delete existing number Enter number as described in Activat ing the room monitor and entering the number to be called page 51 Save changes page 92 Changing previously set internal destination number v í Add Features Room Monitor s Scroll to the Call to line Edit Press the display key Yes Press the display key to con firm the prompt Enter number as described in Activat ing the room...

Page 57: ...ess OK r Select contrast Save Press the display key a Press and hold idle status Setting the screen picture You can display a screen picture picture or digital clock when the handset is in idle status This will replace the idle status dis play It may conceal the date time and name The screen picture is not displayed in cer tain situations e g during a call or when the handset has been de registere...

Page 58: ...t display key e g FixedLine The list of possible key assignments is opened The following can be selected u INT INT Opens the list of internal subscribers u SMS SMS Opens the SMS submenu for writing sending and reading SMS messages page 34 î Messaging SMS u SMS Service SMS Info Opens the menu for ordering an info service page 40 î Messaging SMS SMS Service u SMS Notific Notif Opens the menu for act...

Page 59: ...ge 24 Options Open menu Volume Select and press OK Configure setting see above Changing ringer tones u Volume You can choose between five volumes 1 5 e g volume 2 ˆ and the Crescendo ring 6 volume increases with each ring u Ringer tones You can choose between 15 different melodies You can set different ringer tones for the following functions u Ext Calls for external calls u Internal Calls for int...

Page 60: ...ll will now be signalled by one short alert tone You will now see º in the display Activating deactivating muting of the first ring v Open menu 5 5 O 1 O Press keys Q OK Make the first ringer tone audible Or 1 OK Suppress the first ringer tone a Press and hold idle status Activating deactivating advisory tones Your handset uses advisory tones to tell you about different activities and statuses The...

Page 61: ... the wake up call is repeated twice at five minute intervals and then switched off During a call the wake up call is signalled by a short tone Deactivating the wake up call repeating after a pause snooze mode Precondition A wake up call is sounding OFF Press the display key The wake up call is deactivated or Snooze Press the display key or any key The wake up call is deacti vated and then repeated...

Page 62: ...ne Now re enter the new system PIN and press OK For security reasons is displayed instead of the system PIN a Press and hold idle status Restoring the base station to factory settings Resetting the base station via the menu The individual settings are reset Only the date and time and the system PIN are retained All handset remain registered v Ð Settings Base Base Reset Enter the system PIN and pre...

Page 63: ... the default connection Press and hold the talk key c if you want to make the call via the other con nection type Updating the base station firmware If necessary you can update your base sta tion firmware The firmware update is downloaded directly from the Internet by default The relevant website is preconfigured in your phone Precondition The base station is in idle status i e u No calls are bein...

Page 64: ...ion Assist Select and press OK Enter the system PIN and press OK For how to enter VoIP settings using the connection assistant see page 11 Changing settings without the connection assistant You can change the VoIP user data via the menu without starting the connection assistant Entering changing VoIP user data The VoIP settings must also be extended for your personal data You will receive all nece...

Page 65: ...ss that is to be assigned to the base station overwrit ing the current settings 192 168 2 2 has been preset For the IP address see also page 120 Subnet Mask For IP Address Type Dynamic The subnet mask that is currently assigned to the base station will be dis played It cannot be amended For IP Address Type Static Enter the IP address that is to be assigned to the base station overwrit ing the curr...

Page 66: ...our network configura tion you may have to enter your base sta tion MAC address for example into your router s access control list You can check your base station MAC address v 5 5 O 2 Q The base station MAC address is displayed a Press and hold idle status Operating the base station on the PABX The following settings are only necessary when your PABX requires them see the PABX user guide The sett...

Page 67: ...use if your PABX requires this refer to the user guide for your PABX v 5 5 O 1 1 Enter a number for the length of the pause 1 1 sec 2 2 secs 3 3 secs 4 6 secs and press OK a Press and hold idle status Switching temporarily to tone dialling DTMF If your PABX still operates with dial pulsing DP but you need touch tone dialling DTMF for a connection e g to listen to the network mailbox you must switc...

Page 68: ...tor Registering setting the Web configurator language Once you have successfully established the connection the Web page Login will be displayed in the Web browser You can select the language you want the menus and Web configurator dialogs to be displayed in The language that is cur rently selected is displayed in the top field of the Web page If necessary click on to open the list of available la...

Page 69: ...re your device s factory settings Please note that this will restore all other settings too page 58 If you do not make any entries for a lengthy period around 10 minutes you will be automatically logged off The next time you try to make an entry or open a Web page the Login Web page will be displayed Enter the system PIN again to log in again Entries that had not yet been saved on the phone before...

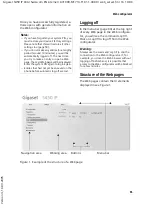
Page 70: ...n the working area Working area Depending on the function selected infor mation or dialog boxes are displayed in the working area which allow you to make or change your phone settings Making changes Make settings for entry fields lists or options u There may be restrictions regarding the possible values for a field e g entering special characters or certain value ranges u To open a list click on Y...

Page 71: ...ony VoIP provider settings page 70 Configuring up to four VoIP accounts Name of the fixed network u User specific dialling rules page 78 u Type of DTMF signalling for remote control of an answering machine u Data server for firmware update down loads page 81 u Displaying VoIP status messages on your handset page 82 IP configuration Assigning the IP address Make the necessary settings for operating...

Page 72: ...t Preferred DNS server Enter the IP address for the preferred DNS server DNS Domain Name Sys tem allows you to assign public IP addresses to symbolic names The DNS server is required to convert the DNS name into the IP address when connection is being established to a server You can specify your router s IP address here The router forwards phone address requests to its DNS server 192 168 2 1 has b...

Page 73: ...f the connection will be shown for VoIP connections registered The connection is activated The phone has been successfully registered You can use the connection to make calls Disabled The connection is deactivated The phone is not registering with the corre sponding account with the VoIP serv ice You can not use the connection to make or receive calls Registration failed Server not accessible Exam...

Page 74: ...mber max 16 char acters The connection will be shown under this name on the handset and in the Web configurator interface e g when assigning sending and receiving numbers page 77 with call display page 19 Provider Is only shown for the first VoIP connec tion IP1 The name of your VoIP provider will be shown if you have already selected it Click on the Select VoIP Provider button if necessary to sel...

Page 75: ...This name must not exceed 32 charac ters If you do not enter a name your Username VoIP phone number will be displayed Ask your VoIP provider if this feature is supported Area Call Forwarding You can also forward calls to this VoIP number to another external number VoIP fixed network or mobile phone The for warding is done via VoIP The Call Forwarding area is where you define for the VoIP number wh...

Page 76: ...activated VoIP phone numbers The default is 180 seconds If you enter 0 seconds the registration will not be repeated periodically Area Listen ports Specify the phone s local ports for VoIP telephony here The ports must not be used by any other subscriber in the LAN SIP port Specify the local communication port that the phone should use to send and receive signalling data Specify a number between 1...

Page 77: ...on request to the SIP proxy but to an outbound proxy on the Internet that supplies the data packets along with the public address The STUN server and outbound proxy are used alternately to work around the NAT firewall in the router STUN enabled Click on Yes if you want your phone to use STUN as soon as it is used on a router with asymmetric NAT STUN server Enter the fully qualified DNS name or the...

Page 78: ...vate Silence Suppression and specify the language and earpiece volume VoIP Volume Your phone supports various voice codecs for digitalising coding and decoding voice data The voice codec used on a phone connection has a significant influ ence on the voice quality e g through the time need to code decode voice delay The choice of voice codec is a compromise between voice quality and necessary bandw...

Page 79: ...pauses is to be suppressed Yes Apply the voice codecs that your phone suggests with outgoing calls into the Selected codecs list Click in the Available codecs list on the voice codec that you want to apply you can mark several entries using the Shift key or the Ctrl key Click on the Add button Move the voice codecs that you do not want the phone to use into the Available codecs list Also select th...

Page 80: ...ered for the connection You can now be reached on this VoIP phone number Selecting the VoIP provider and downloading the VoIP provider data Profile files with the general access data for the most important VoIP providers are available for download on the Siemens server on the Internet The address for the server is stored in your phone page 81 Navigation Open the following Web page Settings Telepho...

Page 81: ...he phone The connec tion names are shown in the Connections column The fixed network connection is always at the end of the list Define a VoIP phone number as the sending number for each handset To do this click on the option behind the phone number in the Send column The previous assignment will automatically be deactivated Select the phone numbers for each handset fixed network VoIP that are to ...

Page 82: ... field e g 089 Click on the Yes option next to Predial area code for local calls through VoIP to activate the function If you click on No you must enter the area code even for local calls via VoIP Numbers in the directory must always contain the area code for dialling via VoIP Click on Set to save the settings Changing settings for dialling emergency numbers The default setting for your phone is t...

Page 83: ...n delete the current directory from the handset first Tip Back up the cur rent directory on your PC before delet ing it You can then load it back onto the handset if the modified directory is affected by formatting errors and some or all of it cannot be loaded onto the handset Preconditions u The handset can send and receive directory entries u The directory on the handset is not being accessed Th...

Page 84: ...r be tween 0 and 9 If one of the above parameters in a direc tory entry is not set then the relevant position must remain empty tab tab Example You want to create an entry for Anna Sand with the number 123456 Anna Sand should be entered as a VIP no anniver sary The tsv file must contain the following in a line tab Anna Sand tab 123456 tab tab tab tab tab 5 tab Making e mail settings You can use yo...

Page 85: ...xample 192 168 2 105 S450IP Firmware_Datei bin Click on Set to save the changes This setting is automatically used for the subsequent firmware update The Inter net server URL stays saved and is re used for further firmware updates If you want to use a local PC again for another update then you have to re enter the IP address and file name Starting firmware update Preconditions u No calls are being...

Page 86: ...These messages give you infor mation on the status of a connection and contain a provider specific code that helps the service team when they are analysing the problem Open the following Web page Settings Miscellaneous Click on the Yes option after Show VoIP status on handset to activate status mes sage display If you click on No no VoIP status mes sages are displayed Click on Set to save the chan...

Page 87: ...f help with troubleshooting Not every problem signifies a fault in your telephone In some cases problems can be resolved by briefly interrupting the power supply to the base station unplug the power supply unit and then plug it in again or removing the battery cells from the handset and reinserting them The fol lowing information is designed to help you with specific problems Important Some proble...

Page 88: ...d has been replaced When purchasing a new cord ensure that it has the correct pin connections page 10 The other party cannot hear you You have pressed the u INT key The hand set is muted Switch on the microphone again page 20 When making calls from the fixed network the caller s phone number is not displayed although CLIP page 19 is set Phone number identification is not enabled The caller should ...

Page 89: ... entered may be incomplete or wrong Check your information In particular check your use of upper and lower case You cannot be reached for calls from the Internet There is no entry for your phone in your router s routing table Check the settings for the NAT refresh time page 73 Your phone is not registered with the VoIP provider You have entered the wrong user ID or an incorrect domain page 71 No f...

Page 90: ...ce again to another proxy server This is not a redirection of the address per se 0x380 Other service The query or the call could not be made But the phone is notified what other options there are to be able to connect the call 0x400 Wrong call 0x401 Not authorised 0x403 The requested service is not sup ported by the VoIP provider 0x404 Wrong phone number No subscriber to this number Example In a l...

Page 91: ...ce that transmits this error code is a proxy or a gateway and has received an invalid response from its gateway via which this query is to be processed 0x503 The query cannot currently be proc essed by the receiving device or the proxy because the server is either overloaded or is being serviced If it is possible for the query to be repeated in the foreseeable future the server informs the caller ...

Page 92: ... conducting an external call The connection has been established for at least 8 sec Options Service Info Confirm selection with OK The following information is displayed 1 Serial number of the base station RFPI 2 Serial number of your handset IPUI 3 Informs the service employees of the base station settings in hex diagram e g the number of registered handsets repeater mode The last 4 digits indica...

Page 93: ...re additional outside the warranty period Batteries Battery cells are considered consumed material which is not covered by the warranty service Defective batteries are not replaced free of charge This applies to rental and purchased devices Help If you have any general questions about products services etc please contact your Swisscom Information Centre toll free number 0800 800 800 Authorisation ...

Page 94: ...pending on current status around 2 5 W General specifications Standby time around 170 hours 7 days Talktime around 13 hours Charging time around 6 hours Note When the display backlight is switched on the standby time of the handset is reduced to around 30 hours Interfaces Fixed network Ethernet No of channels 60 duplex channels Radio frequency range 1880 1900 MHz Duplex method Time multiplex 10 ms...

Page 95: ...rm in the user guide This is illustrated below using the example of Setting the contrast for the display The things you have to do are explained in the boxes v Ð Settings Display With the handset in idle status press on the right of the control key to open the main menu Use the control key to select the Ð Settings line by pressing the con trol key repeatedly up or down until the menu function is s...

Page 96: ...ame of directory entries is automatically capitalised fol lowed by lower case letters Entering special characters Press the star key A table is opened containing all the special characters The cursor is on the character Navigate to the required character with the control key r q Example To select press v four times and t twice Press the display key Insert The charac ter is inserted into the text P...

Page 97: ... and O is assigned several letters and characters see special characters page 92 These appear in a selection line immediately under the text panel over the display keys as soon as you press a key The letter you are most likely looking for is shown in reversed highlights and is at the begin ning of the selection line It is copied into the text panel 1 EATONI is activated 2 Upper lower case or digit...

Page 98: ...is licensed under the GNU Lesser General Public License This free software was developed by a third party and is protected by copyright You will find the licence text in its original Eng lish version on the pages that follow The software is provided free of charge You are authorised to use this free soft ware in accordance with the above men tioned licence conditions In the event of contradictions...

Page 99: ...er GPL It also counts as the successor of the GNU Library Public License version 2 hence the ver sion number 2 1 Preamble The licenses for most software are designed to take away your freedom to share and change it By contrast the GNU General Public Licenses are intended to guarantee your freedom to share and change free software to make sure the software is free for all its users This license the...

Page 100: ...t it becomes a de facto standard To achieve this non free pro grams must be allowed to use the library A more frequent case is that a free library does the same job as widely used non free libraries In this case there is little to gain by limiting the free library to free software only so we use the Lesser General Public License In other cases permission to use a particular library in non free pro...

Page 101: ...must still compute square roots These requirements apply to the modified work as a whole If identifiable sections of that work are not derived from the Library and can be reasonably considered independent and sepa rate works in themselves then this License and its terms do not apply to those sections when you distribute them as separate works But when you distribute the same sections as part of a ...

Page 102: ...ting the user to the copy of this License Also you must do one of these things a Accompany the work with the complete cor responding machine readable source code for the Library including whatever changes were used in the work which must be distributed under Sections 1 and 2 above and if the work is an executable linked with the Library with the complete machine readable work that uses the Library...

Page 103: ...and any other pertinent obligations then as a con sequence you may not distribute the Library at all For example if a patent license would not permit royalty free redistribution of the Library by all those who receive copies directly or indi rectly through you then the only way you could satisfy both it and this License would be to refrain entirely from distribution of the Library If any portion o...

Page 104: ...ND OF TERMS AND CONDITIONS How to Apply These Terms to Your New Libraries If you develop a new library and you want it to be of the greatest possible use to the public we recommend making it free software that every one can redistribute and change You can do so by permitting redistribution under these terms or alternatively under the terms of the ordi nary General Public License To apply these ter...

Page 105: ...r around 150 entries u SMS Precondition CLIP must be enabled u Headset socket incl headset u Room monitor Charger CL100 CL300 CL400 ISDN CL700 IP Incl mains adapter You can purchase the accessories and battery pack from a Swisscom shop or a specialist retailer Alternatively they may be ordered through the Internet at www swisscom com onlineshop Only use original accessories This will avoid possibl...

Page 106: ...102 Aton CL700 IP LBA Swisscom EN internet A31008 M1713 F161 1 XXXX montage_charger_base fm 16 10 06 Version 4 16 09 2005 ...

Reviews: