P
S
WIID
P
LUG
™
Z-W
AVE
®
A
DAPTER
P
LUG
Installation and User's Guide
FOREWORD
The SwiidPlug
™
is designed to switch on and off remotely appliances (mainly
lights) which are plugged into its female socket, The SwiidPlug
™
is suitable for
the wireless switching of incandescent light bulbs as well as halogen and LED
lights (all transformer types).
The SwiidPlug
™
can be operated manually by pressing on its
FUNCTION
button
which then acts as an on/off toggle switch and can be operated remotely and
wirelessly by Z -Wave
®
.
The SwiidPlug
™
can also handle associations with other devices, both ways to
and from it. Thus, your SwiidPlug
™
can respond directly to a signal from another
Z-Wave
®
device in your network, such as the triggering of a presence detector.
As soon as it has been plugged into a mains socket, the SwiidPlug
™
can be
included into a Z-Wave
®
network so as to interoperate with controllers and other
Z-Wave
®
devices.
WARNING
Insert
SwiidPlug™
only in sockets equipped with a
ground wire
R
ISK OF ELECTROCUTION
: Do not attempt to clean
when plugged in
SPECIFICATIONS
Device Type :
BINARY POWER SWITCH
Power input :
230V ± 10% - 50Hz
Max. power :
3600W
EU Norms :
EN300220, EN301489-1/-3 &
EN60669-1 + EN60669-2-1
Protection index :
IP20
Size :
60.0 x 49.0 x 60.5 mm
Radio protocol :
Z-Wave
®
(SDK 4.55)
Radio frequency :
868,42 MHz (EU)
Transmission dist.:
Up to 30m indoors (varies with building
materials)
Working temp :
0
– 40°C
On/Off
and
not
included
signals:
Blue
/
yellow
LED on
FUNCTION
button
Power consumption :
< 1.5W
Your SwiidPlug
™
has been certified by a certification firm approved by the
Z-Wave
®
Alliance and, as such, is fully interoperable with all the certified Z-
Wave
®
devices produced by other manufacturers using the same
authorised radio frequency (EU in our case)
Installing the SwiidPlug
™
consists of plugging it into a grounded wall socket and
plugging into it the on/off electrical device you want to control.
In order to configure the SwiidPlug
™
so that it can be controlled wirelessly by a Z-
Wave
®
controller, please follow instructions provided in the next chapters of this
manual.
KEY FEATURES
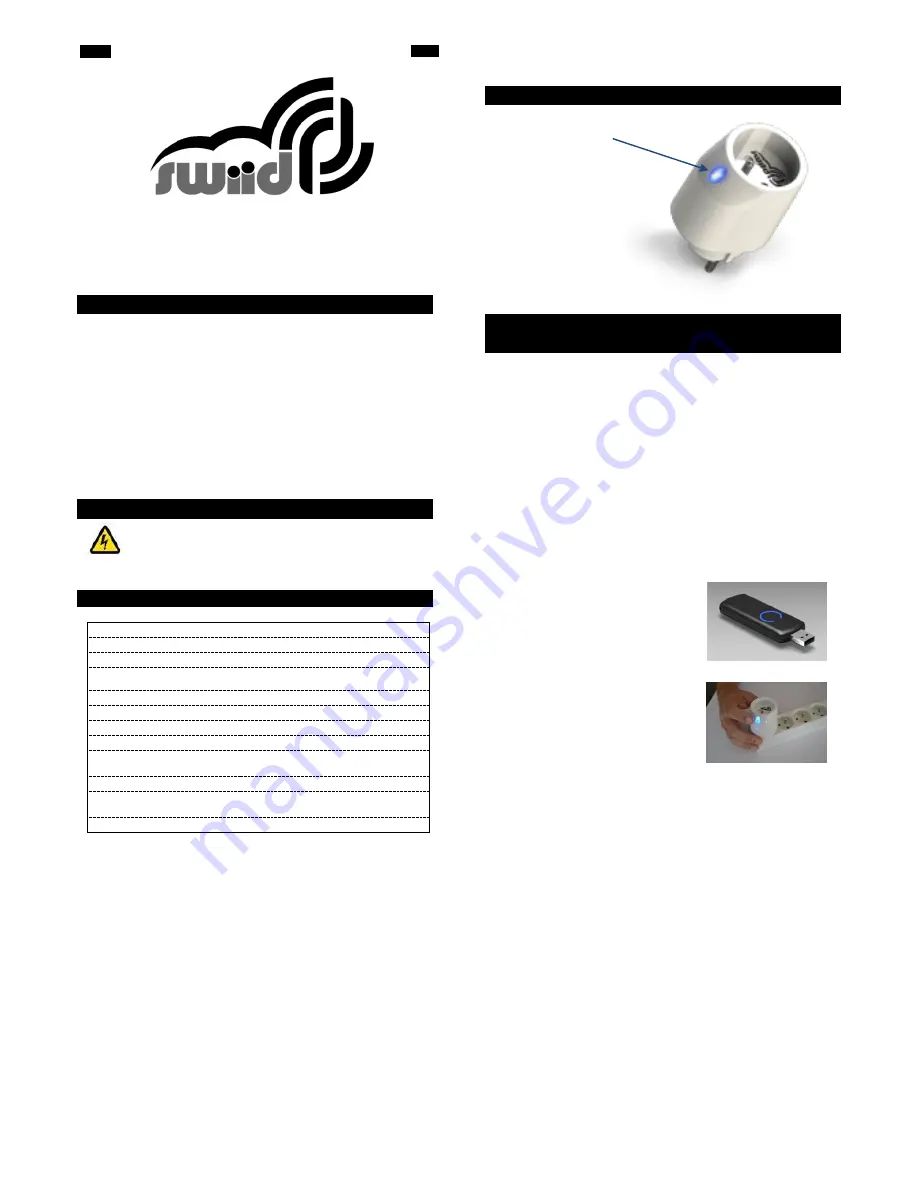
Translucent FUNCTION
button, which also acts as
a manual on/off toggle
switch.
LED lights up
blue
when
"ON" and
yellow
when
"OFF" and blinks
alternatively
blue
and
yellow
when not included
in a Z-Wave
®
network
INCLUSION OF A SWiiDPLUG
™
INTO A Z-WAVE
®
NETWORK
In order to control your SwiidPlug
™
remotely, it needs to be recognized by a Z-
Wave
®
network. Many people are put off by the very use of the word "network",
but it may in fact designate a single remote control or wireless control switch
coupled with a single adapter plug. The important thing to remember is that your
SwiidPlug
™
needs to be recognized by any device by which you intend to control
it (you can't call your dog, if you don't know its name). To do this, an
inclusion
operation needs to be performed: this is also often called an integration or a
pairing
operation.
When you first plug your SwiidPlug
™
into the active mains, the LED will blink
alternatively
blue
and
yellow
to indicate that it has not yet been included into a
Z-Wave
®
network. In case the LED lights up
solid
blue
or
solid yellow
, this
means your SwiidPlug
™
may have been included into another Z-Wave
®
network
and you will need to run an exclusion process (see next Chapter) before including
it into your own Z-Wave
®
network.
In order to include a SwiidPlug
™
into a Z-Wave
®
network, you do not need to use
any tools. Simply bring your SwiidPlug
™
(always
plugged into the mains
) close
to the Z-Wave
®
controller (or vice versa) and proceed as follows:
1.
First put your primary Z-Wave
®
controller in
inclusion mode (generally done by pressing
once or several times on an
inclusion
button
on the controller : here an Aeotech
Z-Stick2)
2.
With the LED flashing alternatively
blue
and
yellow
,
press
the
FUNCTION
button of
your SwiidPlug
™
3 times (3x) within 2
seconds
.
3.
The inclusion process should then start automatically and the LED on your
SwiidPlug
™
will remain lit
solid blue
or
solid yellow
based on switch status.
This indicates that the Z-Wave
®
inclusion process was successful.
Depending on the type of controller you are using, you may be immediately able
to operate your SwiidPlug
™
via your Z-Wave
®
network. For some controllers,
however, you need to perform an additional pairing step in order to assign your
SwiidPlug
™
to a specific command button on the controller (e.g. on a multi-button
remote control).
Once you are able to operate your SwiidPlug
™
remotely from your Z-Wave
®
network, you are able to check that the
blue
LED lights up to illuminate the
FUNCTION
button when it is turned "On" (
yellow
when "Off"). You can also check
that your SwiidPlug
™
continues to respond to a manual press locally on the
FUNCTION
button.
ZAP1
EN


