10
Creating a Privacy Mask
1.
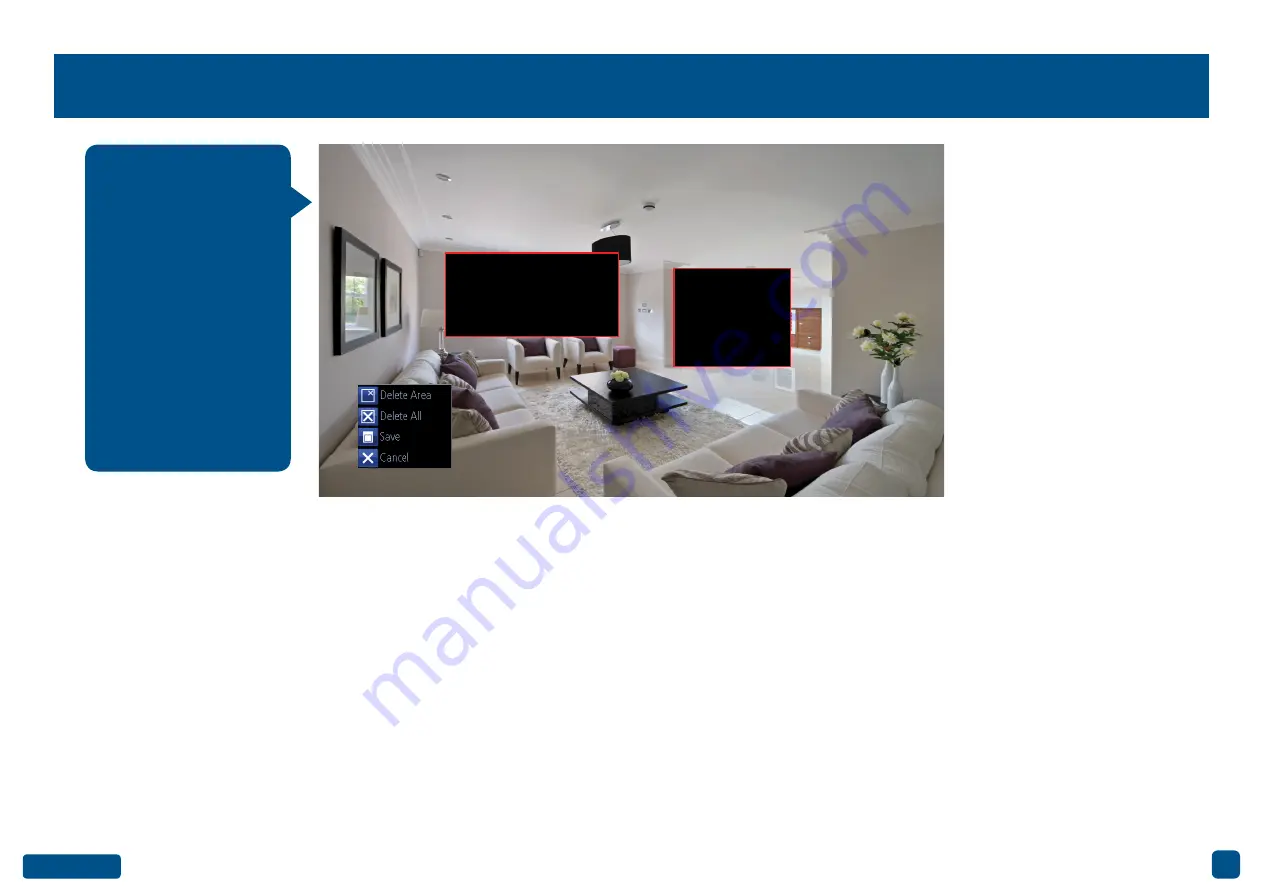
Using the mouse, click & drag to select the area that you want to
create a privacy mask for (as shown above). Up to four masks can be
created.
2.
To delete a mask, move the mouse pointer within the mask, right-
click the mouse to access the sub-menu (as shown above) then click
“Delete Area”. Click “Delete All” to delete all masks. Click “Save” to
save your mask or click “Cancel” to exit.
• Click the “Default” button to revert back to default settings.
• Use the “Copy to” button to apply all settings to the other cameras.
• Don’t forget to click “Apply” to save settings.
• Right-click the mouse to exit the Menu.
A privacy mask can be
used if you want to ob-
scure part of your im-
age for privacy. You can
also use this option to
minimize false trig-
gers for Motion Detec-
tion. You can create up
to four areas per cam-
era to mask. Any area
obscured by a privacy
mask won’t be shown
live or recorded.


