background image

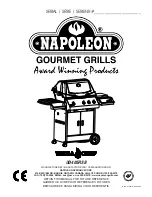
4 Burner w/ Rear Burner Gas Grill - LP

Stop! Missing a part?


DO NOT RETURN PRODUCT TO STORE

The store where you made the purchase does not stock

parts for this item. If you need parts, whether they are

missing or damaged, please call Customer Service at 

1-800-229-5647

Call us between 8:00 AM and 5:00 PM Eastern time, Monday through Friday

or email us at [email protected]

FOR YOUR SAFETY:

1. Read this Manual before attempting to assemble or operate your grill.
2. Follow safety instructions.
3.  Check  for  leaks  according  to  the  directions  in  this  Manual  before  operating  your  grill, 

even if purchasing an assembled grill.

4. Keep this Manual for future reference.
5. Contact 

1-800-229-5647

 should you need assembly assistance or have any questions.

THIS GRILL IS FOR OUTDOOR USE ONLY.

If stored indoors, then detach and leave propane cylinder outside.

USE AND CARE MANUAL

SF308LP

Summary of Contents for SF308LP

Page 1: ...or email us at saleshelp sureheat com FOR YOUR SAFETY 1 Read this Manual before attempting to assemble or operate your grill 2 Follow safety instructions 3 Check for leaks according to the directions...

Page 2: ...ill installed by a qualified service technician Locate the main gas supply valve so that you know how to shut the gas off to your grill If you smell gas make sure all gas connections are tight before...

Page 3: ...ious bodily injury death or property damage FOR YOUR SAFETY DO NOT store or use gasoline or other flammable vapors and liquids in the vicinity of this or any other appliance An LP cylinder not connect...

Page 4: ...r 5 Control knob Rear infrared burner 6 Control knobs Main burners 7 Hood Handle 8 Bread warming rack 9 Rear Infrared burner 10 Side burner 11 Control Knob Side burner 12 Electronic igniter main burne...

Page 5: ...et aside all inner boxes and parts from the master carton 2 Remove and set aside all wrapping paper and additional packaging from the parts 3 Do not destroy carton or packing until your grill is compl...

Page 6: ...ft side and the Wheel Channel Right 1C on the right side of the cart base The rubber door stops should be facing the front c Pick up the left side of the cart base and set the caster assembly left in...

Page 7: ...stall the Cart Side Right 2B d Place the Cart Back 2C onto the grill cart base e Then place two bolts through the holes on the bracket and cart base then tighten the holes to the thread hole on the ca...

Page 8: ...lat end of the barrier to the pre drilled hole in the cart base with a self tapping screw WARNING The Spare L P Gas Tank Barrier must b e i n s t a l l e d t o prevent storage of spare L P Gas Tanks F...

Page 9: ...d grill bottom c Have someone help you pick up the grill head d Make sure the four 4 bolts fall through the large opening in the key hole slots in the cart sides e Slide the grill forward in the key h...

Page 10: ...end of the Door Handle Bar 5D into the installed handle end Attach the second handle end using the supplied phillips head screw while holding the cart door assembly in place d Repeat to assemble the...

Page 11: ...x 10 phillips head screw while holding the assembly in place c Loosen the four 4 5 16 24 Hex Head screws on the left side of the grill as shown Note The screws were pre installed on the grill head ass...

Page 12: ...side of the cart c Loosen the four 4 5 16 24 Hex Head Screws on the right side of the grill d Attach the Right Side Burner Shelf 7A by inserting the four 4 screws on the side of the grill head into th...

Page 13: ...lace with the OFF position pointing up making sure to line up holes d Attach bezel valve to side burner shelf with screws removed in step 8a e Press knob 8F onto valve stem assembly f Unscrew the igni...

Page 14: ...ledges provided on the grill to create your cooking surface d Slide the Bread Warming Grate 9D through the cutouts on the hood support sides and rest it on the brackets The finished grill should look...

Page 15: ...of L P gases Never use pipe sealant on flare fittings All gas connections should be made by a competent qualified service technician and in accordance with local codes and ordinances In the absence of...

Page 16: ...nsportation DOT or the National Standard of Canada CAN CAS B339 Cylinders Spheres and Tubes for the Transportation of Dangerous Goods and Commission L P TANK USE When turning the L P tank on make sure...

Page 17: ...on the fuel supply cylinder 5 Turn on the burner control knobs for a moment to release the pressure in the hose then turn the control knobs back off 6 Wash off soapy solution with cold water and towe...

Page 18: ...4 seconds See Fig 1 NOTE If the burner does not light in 4 seconds turn the knob to the OFF position and wait 5 minutes before trying again 5 Repeat above steps to light remaining burners Match Light...

Page 19: ...een leak tested and is properly located 2 Light the grill burners using the instructions provided in this manual 3 Turn the control knobs to desired temperature High Medium or Low and preheat the gril...

Page 20: ...e Rotisserie motor spit and forks are not included and sold separately Remove the warming rack from the grill when using the rotisserie to prevent warping from the intense heat of the infrared unit RO...

Page 21: ...a way to escape the burners may become deprived of oxygen causing them to backfire especially if the burner output is set at HIGH If this occurs repeatedly the burners may crack This is the reason yo...

Page 22: ...el and bake on to the surface and give a worn appearance For removal use a non abrasive oven cleaner in conjunction with a stainless cleaner NOTE Always scrub in the direction of the grain IGNITER ACC...

Page 23: ...to reduce this risk BEFORE CALLING CUSTOMER SERVICE If the grill does not function properly use the following checklist Problem Grill will not light when the igniter button is pushed SOLUTION Is your...

Page 24: ...check and clean the burner ports if clogged or dirty Check for leaks Flame is erratic Note PreHeating time can take from 5 to 10 minutes Check gas connection look for kinked hose make sure gas supply...

Page 25: ...alve Assy FCCS0007030 FCMD3008004 1 pcs 1 set Bread Warming Rack Large Bezel FCMD3008001 FCCS0007033 1 pcs 1 pcs Back IR Burner Assy Large Knob FCBJ3308004 FCBJ3308002 1 set 1 pcs Back IR Igniter Smal...

Page 26: ...rt Back FCTG2707026 FCMD3008009 1 pcs 1 set Side Burner Right Assy Cart Side Left FCMD3008005 FCMD3008010 1 set 1 pcs Side Burner Valve Cart Side Right FCTG3007024 FCMD3008011 1 pcs 1 pcs Towel Bar Ca...

Page 27: ...1 set Replacement Part List Not Shown FCBJ3308027 Main Igniter w Wire 920 FCBJ3308028 Main Igniter w Wire 740 FCBJ3308029 Main Igniter w Wire 540 FCCS0007023 Back IR Igniter Wire FCBJ3308032 Flex Line...

Page 28: ...applicable building codes including heating the product to temperatures above its rated specifications which can cause considerable warping disassembly including removal of the product from a built i...

Reviews: