background image

12

Field detection is more complicated, the composition of the 
regional soil, the component, size, shape and the oxidation 
degree of the underground metals will all affect the detection 
results. This chapter only introduces the general steps of the field 
detection. 

You should operate again and again, accumulating 

experience to achieve good results.

1.Turn On

Hold the detector, keep the search coil away from the 
ground. Press the power button, the detector will sound two 
moo tones, and all the LCD patterns are lighted for a while. 
And the detector will revert to the setting of last time.

2.Set the Operation Mode

In general, the user could choose the A-M mode. At this 
time, the detector will respond to all kinds of metals.

3.Set the Sensitivity

The user always expects to set the sensitivity higher. 
However, with the range of high sensitivity, the detector 
will be more sensitive to the electromagnetic interference 
that comes from the power lines or cables around, and it 
will react abnormally to the mineralization soil or electrical 
conductivity soil. 

If you move the search coil in the 

detection area, and the detector sends a false signal, 

please decrease the sensitivity.

Note: 

If you operate the detector with your partner at the same 

time, please pay attention to keep more than 32ft away from 
each other, and decrease the sensitivity appropriately.

Summary of Contents for OT-MD06

Page 1: ...etector Please read this manual carefully and become familiar with the function before using After reading please keep it safe for future reference Email US SUNPOW SERVICE2019 outlook com Email UK SUN...

Page 2: ...F CONTENTS Specifications Easy Assembly Installing the Batteries Panel LCD and Button Testing Guide Basic Operations Cautions Trouble Shooting Guide Warm Tips 02 03 03 06 06 07 07 09 09 11 11 15 16 16...

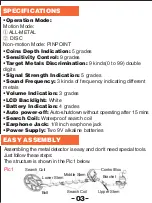
Page 3: ...ndicating different metals Volume Indication 3 grades LCD Backlight White Battery Indication 4 grades Auto power off Auto shutdown without operating after 15 mins Search Coil Waterproof search coil Ea...

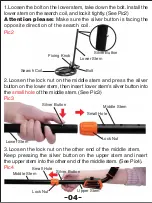
Page 4: ...m Keep pressing the silver button on the upper stem and insert the upper stem into the other end of the middle stem See Pic4 Pic2 Silver Button Lower Stem Bolt Fixing Knob Search Coil Pic3 2 Loosen th...

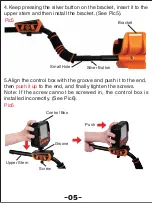
Page 5: ...et See Pic5 5 Align the control box with the groove and push it to the end then push it up to the end and finally tighten the screws Note If the screw cannot be screwed in the control box is installed...

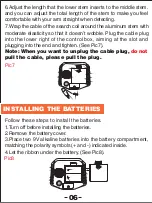
Page 6: ...to the lower right of the control box aiming at the slot and plugging into the end and tighten See Pic7 Note When you want to unplug the cable plug do not pull the cable please pull the plug Pic7 Pic8...

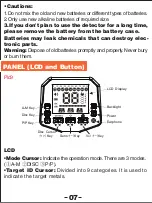
Page 7: ...ry case Batteries may leak chemicals that can destroy elec tronic parts Warning Dispose of old batteries promptly and properly Never bury or burn them PANEL LCD and Button Pic9 LCD Mode Cursor Indicat...

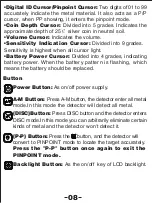
Page 8: ...into 4 grades indicating battery power When the battery pattern is flashing which means the battery should be replaced Power Button As on off power supply A M Button Press A M button the detector ent...

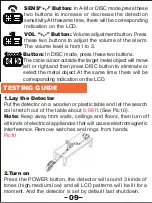
Page 9: ...be lit for a moment And the detector is set by default last shutdown Button In DISC mode press these two buttons The circle cursor outside the target metal object will move left or right and then pre...

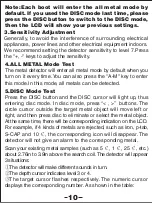
Page 10: ...d 5 DISC Mode Test Press the DISC button and the DISC cursor will light up thus entering disc mode In disc mode press buttons The circle cursor outside the target metal object will move left or right...

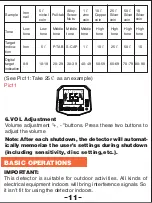
Page 11: ...ilver coin High tone 1 80 90 See Pic11 Take 25 as an example Pic11 30 20 10 40 0 50 60 70 80 90 2 4 6 8 6 VOL Adjustment Volume adjustment buttons Press these two buttons to adjust the volume Note Aft...

Page 12: ...f last time 2 Set the Operation Mode In general the user could choose the A M mode At this time the detector will respond to all kinds of metals 3 Set the Sensitivity The user always expects to set th...

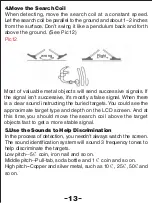
Page 13: ...here is a clear sound instructing the buried targets You could see the approximate target type and depth on the LCD screen And at this time you should move the search coil above the target objects fas...

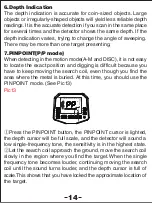
Page 14: ...cult because you have to keep moving the search coil even though you find the area where the metal is buried At this time you should use the PINPOINT mode See Pic13 Pic13 30 20 10 40 0 50 60 70 80 90...

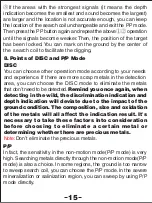
Page 15: ...can choose the DISC mode to eliminate the metals that don t need to be detected Remind you once again when detecting in the wild the discrimination indication and depth indication will deviate due to...

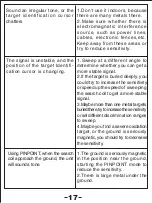
Page 16: ...ion Leave the land and vegetation as it was and fill in the holes after the excavation SYMPTOMS SOLUTIONS No power no boot sound and the LCD has no indication Sound a successive DI DI tone The LCD dis...

Page 17: ...stable signal 2 If the target is buried deeply you could try to increase the sensitivity or speed up the speed of sweeping the search coil to get a more stable signal 3 Maybe more than one metal targ...

Page 18: ...with a damp cloth occasionally to keep it looking like new Do not use harsh chemicals cleaning solvents or strong detergents to clean the detector WARM TIPS This metal detector is an example of super...

Reviews: