29
Servo Calibration (Operation on Raspberry Pi)
In the subsequent part of Operation on Raspberry Pi, you need to log into the Raspberry Pi
REMOTELY instead of direct operation on a screen connected to the RPi – which is also
impossible because the HDMI port on the smart car is blocked and cannot connect to one
such display.
So the back part of the car is completed. Next we'll move on to the front part. But before
assembly, since servos are used in this part, they need some configuration for protection. We
need to make the servo rotate to the 90 degrees when it's mounted, so the rotating range
can match with the application in the car. Otherwise, damages may be caused to servos.
PLEASE DO FOLLOW THIS STEP BEFORE MOVING ON!
And since the servos used in this kit are adjusted by software and there's no such physical
sticking point as other servos, here we need to configure the servo via software. First you
need to finish some software installation before the configuration.
A.
Burn the image
Take the following steps before inserting the TF card into the Raspberry Pi:
1)
Prepare the tool of image burning. Such as
win32DiskImager
2)
Download the complete image on the official website at this link:
https://www.raspberrypi.org/downloads/raspbian/
. Both the RASPBIAN STRETCH WITH
DESKTOP and RASPBIAN STRETCH LITE are available, but RASPBIAN STRETCH WITH DESKTOP
would be a better choice if you have no special requirements.
3)
Unzip the downloaded package and you will see the
xxxx-xx-xx-raspbian-
stretch.img
file
inside.
Note
: This file is
NOT
extractable.
4)
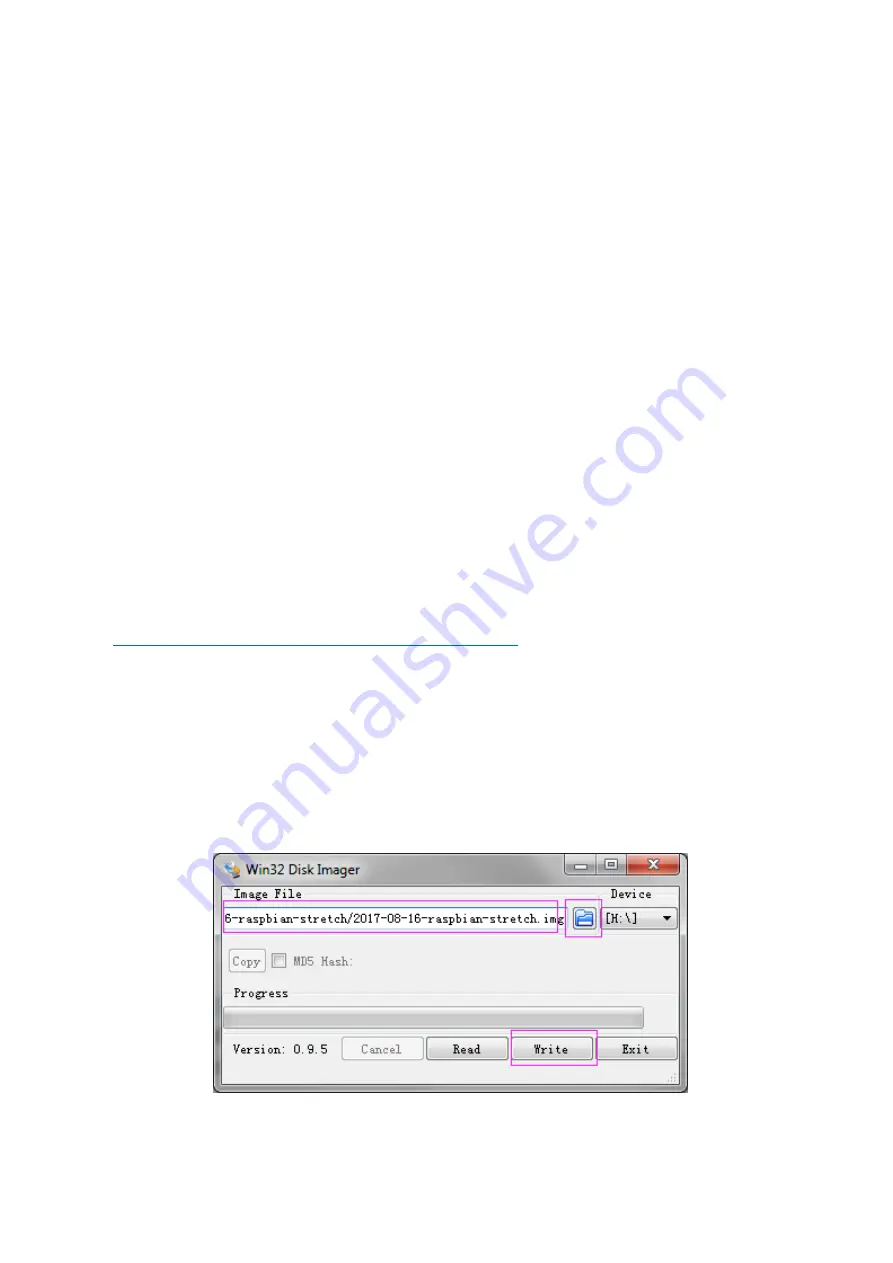
Open the win32DiskImager and insert the SD card into the computer with a card reader.
Select the image file and the drive (the card) in the tool. Click
Write
to write the system
to the SD card. Wait for a while until the system is written to the card.
5)
When the progress bar comes to the end and a prompt "
write successful
" appears, click
OK
.
SunFounder


