CONTENTS
1
Heater
2
Guard, edge
1
Tape
4
Clip, center
4
Screw, #8 x
1
/
2
"
1
Trim, center
1
Wire, ground
1
Bushing, plastic
1
Plug, four pin
1
Bracket, center
This kit is intended for a Designer series undercounter
model and a Designer series drawer model. The door
handle must be next to the drawers.
IMPORTANT NOTE
: The door model face frame is
approximately
1
/
16
" proud of the drawer face frame. This is
only apparent when the door/drawers are open at the same
time.
IMPORTANT NOTE
: If the door model is installed on the
right, proceed to
on page
3. If the drawer model is installed on the right, proceed
to the section below.
CAUTION
If using a power drill to predrill or install screws, verify the
drill chuck does not contact the units face frame.
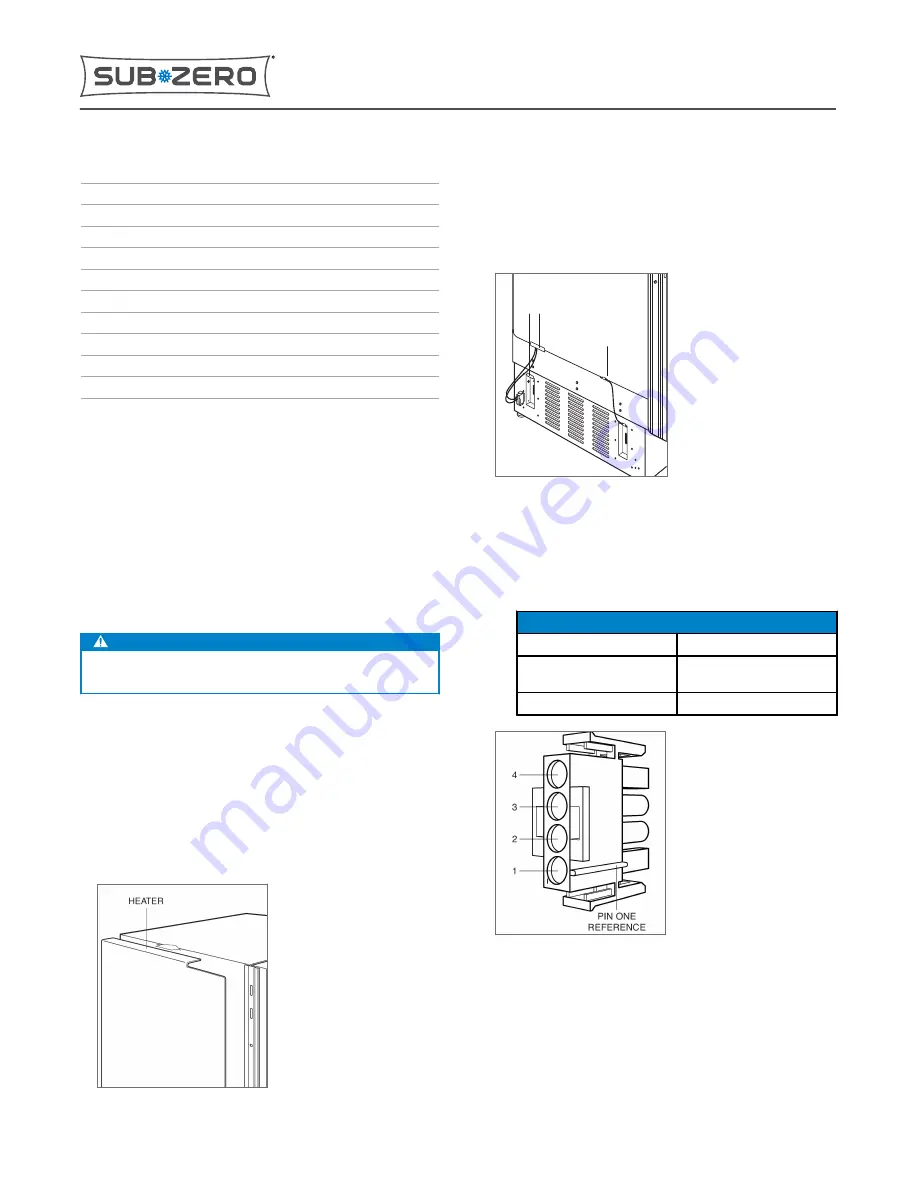
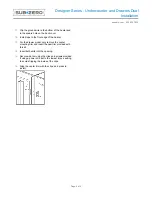
DRAWER MODEL INSTALLED ON RIGHT
1
Remove the paper backing from the tape on the back
of the heater panel.
2
Place the heater on the left side of the unit on the
right.
3
Align the heater with the top of the unit, and press
firmly to secure.
4
Install edge guard on the bottom of the heater panel
where wires pass. Trim the edge guard to fit.
5
Install edge guard along the upper edge of the
opening and bottom of the heater panel where wires
pass. Edge guard must be trimmed to fit.
EDGE
GUARD
GROUND
WIRE
6
Clip the ground wire to the opening and the heater
panel.
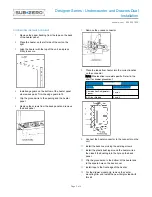
7
Place the leads from heater into the correct location
on the connector.
Note
: Wire location is model-specific. Refer to the
chart for proper placement.
WIRE PLACEMENT
MODEL
WIRE PLACEMENT
Combination Refrigerator/
Freezer
1 and 2
All Other Models
2 and 4
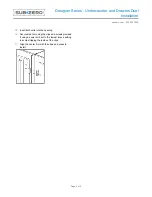
8
Connect the heater connector to the connector on the
unit.
9
Install the back cover using the existing screws.
10
Install the plastic bushing around the heater wires,
then insert the bushing into the hole on the back
panel.
Designer Series - Undercounter and Drawers Dual
Installation
subzero.com 800.222.7820
9043730 REV-A 10/2020
Page 1 of 4
*9043730$REVA*


