Purchase Date
Questions, problems, missing parts?
Before returning to your retailer, call our customer service
department at 1-877-888-8225, 8 a.m. – 8 p.m., EST, Monday - Friday .
ATTACH YOUR RECEIPT HERE
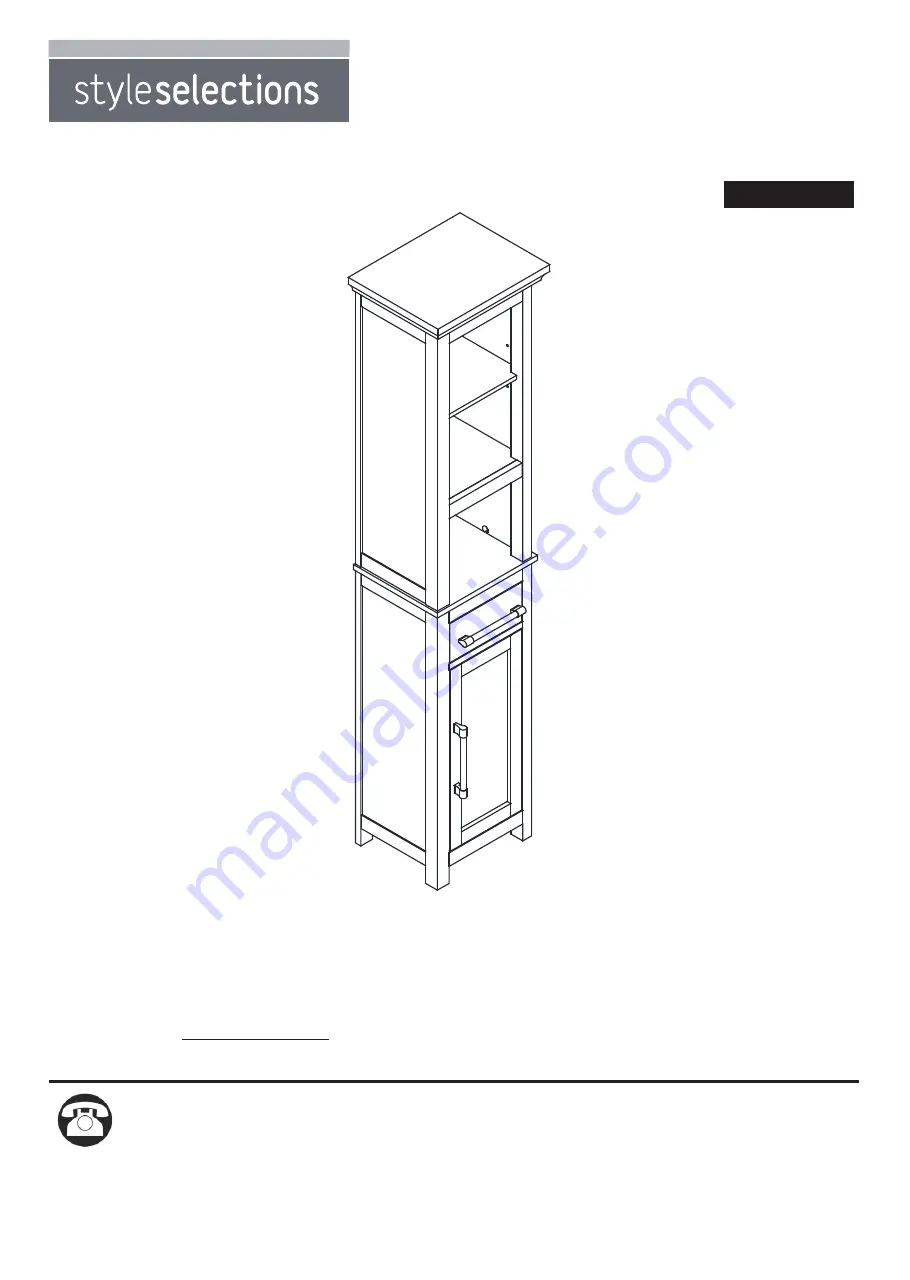
LINEN CABINET
1
ITEM #0740478
MODEL #LW178Q04-W
Français p. 8
TM
AB17387


