


27
8.3 Text Routing
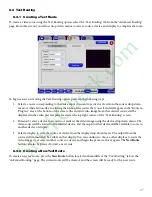
8.3.1 Creating a Text Route
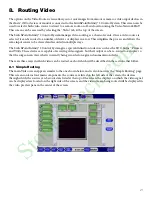
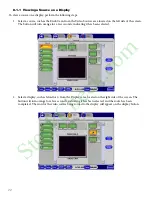
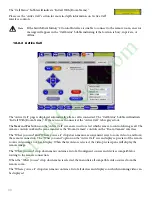
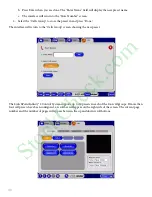
To create a video route using the Text Routing option, select the “Text Routing” tab from the “Advanced Routing”
page. From this screen you will use drop down menus to select a source, device, and display to complete the route.
To begin a new route using the Text Routing option, perform the following steps:
1. Select a source corresponding to the video input you want to record or view from the source drop down
menu. A white button-like box listing the name of the source that you selected will appear in the “Route in
Progress” area at the bottom of the screen. The current video image from the selected source will be
displayed in the video preview pane located at the top right corner of the “Text Routing” screen.
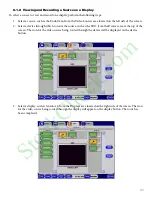
2. If desired, select a device to record to or redirect the video image using the device drop down menu. The
video source will be routed to the selected device, and the ouptut of that device will be available to route to
another device or display.
3. Select a display to view the source or device from the display drop down menu. The output from the
source will immediately be visible on that display. You can continue to choose other displays to route the
video image to, or select another source or device and begin the process all over again. The
New Route
button can also be pressed to start a new route.
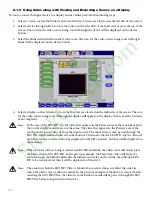
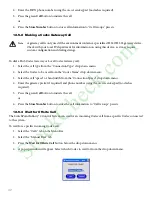
8.3.2 Creating a New Text Route
To create a new text route, press the
New Route
button located in the middle of the “Text Routing” tab on the
“Advanced Routing” page. The current route will be cleared, and the screen will be ready for the new route.
StockCheck.com
Summary of Contents for SwitchPoint Infinity 2
Page 35: ...33 S t o c k C h e c k c o m ...
Page 61: ...59 S t o c k C h e c k c o m ...
Page 80: ...S t o c k C h e c k c o m ...
Page 81: ...S t o c k C h e c k c o m ...