9
English
English
«VIDEO», «INPUT», «Source» or with the symbol
. If you have selected correct input, then
you will see on the on-screen of the receiver named «Init Install».
NOTE:
Depending from brand and model of your TV, the name of the HDMI input
can be different, for example: HDMI1, HDMI2.
Select
OSD Language
. Press
OK
or
u
to start language selection.
Select
Country
and press
OK
or
u
to select the country of your residence.
Select
LCN
and press
OK
or
u
to select if the channel numbering should be according to LCN (as defined
by operator) or not.
Select
Next
and press
OK
or
u
to go to
Antenna Setup
menu.
This part of the wizard is of great help when setting up your antenna system.
Use
pq
to move the highlight to the setting you wish to alter and use
OK
or
u
to change values.
The following settings are available:
Active Antenna
: Before connecting your antenna to the receiver, please read the user manual of your
antenna regarding antenna powering. This parameter is recommended to set to
On
only for active internal or external antennas which require power supply via an
antenna cable with voltage of 5 V DC and consume less than 50 mA. In all other cases
please leave this parameter as
Off
.
Country
Select the country of your residence.
Beep
:
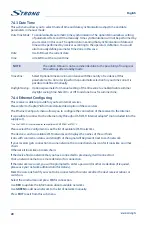
Select
On
for an audible indication of signal reception.
Off
(default) turns the beeper
off.
Channel No.
:
Select a channel that is known to carry a broadcast in your region. The Signal Strength
and Signal Quality bars give a visual indication of the reception. Adjust your antenna
to obtain maximum signal strength and quality.
Frequency
:
Reference information about frequency for the selected frequency channel. Parameter
could be defined manually if you prefer to adjust antenna by frequency.
Bandwidth
:
Reference information about bandwidth for the selected frequency channel.
Parameter could be defined manually if you prefer to adjust antenna by frequency/
bandwidth parameters.
When all settings have been made, select
Start Search
and press
OK
or
u
to start scanning.
The receiver will search for all available channels now.
Once scanning is finished, the receiver switches to viewing mode.
You are now ready to watch TV.
5.0 QUICK GUIDE TO USING YOUR RECEIVER
We at STRONG understand that you can’t wait to enjoy your new digital terrestrial receiver.
The following chapter will make you familiar with the basic operation of this device.
We do, however, advice you to read all chapters of this manual to get the best performance from your
receiver.
To turn your receiver ON or to Standby, use the
q
button on the remote control.
Choose a channel with
pq
(CH+/CH-) on the RCU. Alternatively, you can enter the channel number
with
0-9
buttons on the RCU or press
OK
in viewing mode to display the channel list.
The volume can be adjusted with
t
/
u
(VOL-/VOL+).
Summary of Contents for SRT 8203
Page 2: ...TEXT SUB FAV TV R REC TEXT SUB FAV TV R REC ...
Page 3: ...TEXT SUB FAV TV R REC ...
Page 36: ......
Page 37: ......


