


292
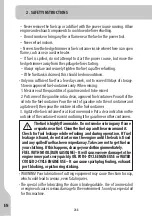
2. SAFETY INSTRUCTIONS
EN
•
When the machine is stopped for servicing, inspection or storage, shut off
the power source, disconnect the spark plug wire from the spark plug and
make sure all moving parts have come to a stop. Allow the hedge trimmer
to cool before making any inspections, adjustments, cleans, etc. Follow the
instructions to carry out regular maintenance, pre-operating procedures and
daily maintenance routines.
y
fi
d
o
m
r
o
e
v
o
m
e
r
r
e
v
e
N
.r
e
r
u
tc
af
u
n
a
m
y
b
d
e
d
n
e
m
m
o
c
e
r
st
r
a
p
e
h
t
yl
n
o
e
s
U
•
the safety components. Improper maintenance or using non-approved parts
or modifi cation of safety components may result in serious damage to the
machine or personal injury.
n
oi
tc
u
rt
s
ni
r
u
o
y
ni
d
e
bi
rc
s
e
d
t
o
n
k
r
o
w
ri
a
p
e
r r
o
e
c
n
a
n
e
t
ni
a
m
y
n
a
t
p
m
e
tt
a
t
o
n
o
D
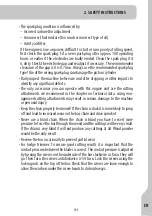
•
manual. Never repair damaged cutting attachments by welding, straightening
or modifying the shape. This may cause parts of the cutting attachment to
come off and result in serious or fatal injuries.
r
o
t
e
r
u
b
r
a
c
e
h
t
t
p
e
c
x
e
,
s
w
e
rc
s
d
n
a
s
tl
o
b
,
st
u
n
ll
a
n
e
t
h
gi
T
.p
r
a
h
s
s
e
d
al
b
p
e
e
K
•
adjustment screws, before each use.
.s
e
d
al
b
n
o
e
c
n
a
n
e
t
ni
a
m
g
ni
m
r
o
fr
e
p
r
o
g
ni
ld
n
a
h
n
e
h
w
s
e
v
ol
g
r
a
e
W
•
r
o
tt
e
r
u
b
r
a
c
e
h
T
.g
ni
tt
e
s
d
r
a
d
n
a
ts
a
h
ti
w
y
r
o
tc
af
e
h
t
m
o
rf
s
e
m
o
c
r
o
tt
e
r
u
b
r
a
c
e
h
T
•
has been adjusted for optimum performance and fuel effi ciency in all operating
states. The carburettor shall be only adjusted by authorised person.
,
n
oi
t
p
m
u
s
n
o
c
le
u
f
e
s
a
e
rc
ni
,
e
c
n
a
m
r
o
fr
e
p
e
ni
g
n
e
ri
a
p
m
i l
li
w
s
r
e
tl
fi
ri
a
d
el
u
o
F
•
excessively wear the parts and make the machine more diffi cult to start. Clean
the fi lter every 25 hours, or more regularly if conditions are exceptionally dusty.
Remove the air fi lter cover and take out the fi lter. Wash it clean in warm, soapy
water. Ensure that the fi lter is dry before refi tting it. A damaged air fi lter must
always be replaced.
l
e
u
f
e
h
t
d
n
a
p
a
c
k
n
a
t
le
u
f
e
h
t
k
c
e
h
c
,y
lp
p
u
s
le
u
f
f
o
tr
o
h
s
s
n
u
r
e
ni
g
n
e
e
h
t
n
e
h
W
•
fi lter for blockage.
,r
e
v
e
w
o
H
.
y
r
o
tc
af
e
h
t
t
a
e
s
a
e
r
g
f
o
y
ti
t
n
a
u
q
t
h
gi
r
e
h
t
h
ti
w
d
el
l
fi
si
r
a
e
g
le
v
e
b
e
h
T
•
before using the machine you should check that the bevel gear is fi lled three-
quarters full with grease. The grease in the bevel gear does not normally need
to be changed except if repairs are carried out.
Maintenance
Summary of Contents for 3276000338871
Page 2: ......
Page 27: ...25 8 VUE ÉCLATÉE AVEC LISTE DES PIÈCES TAILLE HAIE TPT01 FR ...
Page 29: ...27 8 VUE ÉCLATÉE AVEC LISTE DES PIÈCES ÉLAGUEUSE SUR PERCHE TPS01 FR ...
Page 31: ...29 8 VUE ÉCLATÉE AVEC LISTE DES PIÈCES TUBE D EXTENSION TET01 FR ...
Page 58: ...8 PLANO DE DESPIECE CON LA LISTA DE PIEZAS CORTASETOS TPT01 56 ES ...
Page 60: ...8 PLANO DE DESPIECE CON LA LISTA DE PIEZAS PODADERA DE PÉRTIGA TPS01 58 ES ...
Page 62: ...60 ES 8 PLANO DE DESPIECE CON LA LISTA DE PIEZAS TUBO DE EXTENSIÓN TET01 ...
Page 88: ...86 8 VISTA PORMENORIZADA COM LISTA DE PEÇAS CORTA SEBES TPT01 PT ...
Page 90: ...88 8 VISTA PORMENORIZADA COM LISTA DE PEÇAS PODADORA DE HASTE TPS01 PT ...
Page 92: ...90 PT 8 VISTA PORMENORIZADA COM LISTA DE PEÇAS TUBO DE EXTENSÃO TET01 ...
Page 118: ...116 8 VISTA ESPLOSA ED ELENCO DELLE PARTI TAGLIASIEPI TPT01 IT ...
Page 120: ...118 8 VISTA ESPLOSA ED ELENCO DELLE PARTI POTATORE TPS01 IT ...
Page 122: ...120 8 VISTA ESPLOSA ED ELENCO DELLE PARTI ASTA TELESCOPICA TET01 IT ...
Page 150: ...148 8 ΑΝΑΛΥΤΙΚΗ ΑΠΕΙΚΟΝΙΣΗ ΜΕ ΚΑΤΑΛΟΓΟ ΕΞΑΡΤΗΜΑΤΩΝ ΘΑΜΝΟΚΟΠΤΙΚΟ ΤΡΤ01 EL ...
Page 152: ...150 8 ΑΝΑΛΥΤΙΚΗ ΑΠΕΙΚΟΝΙΣΗ ΜΕ ΚΑΤΑΛΟΓΟ ΕΞΑΡΤΗΜΑΤΩΝ ΚΛΑΔΕΥΤΗΡΙ ΜΕ ΛΑΒΗ TPS01 EL ...
Page 154: ...152 8 ΑΝΑΛΥΤΙΚΗ ΑΠΕΙΚΟΝΙΣΗ ΜΕ ΚΑΤΑΛΟΓΟ ΕΞΑΡΤΗΜΑΤΩΝ ΕΚΤΕΙΝΟΜΕΝΟΣ ΣΩΛΗΝΑΣ TET01 EL ...
Page 181: ...179 8 RYSUNEK ROZSTRZELONY Z LISTĄ CZĘŚCI NOŻYCE DO ŻYWOPŁOTU TPT01 PL ...
Page 183: ...181 8 RYSUNEK ROZSTRZELONY Z LISTĄ CZĘŚCI OKRZESYWARKA TPS01 PL ...
Page 185: ...183 8 RYSUNEK ROZSTRZELONY Z LISTĄ CZĘŚCI TRZONEK TELESKOPOWY TET01 PL ...
Page 188: ......
Page 190: ......
Page 215: ...213 8 ИЗОБРАЖЕНИЕ В РАЗОБРАННОМ ВИДЕ И СПИСОК ЧАСТЕЙ УСТРОЙСТВА КУСТОРЕЗ ТРТ01 RU ...
Page 217: ...215 8 ИЗОБРАЖЕНИЕ В РАЗОБРАННОМ ВИДЕ И СПИСОК ЧАСТЕЙ УСТРОЙСТВА ВЫСОТОРЕЗ TPS01 RU ...
Page 219: ...217 8 ИЗОБРАЖЕНИЕ В РАЗОБРАННОМ ВИДЕ И СПИСОК ЧАСТЕЙ УСТРОЙСТВА УДЛИНИТЕЛЬНАЯ ТРУБКА TET01 RU ...
Page 246: ...8 ЗОБРАЖЕННЯ В РОЗІБРАНОМУ ВИДІ ТА СПИСОК ДЕТАЛЕЙ КУЩОРІЗ TPT01 244 UA ...
Page 248: ...8 ЗОБРАЖЕННЯ В РОЗІБРАНОМУ ВИДІ ТА СПИСОК ДЕТАЛЕЙ СЕКАТОР НА ШТАНЗІ TPS01 246 UA ...
Page 250: ...248 8 ЗОБРАЖЕННЯ В РОЗІБРАНОМУ ВИДІ ТА СПИСОК ДЕТАЛЕЙ ПОДОВЖУВАЧ ДЛЯ TET01 UA ...
Page 276: ...274 8 VEDERE ÎN SPAȚIU CU LISTA PIESELOR COMPONENTE TRIMMER DE GARD VIU TPT01 RO ...
Page 278: ...276 8 VEDERE ÎN SPAȚIU CU LISTA PIESELOR COMPONENTE FERĂSTRĂU CU TIJĂ TPS01 RO ...
Page 280: ...278 8 VEDERE ÎN SPAȚIU CU LISTA PIESELOR COMPONENTE TUB EXTENSIBIL TET01 RO ...
Page 302: ...300 8 EXPLODED VIEW WITH PARTS LIST HEDGE TRIMMER TPT01 EN ...
Page 304: ...302 8 EXPLODED VIEW WITH PARTS LIST POLE PRUNER TPS01 EN ...
Page 306: ...304 8 EXPLODED VIEW WITH PARTS LIST EXTENSION TUBE TET01 EN ...