1
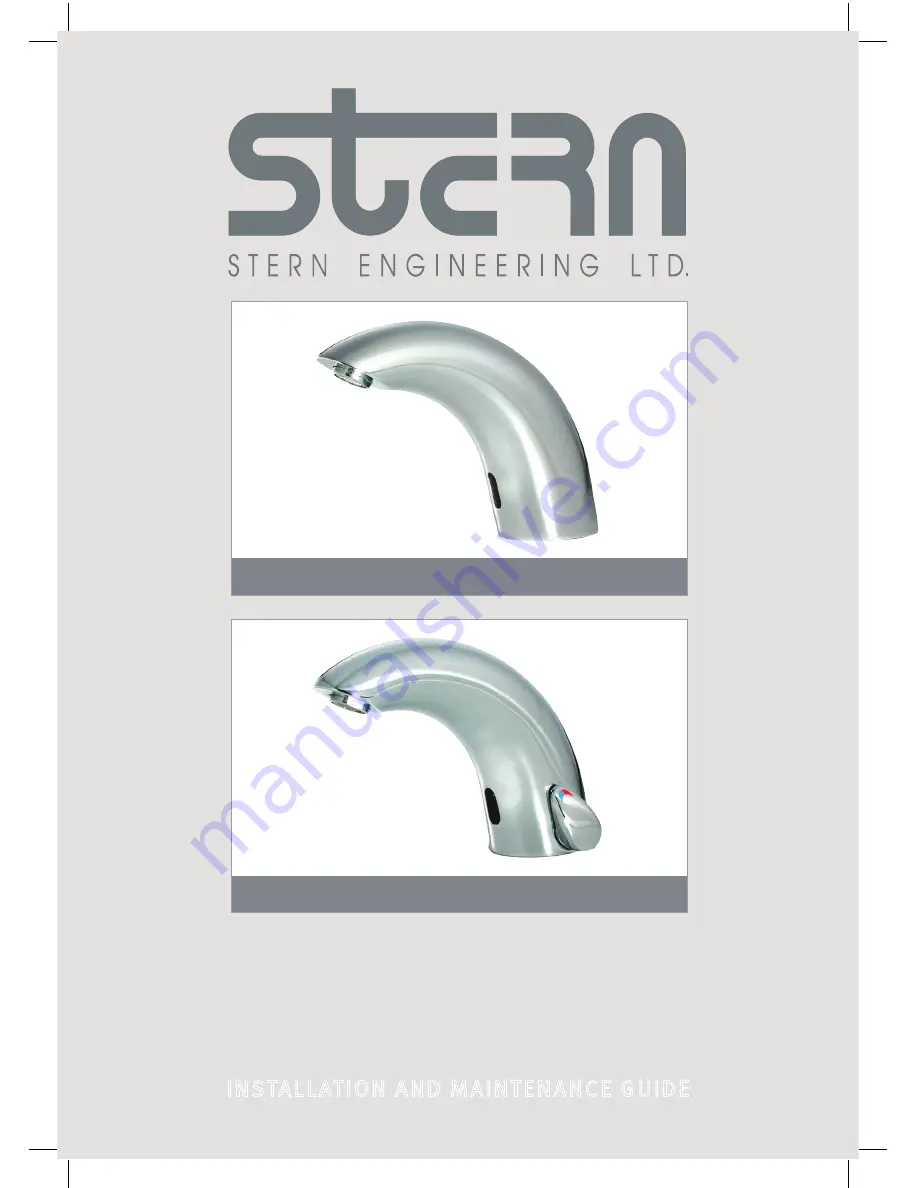
SWAN SERIES
INSTALLATION AND MAINTENANCE GUIDE
E L E C T R O N I C L A V A T O R Y F A U C E T
SWAN 1000
SWAN 1010
Page 1: ...1 SWAN SERIES INSTALLATION AND MAINTENANCE GUIDE ELECTRONIC LAVATORY FAUCET SWAN 1000 SWAN 1010 ...
Page 2: ... INSTALLATION INFO 5 7 FAUCET INSTALLATION 8 11 SETTINGS ADJUSTMENT 12 13 BATTERY REPLACEMENT 14 SPARE PARTS LIST 15 MAINTENANCE Filters cleaning instructions Care and cleaning of chrome and special finishes 16 LIMITED WARRANTY 17 TROUBLE SHOOTING ...
Page 3: ...sformer Recommended water pressure 0 5 8 0 bar 7 116 PSI With water pressure of more than 8 bars use a pressure reducing valve for reduction Preset sensor range 220 mm Adjustable Minimum sensor range 80 mm Maximum sensor range 300 mm Security time 90 seconds SWAN 1010 B 250300 SWAN 1010 E 250400 SWAN 1000 252200 SWAN 1000 B 252300 SWAN 1000 E 252400 ...
Page 4: ...2 PACK CONTENTS Familiarize yourself with the part names and confirm that the parts are included SWAN 1010 E VERSIONS B VERSIONS Transformer 9V Battery box 1 x Faucet and attachments 1 x Allen Key ...
Page 5: ...3 PACK CONTENTS Familiarize yourself with the part names and confirm that the parts are included SWAN 1000 1 x Faucet and attachments E VERSIONS B VERSIONS Transformer 9V Battery box 1 x Allen Key ...
Page 6: ...u obtain the missing parts WARNINGS Do not install facing a mirror or any other electronic system operated by an infrared sensor To prevent reflection problems it is recommended to keep a minimum distance of 1 50 meters between the faucet and any other objects PREPARATION FOR INSTALLATION Flush water supply lines thoroughly before installing the faucet Do not allow dirt Teflon tape or metal partic...
Page 7: ...ing from the base of the faucet NUT DISC GASKET STEP 2 INSTALLING THE FAUCET 1 Place the faucet with O ring into the hole in deck or lavatory Make sure the O ring is located between the deck or lavatory and the bottom of the faucet 2 Below the deck slide the gasket disk and hexagonal nut over the flexible hose and secure the faucet into place GASKET NUT DISC GASKET ...
Page 8: ...ral water supply and the shut off valves angle valves and check for leaks STEP 4 CONNECTING THE POWER SOURCE 1 If your model is Swan 1010 Swan 1000 your product contains an internally mounted 9V battery To activate it proceed to clause 2 If your model is Swan 1010 B Swan 1000 B install the battery box underneath the sink with the cable connection pointing down and connect the connectors If your mo...
Page 9: ...T INSTALLATION 2 Remove the protective sticker from the sensor 3 Wait a few seconds before activating the faucet If the range is unsatisfactory refer to the section titled Settings adjustment 15 SECONDS ABOUT ...
Page 10: ...0cm Choose the function you want to adjust by pressing once on one of the function buttons After pressing once on a specific function button a quick flashing of the red light at the front of the sensor will occur At this stage you can change the setting by pressing the or the buttons every push will increase or decrease one level After finishing the adjustment turn the water supply back on DETECTI...
Page 11: ...ed Then press to increase the security time and to reduce it DELAY IN TIME It is recommended to change the delay in time for flush valves for urinals or toilets only If required the delay in time can be modified also in faucets as follows Press the IN button Wait until a quick flashing of the red light of the sensor eye is perceived Then press to increase the delay in time and to reduce it DELAY O...
Page 12: ...fault and you would like to deactivate it press the lock button Wait until a quick flashing of the red light of the sensor eye is perceived Then press to activate the lock out time or to deactivate it To activate it again press the lock button and without releasing it press the button once TEMPORARY OFF FUNCTION This function is ideal to perform any kind of activity in front of the sensor without ...
Page 13: ...nto the adjusting mode put your hand in front of the sensor at a distance of 2 5cm to 4 10cm within 5 seconds after the reconnection of the power supply NOTE If you will not put your hand in front of the sensor after connecting the power supply the sensor will not enter into adjusting mode and the previous setting will return 5 When the sensor goes into the adjusting mode and your hand is in front...
Page 14: ...ery with a new 9V battery A lithium battery is recommended Release the Allen screw to carefully remove the faucet s body Disconnect the connector from the elec tronic unit s connector If your model is Swan 1000 Release the handle set screw to remove the mixing handle Release the Allen screw to carefully remove the axis assembly by pulling it out Turn off the shut off valve angle valve If your mode...
Page 15: ... the opening in the faucet s body by pushing it moder ately into the o ring Swing the sensor gently to align it with its location Be careful and make sure that you do not tear the o ring If torn replace it with a new one BATTERY REPLACEMENT 6 7 To replace the battery at Swan 1010 B Swan 1000 B models IMPORTANT Spent batteries should not be disposed of with normal household waste Contact your local...
Page 16: ...wan 1010 Swan 1000 07220001 Sensor kit for Swan 1010B E Swan 1000B E 07220002 Solenoid valve kit 07230002 Filter 08530014 Battery box 06530008 IP67 battery box 06530020 Insert Kit for Swan 1010 07240014 Insert Kit for Swan 1000 07240003 Mixer Handle Kit 07260000 Mixer Kit 07250002 Transformer 06522025 Remote control 13B Optional 07100005 ...
Page 17: ...move the filter s and wash it them under running water 4 Reassemble the parts 5 Make sure that there is no water leakage Care and cleaning of chrome and special finishes DO NOT use steel wool or cleansing agents containing alcohol acid abrasives or the like Use of any prohibited cleaning or maintenance products or substances could damage the surface of the faucet For surface cleaning of faucet use...
Page 18: ... price of the faucet valve or control If you believe that you have a warranty claim contact your Stern Distributor Dealer or Plumbing Contractor Please be sure to provide all pertinent information regarding your claim including a complete description of the problem the product model number the date the product was purchased from whom the product was purchased and the installation date Also include...
Page 19: ...id and clean them Use scale remover material if needed When replacing the plunger please make sure that the spring is in vertical position 2 Debris or scale in solenoid Clean the orifice or replace diaphragm 3 The central orifice in the diaphragm is plugged or the diaphragm is torn Reduce the supply water pressure 4 The water supply pressure is higher than 8 bar Shut off water supply and unscrew o...
Page 20: ...18 02 14 015410658 B 15 Gan Rave Blvd 81222 Gan Rave Yavne Israel Tel 972 8 9326000 Fax 972 8 9326025 export sternfaucets com www sternfaucets com ...