


11-19
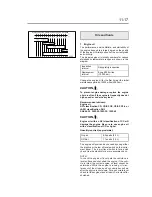
CAUTION
•
Add oil of the same grade and viscosity as
the original engine oil fill. Mixing oil can
damage the engine.
•
Do not add more than the necessary quantity
of oil. The engine can be severely damaged if
the correct oil level is not maintained.
1.4
Changing oil
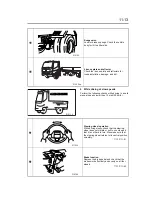
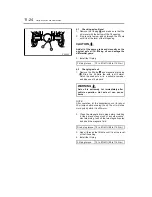
1. Clean the surface around the oil filler cap .
When clean, remove the oil filler cap.
2. Remove the drain plug from the oil pan and
allow the oil to drain while it is still warm.
Replace the oil filter at the same time.
P. 11-28
NOTE:
After operation, let the engine cool for about 30 min-
utes before draining the oil.
The oil will drain more
quickly while it is still warm.
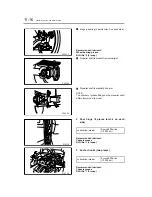
3. After oil has been drained, clean the area
around the drain plug hole.
4. Install the drain plug.
5. Carefully add fresh engine oil through the oil
filler hole.
6. Wait for more than 5 minutes and check the oil
level using the dipstick.
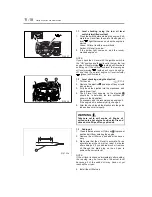
7. Crank the engine with the ignition switch, then
start the engine.
P. 5-8
8. Let the engine idle, allowing oil to circulate
throughout the engine. Then, shut down the
engine and wait for more than 30 minutes before
checking the oil level again. At the same time,
check for possible oil leaks.
9. Once you are sure the oil level is correct, check
that the drain plug, oil filler cap, and dipstick are
all tight and securely in place.
WARNING
Engine oil is extremely hot immediately after
vehicle operation. Hot engine oil can cause
burns.
Oil drain plug torque
29 lbf·ft (39 N·m)
WARNING
Take care not to spill engine oil. Engine oil
spilled onto a hot engine could catch fire and
cause burns. Wipe off any spilled oil.
Z12039
Z10767
Summary of Contents for 360
Page 13: ...2 1 Locations in cab 2 2 Locations outside cab 2 4 2 Warning labels ...
Page 16: ...2 4 Warning labels Locations outside cab Z12496 ...
Page 19: ...2 7 Warning labels 30 gallon 113 liter fuel tank Z12494 ...
Page 27: ...4 1 Seats 4 2 Seat belts 4 4 Steering wheel 4 7 4 Seat and steering wheel adjustments ...
Page 204: ...14 1 Maintenance schedule 14 2 Lubrication schedule 14 6 14 Maintenance schedule ...
Page 210: ...15 1 15 Alphabetical index ...