


SpectraLink Corporation
Installation, Configuration, and Administration
NetLink Telephony Gateway
Part Number: 72-0065-02-R.doc
Page 33
9.3
Connecting Via Telnet
In addition to the serial connection described in the previous section, connection to
the NetLink Telephony Gateway may be done via the network using Telnet. Once
the IP addresses are configured, every NetLink Telephony Gateway is accessible
through a connection to any NetLink Telephony Gateway.
If you do not have a DHCP Server, Telnet can only be used after the
NetLink Telephony Gateway’s IP address is configured. See the previous
section.
The Telnet method of connection is used for routine maintenance of the system for
both local and remote administration, depending on your network.
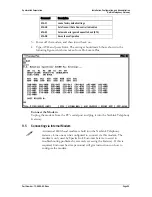
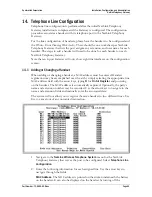
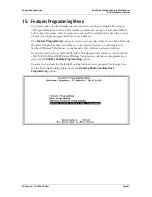
To connect via Telnet, run a Telnet session to the IP address of any NetLink
Telephony Gateway. Once you connect to any NetLink Telephony Gateway and log
in, the
Gateway Connection Selection
screen displays.
Select the NetLink Telephony Gateway you wish to administer and press Enter.
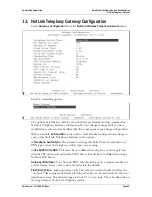
The top line of each administration screen displays the hostname and IP address of
the NetLink Telephony Gateway on which you are currently operating.
9.4
Connecting Via External Modem
The external modem method of connection is most frequently used for routine
maintenance of the system when administration of the system is remotely done, and
the network itself is not remotely accessible.
You will need a standard analog phone line for the modem. (A digital line
from a digital PBX will not work.) Consult with your telephone system
vendor or the Telephone Company for more information about dialing
into a modem.
If needed, the external modem generally should maintain its default settings, except
Hardware Flow Control must be disabled.
The following settings use the US Robotics
®
Sportster
®
modem. Other modem
models may be used, but the particular model’s settings will have to be adapted to
conform to those listed in the following table.
Configure Modem Internal Settings (US Robotics Sportster)
1.
Connect the modem to a PC using a standard modem cable. Plug the 9-pin
connector into the RS-232 port on the PC, and the 25-pin connector into the
modem’s port.
2.
Using a standard communications package such as ProComm Plus or
HyperTerminal™, bring up the modem and type the following commands. Press
Enter after typing each command.