


Chapter 4 — Managing Network Attached Storage
Managing Volumes
September 2017
User Guide
—
Spectra Verde Array
74
Note:
The
options
for
the
NFI Volume Policy
are
only
used
in
conjunction
with
a
BlackPearl
system.
To
configure
NFI,
see
on
.
4.
Click
Save
.
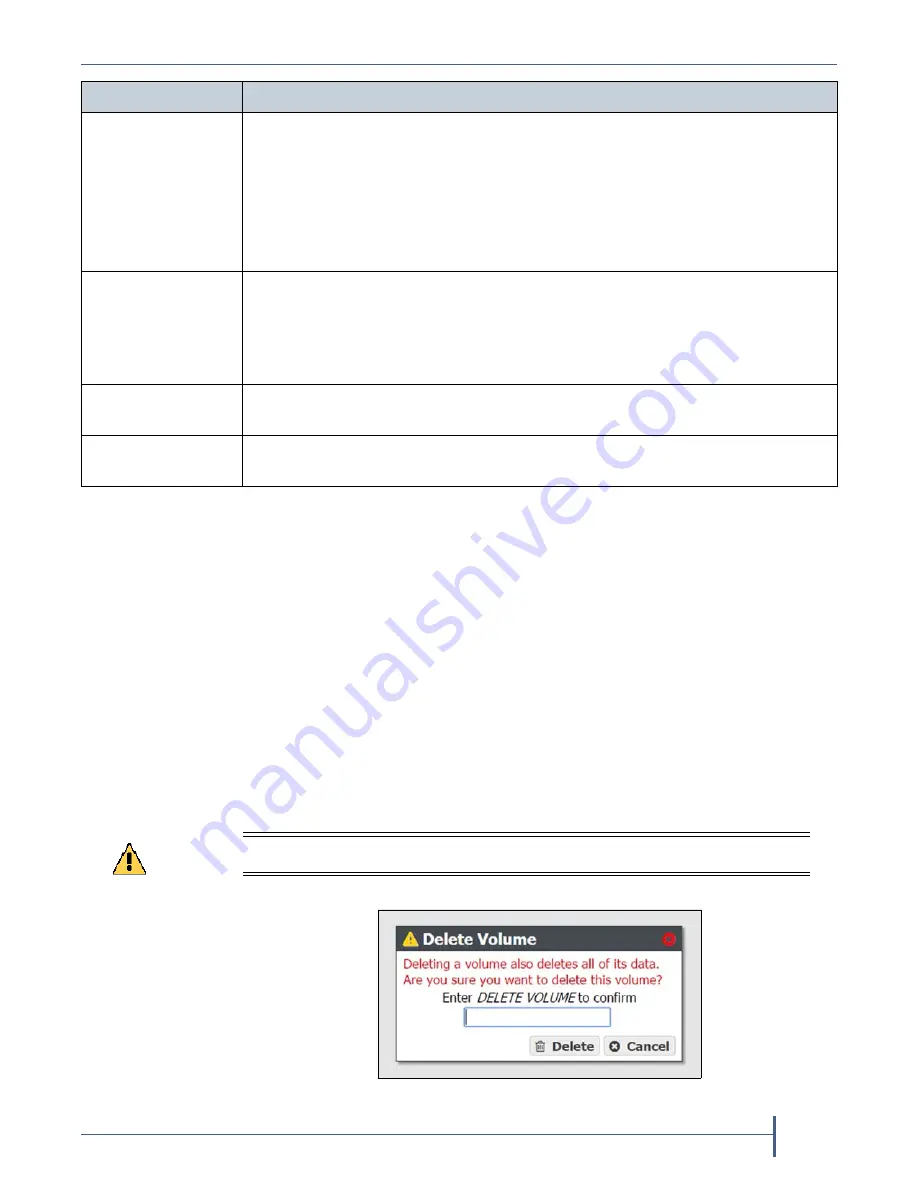
Delete a Volume
Use
the
following
steps
to
delete
a
volume.
1.
From
the
menu
bar,
select
Configuration > NAS > Volumes
,
or
click
the
Volumes
pane
on
the
Dashboard.
The
Volumes
screen
displays
(see
2.
Select
the
volume
you
want
to
delete
and
then
select
Action > Delete
.
A
dialog
box
displays
asking
you
to
confirm
the
deletion.
Maximum Size
Select
the
desired
unit
size
from
the
drop
‐
down
menu
and
enter
a
numerical
value
for
the
maximum
size
in
the
text
box
to
the
left
of
the
unit
size
drop
‐
down
menu.
Notes:
The
maximum
size
must
be
greater
than
the
current
amount
of
used
space
on
the
volume.
Volumes
are
thin
provisioned,
so
it
is
possible
for
the
combined
allocated
maximum
storage
of
all
volumes
to
exceed
the
physical
space
available.
Compression
If
desired,
select
the
check
box
to
enable
the
Verde
array
to
compress
data
stored
on
the
array.
For
more
information,
see
.
Note:
Changing
the
compression
setting
only
affects
data
written
to
the
volume
after
the
compression
setting
is
changed.
It
does
not
affect
data
already
on
the
volume.
Access Time
If
desired,
select
the
check
box
to
configure
the
array
to
update
the
time
stamp
of
a
file
when
it
is
read.
Selecting
Access Time
may
slow
performance.
Read Only
If
desired,
select
the
check
box
to
configure
the
volume
so
that
data
can
be
read,
but
not
written
to
the
volume.
For this option....
Do the following...
Caution
Deleting a volumes deletes all data in the volume. This action cannot be undone.
Figure 43
Confirm the volume deletion.