


Account & Permission Management
NVR User Manual
51
10
Account & Permission Management
10.1 Account Management
Click Start
Settings
Account and Authority
Account
Edit User to go to the interface as shown below.
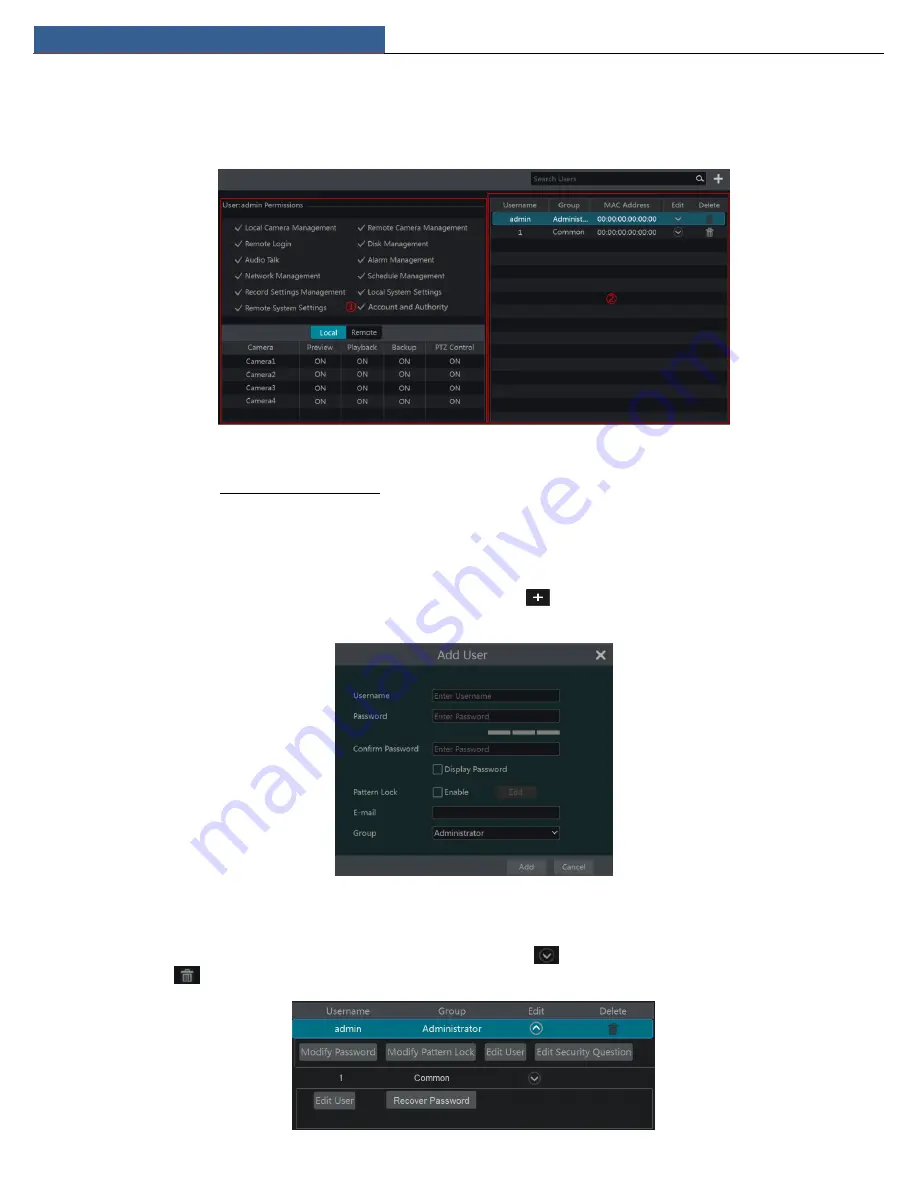
Area ① displays the user permissions. Area ② displays the user list. Click the user in the list to display its user permissions in area ①.
There are three default permission groups (“Administrator”, “Advanced” and “Common”) available when adding accounts. You can manually add
new permission group (see 10.3.1 Add Permission Group for details).
Only
admin
and the users that have the “Account and Authority” permission can manage the system’s accounts. Group “Administrator” owns all
the permissions displayed in area ① except “Account and Authority” and its permissions cannot be changed while the permissions of “Advanced”
and “Common” can be changed.
10.1.1 Add User
①
Click Start
Settings
Account and Authority
Account
Add User or click
beside the search box to pop up the window as shown
below.
②
Set the username, password and group. User can also set the pattern lock here. The e-mail address is optional. Click “Add” to add the user.
10.1.2 Edit User
Click Start
Settings
Account and Authority
Account
Edit User and then click
in the user list or double click the user to edit the user
information. Click
to delete the user (the user
admin
cannot be deleted).


