TRAK Machine Tools
Southwestern Industries, Inc.
The ProtoTRAK DXF Converter Operating Manual
25
4.8.1 Event Types
Posn
. Allows the creation of a position event by clicking anywhere on the screen. You
will see a small circle, or dot, appear in the location where you clicked.
Drill.
The Drill event converts any horizontal line into a drill event. The converter will
take the most positive Z-dimension as the entry of the drill (it will also add
.100” as a
safety rapid point) and will use the most negative Z-dimension as the depth of the drill.
X will always be at zero.
Bore.
The Bore event converts any horizontal line into a Bore event. The converter will
take the most positive Z-dimension as
the entry of the drill (it will also add .100” as a
safety rapid point) and will use the most negative Z-dimension as the depth of the Bore.
Turn.
Converts any straight line into a Turn event. Click on the end of the line where you
want to establish the beginning point (X Beg, Y Beg).
Arc
. Converts any arc in the drawing into an Arc event. Click on the end on the arc
where you want to establish the beginning point (X Beg, Y Beg).
Cycle
. Converts connecting lines and arcs into a Cycle event. When selecting a Cycle
event, the first line clicked determines where the Cycle starts and the second line clicked
determines the direction of the Cycle.
X stock
. The cycle event inside of the DXF converter (only) has an X stock field. This
field allows you to enter the radius of the stock you will be using and helps the
ProtoTRAK determine how much material needs to be roughed out.
Thread
.
The information provided in drawings is insufficient to properly create a
ProtoTRAK thread event. The thread event inside the DXF converter will not allow
you to select any geometry to transfer coordinates. Instead, select Thread to insert
the Thread event into the program and manually fill in the data to complete the
event.
Groove.
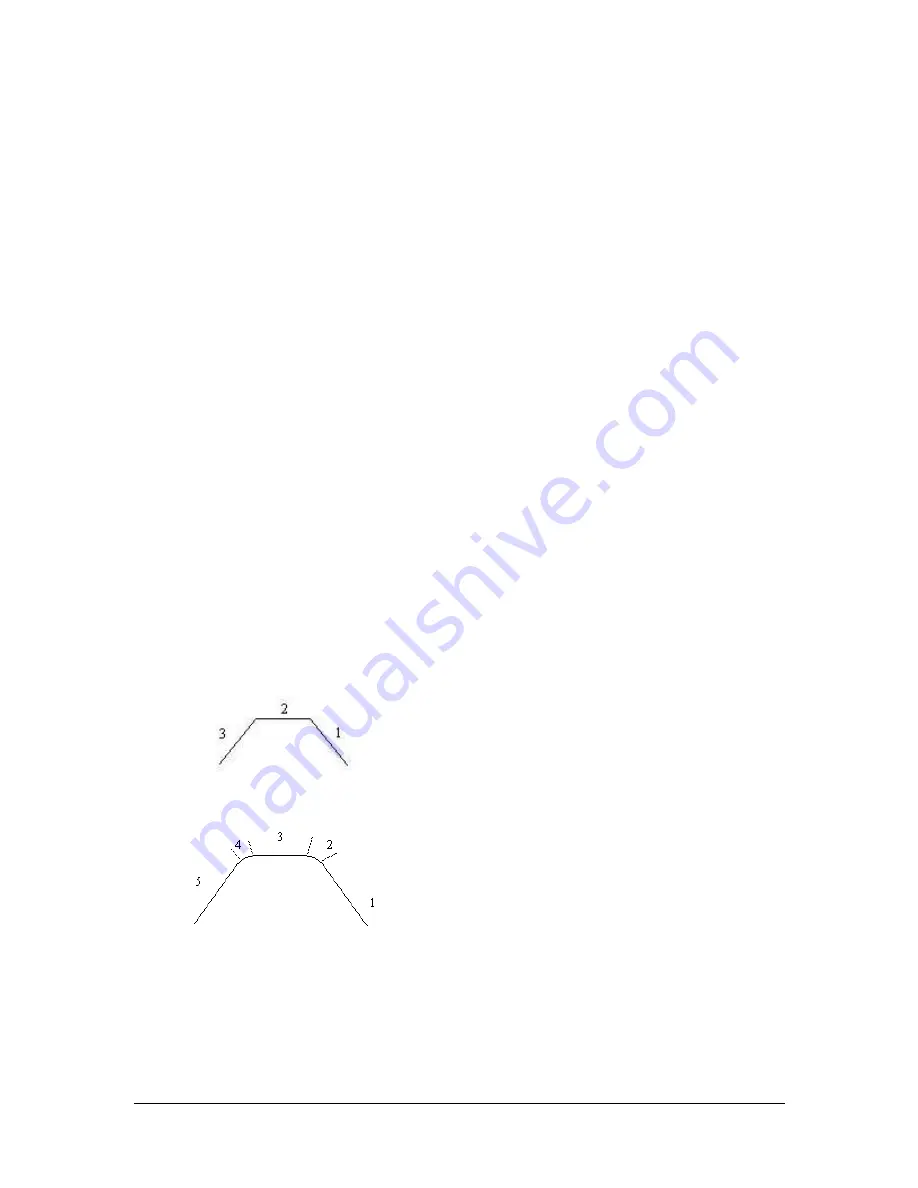
Allows the conversion of three lines, in a specific order, into a groove event.
In this drawing, for example, we would first
click on Groove, and then we would click on
the three lines in a counter clock-wise
order. The order in which these lines are
selected will determine the direction in
which the event is roughed and finished.
The event only allows for the selection of
three lines. When we want to include
conrads and chamfers, in the example to
the left, we would select Groove then click
on lines 1, 3 and 5 skipping lines/arcs 2 and
4. The conrads or chamfers can then be
entered manually into the event.


