-28-
For Machines Mfd. Since 12/20
South Bend Tools
Model SB1117
O P E R A T I O N
2.
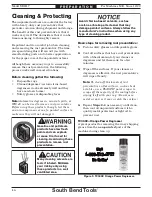
Tilt main table until pointer on tilt scale
indicates desired angle (see Figure 38).
3.
Tighten lock handles from Step 1 to secure
setting.
4.
Measure clearance between table and
sanding belt.
—
If clearance is less than
1
/
16
", no further
adjustment is necessary.
—
If clearance is more than
1
/
16
", proceed to
Step 5.
Figure
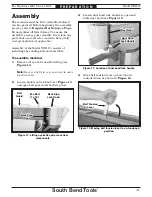
Figure 39. Location of lock bolts.
. Location of lock bolts.
Adjusting End Table
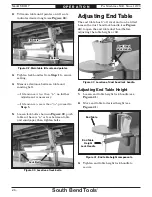
The end table has 8" of travel and can be tilted.
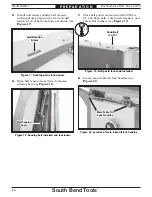
Loosen the dust hood lock handle (see Figure
40) to open the end table dust hood before
adjusting the table height or tilt.
Adjusting End Table Height
1.
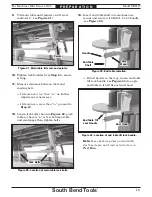
Loosen end table height lock handle (see
Figure 41).
2.
Move end table to desired height (see
Figure 41).
3.
Tighten end table height lock handle to
secure.
Figure
Figure 40. Location of dust hood lock handle.
. Location of dust hood lock handle.
Dust Hood
Dust Hood
Lock Handle
Lock Handle
Figure
Figure 41. End table height components.
. End table height components.
End Table
End Table
End Table
End Table
Height
Height
Lock Handle
Lock Handle
Figure
Figure 38. Main table tilt scale and pointer.
. Main table tilt scale and pointer.
Tilt Scale
Tilt Scale
Pointer
Pointer
5.
Loosen lock bolts shown in Figure 39, push
table so there is
1
/
16
" or less between table
and sandpaper, then tighten bolts.
Lock Bolts
Lock Bolts

