background image

9

UTS MPO Serie


 BT319

UTS1JC18MPN & UTS6JC18MPN

 (Continued)

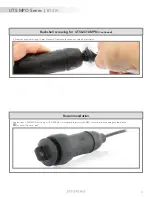
Backshell screwing for UTS1JC18MPN

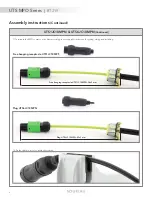
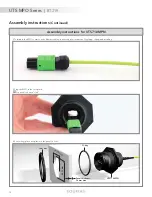
13. Plug the MPO in the cavity.


You need to hear a “click”.

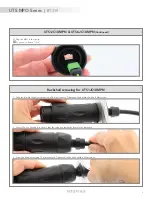
1.  Slide the blackshell and screw it using a 28 mm U-wrench. Tightened the backshell with a 4 Nm torque.

2.  Control: Pull on the cable to ensure that the retention system bottoms in the backshell.

3.  Screw the head nut using a 15 mm U-wrench. Tightened the head nut with a 2 Nm torque.

Summary of Contents for UTS MPO Series

Page 1: ...ASSEMBLY INSTRUCTIONS UTS MPO Series BT 319...

Page 2: ......

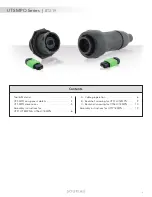
Page 3: ...details 5 UTS MPO dimensions 5 Assembly instructions for UTS1JC18MPN UTS6JC18MPN 6 A Cable preparation 6 B Backshell screwing for UTS1JC18MPN 9 C Backshell screwing for UTS6JC18MPN 10 Assembly instru...

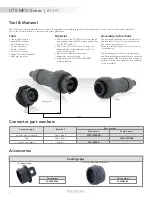
Page 4: ...ve these diameter limits some adaptations are necessary Suggested glue LOCTITE 480 PRISM Instant Adhesive Assembly instructions The assembly should be done in a dust free and dried environment in acco...

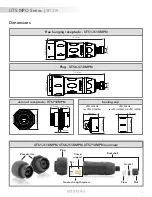
Page 5: ...Backshell Tensile strength system Ear Claw Nut Gasket Crimp support Receptacles UTS1JC18MPN UTS6JC18MPN UTS718MPN overview Sealing cap 35 7 max 34 max UTS18DCG2 for UTS1JC18MPN UTS718MPN UTS618DCG2 fo...

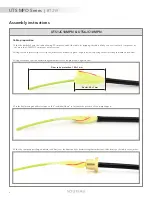
Page 6: ...iven in figure below exposing the kevlar strength members and fiber 4 Fix the Kevlar using an adhesive tape on the individual fibers to facilitate the insertion of the crimp support 5 Slide the crimp...

Page 7: ...ms on the rear flange of the support 6 Separate the kevlar strength members in two groups Use an adhesive tape to fix the kevlar strength members on the jacket 7 Apply the instant adhesive on the fibe...

Page 8: ...d 11 Terminate the MPO contact on the fiber according to your supplier instruction for gluing cliving and polishing 12 Fix the cable in a tool to avoid the rotation Free hanging receptacle UTS1JC18MPN...

Page 9: ...he cavity You need to hear a click 1 Slide the blackshell and screw it using a 28 mm U wrench Tightened the backshell with a 4 Nm torque 2 Control Pull on the cable to ensure that the retention system...

Page 10: ...Coupling plug with receptacle 3 Slide the blackshell and screw it using a 28 mm U wrench Tightened the backshell with a 4 Nm torque 4 Control Pull on the cable to ensure that the retention system bot...

Page 11: ...ptacle to protect the MPO contacts from surrouding contamination You need to hear a click 5 Screw the head nut using a 15 mm U wrench Tightened the head nut with a 2 Nm torque UTS MPO Series BT319 Bac...

Page 12: ...ess 3 2mm max 30 35 mm 31 85 mm 2 Terminate the MPO contact on the fiber according to your supplier instruction for gluing cliving and polishing 3 Plug the MPO in the receptacle You need to hear a cli...

Page 13: ...13 5 Tightened the jam nut with a torque of 5 Nm using a 36 5 mm U wrench 6 Coupling UTS MPO Series BT319 Assembly instructions for UTS718MPN Continued...

Page 14: ...orm part of any contract All rights reserved to SOURIAU for changes without prior notification or public announcement Any duplication is prohibited unless approved in writing Credit photos page 11 Rid...

Reviews: