background image

Made in HY, China

Important Information:

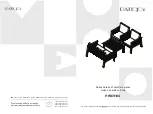
Assembly Instruction

Read all instructions 

By Sorelle - A Division of C & T International, Inc.

46 Whelan Road, East Rutherford, N.J.07073 U.S.A.
Tel, +1(201) 531 1919 Fax, +1(201) 531 1920

BEFORE

 assembling Changing Table.

KEEP INSTRUTIONS FOR FUTURE USE.

Urban Changing Table

Website: 

www.sorellefurniture.com

Summary of Contents for Urban Changing Table

Page 1: ...all instructions By Sorelle A Division of C T International Inc 46 Whelan Road East Rutherford N J 07073 U S A Tel 1 201 531 1919 Fax 1 201 531 1920 BEFOREassembling Changing Table KEEP INSTRUTIONS FOR FUTURE USE Urban Changing Table Website www sorellefurniture com ...

Page 2: ...ace It is strongly recommended that assembly is done on a soft non abrasive surface to avoid damaging the finish NOTES ON CARE AND MAINTENANCE Do not scratch or chip the finish Inspect the product periodically contact C T International Sorelle for replacement parts or questions Do not store the product or any parts in extreme temperatures and conditions such as a hot attic or a damp cold basement ...

Page 3: ...x No A B C C1 D D1 E E1 F G H I J K Description Back Frame Front Frame Left Non grooved Rail Right Non grooved Rail Left Upper Grooved Rail Right Upper Grooved Rail Left Grooved Rails Right Grooved Rails Top Shelf Shelfs M6 30mm Bolts Changing Pad Safety Harness Allen Key Qty 1 1 1 1 1 1 2 2 1 2 16 1 1 1 A Tool required ASSEMBLY INSTRUCTIONS H B I 1x K C1 F G G E E1 E1 C E D D1 J THIS PRODUCT MAY ...

Page 4: ...ion Sheet Sorelle Changing Table Assembly Steps Step 1 Figure 1 Figure 2 Connect Rails to Back Frame as Figure 1 shows c H H H H H H H H Step 2 Shelves Assembled as Figure 2 shows Slide the shelves through the grooves in the Rails and Back Frame F G G E1 E1 ...

Page 5: ...buckled ends into each other until they lock shut with a click 3 Gently pull the loose end of the safety to lightly snug the safety harness around the infant Step 1 To attach the safety harness place the safety harness Part J on the top shelf and align the hole on the safety harness end with the hole on the top shelf Step 2 Insert the bolt Part S through a washer Part T the harness hole and the to...

Reviews: