12
Front Panel
Chap
te
r 2
Name
s
an
d
F
u
nc
tio
n
s
o
f Pa
rt
s
c
PUSH SET knob
Use for menu and clip list screen operations. Turn the knob
to select items, and press it to confirm the selection. This
button is also used to set numerical and timecode values.
See “Clip Operations” (page 57) for more information
about how to use the thumbnail screens.
d
MENU button
Displays the setup menu or the clip list screen menu. The
setup menu appears when no clip list screen is visible. The
same information is also superimposed on the display on a
monitor connected to the HDMI OUT connector of the
unit. Press once more to return to the original display.
See “Clip Operations” (page 57) for more information
about how to use the thumbnail screens.
e
RESET/RETURN button
Functions as the RESET button or the RETURN button.
RESET button:
Reset counters or the setting values of the
timecode generator. This button is also used to abort
or cancel setup menu and thumbnail search
operations.
RETURN button:
In setup menu and clip list screens,
returns to the previous procedure.
f
COPY button
when pressed
while the clip list screen is shown on the display.
g
THUMBNAIL button
When this button is pressed when the basic operation
screen or video monitor screen is displayed, a list of clips
or EDLs saved on the currently selected media is
displayed. (That is, the current screen is switched to a clip
list screen.) When pressed again, returns to the basic
operation screen or the video monitor screen.
See “Clip Operations” (page 57) for more information
about how to use the thumbnail screens.
h
DISPLAY button
Each press of this button switches between the basic
operation screen and video monitor screen
When the clip list screen is shown on the display, this
button switches the display screen between thumbnails
view and details view.
i
SHIFT button
Switches between functions for any button with two
functions.
j
PAGE/HOME button
When pressed alone functions as the PAGE (page
switching) button. When pressed together with the SHIFT
button, functions as the HOME button.
PAGE button:
Displays the function menu, if it is not
already visible. (The most recently displayed page of
the function menu appears.)
HOME button:
When pressed with the function menu
visible, returns to the HOME page of the function
menu.
6
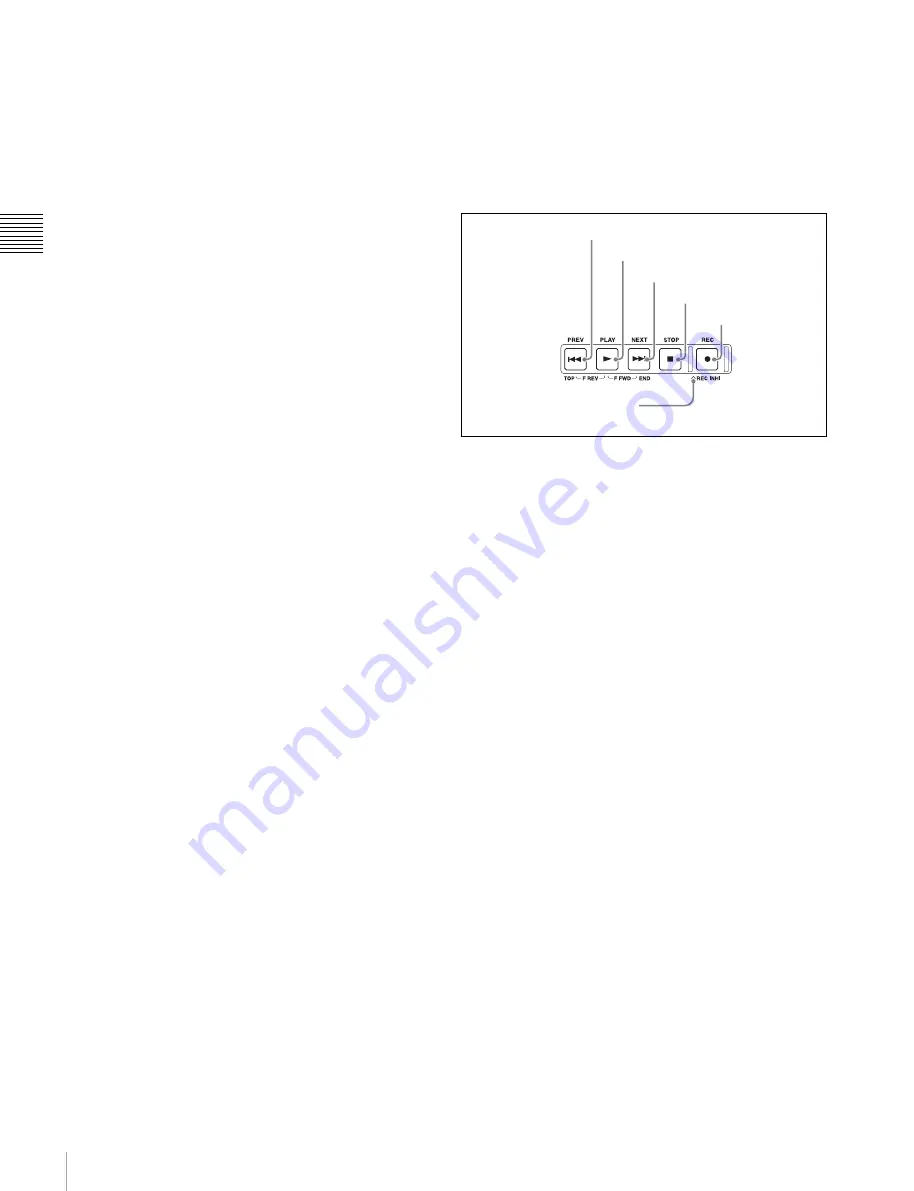
Recording and playback control section
a
PREV (previous) button
Press this button, turning it on, to show the first frame of
the current clip. While the first frame of a clip is shown,
pressing this button jumps to the beginning of the previous
clip. This button is also used together with other buttons
for the following operations.
Reverse direction high-speed search:
Hold down the
PLAY button, and press this button. A high-speed
search in the reverse direction is carried out.
Displaying the first frame of the first clip:
Hold down
the SHIFT button, and press this button.
b
PLAY button
To start playback, press this button, turning it on.
When pressed during recording, stops recording and enters
stop mode. If you do not want to stop recording when this
button is pressed, set setup menu item 145 MODE KEY
ENABLE DURING RECORDING to “stop”.
c
NEXT button
Press this button, turning it on, to jump to the next clip, and
show the first frame. This button is also used together with
other buttons for the following operations.
Forward direction high-speed search:
Hold down the
PLAY button, and press this button. A high-speed
search in the forward direction is carried out.
Displaying the last frame of the last clip:
Hold down the
SHIFT button, and press this button.
d
STOP button
To stop recording or playback, press this button, turning it
on. The frame at the stop point appears.
1
PREV button
2
PLAY button
3
NEXT button
4
STOP button
5
REC button
6
REC INHI indicator


