


83
Basic Menu Operations
Chapt
er
8
Me
n
u
Conf
igur
a
tio
n and Det
a
ile
d Set
tings
Basic Menu
Operations
This section describes the basic operations
for setting the setup menu items.
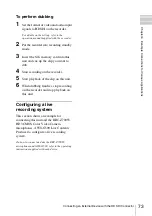
To display the setup menu
Press the MENU button.
The menu icons appear on the monitor
screen.
The cursor is displayed on the icon of the
menu used last, and the corresponding
menu item selection area is displayed to the
right.
Example: When the cursor is
located at
(TC/UB SET menu
icon)
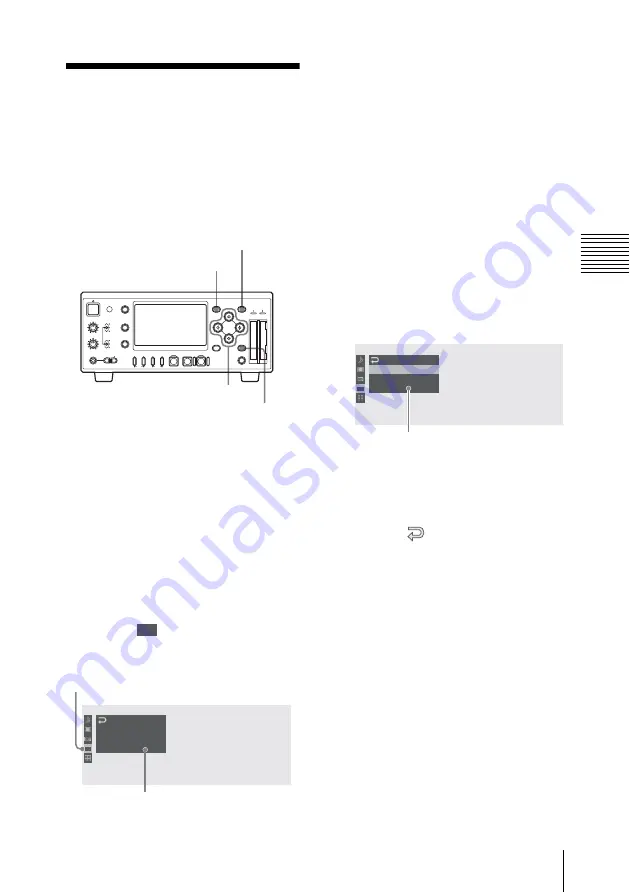
To set the setup menus
1
Press the
M
or
m
button to move the
cursor to the icon of the menu you wish
to set.
The selectable menu items are
displayed in the menu item selection
area to the right of the icon.
2
Press the SET button.
The cursor moves to the menu item
selection area.
You can also move the cursor to the
menu item selection area by pressing
the
,
button.
The menu item selection area can show
seven lines at maximum. When all the
selectable items cannot be displayed at
one time, you can scroll the display up
or down by moving the cursor.
A triangle appears at the upper or
lower right corner of the menu item
selection area to indicate that scrolling
is enabled.
REC LEVEL
CH-1
VIDEO INPUT
PHONES
DISPLAY
MENU
TC/UB
STATUS
F REV
PLAY/PAUSE
m
u
SLOT
SELECT
CH-2
iLINK
HD SDI
SG
AUDIO INPUT
PHONE LEVEL
PREV
.
NEXT
>
F FWD
M
SET
A
B
THUMBNAIL
CANCEL
ANALOG
HD SDI
CH-1/2
HD SDI
CH-3/4
ACCESS
1
STOP
x
REC
z
TOP
END
MENU button
SET button
CANCEL
button
<
,
,
,
M
,
m
buttons
00:00
00:00
TC/UB SET
Timecode
Users Bit
TC For mat : DF
B
B
Menu icon
Menu item selection area
00:00
TC/UB SET
Timecode
Users Bit
TC For mat : DF
B
B
Menu item selection area
• A
B
symbol is displayed to the right
of any item that has subitems.
• The current setting value is
displayed to the right of an item that
has no subitems.
• To return to the previous layer,
select “
” or press the CANCEL
button.
Summary of Contents for XDCAM EX PMW-EX30
Page 111: ......


