background image

NWZ-S636F / S638F / S639F / S736F / S738F / S739F .GB.4-110-117-11(1)

  Common Settings

11


11


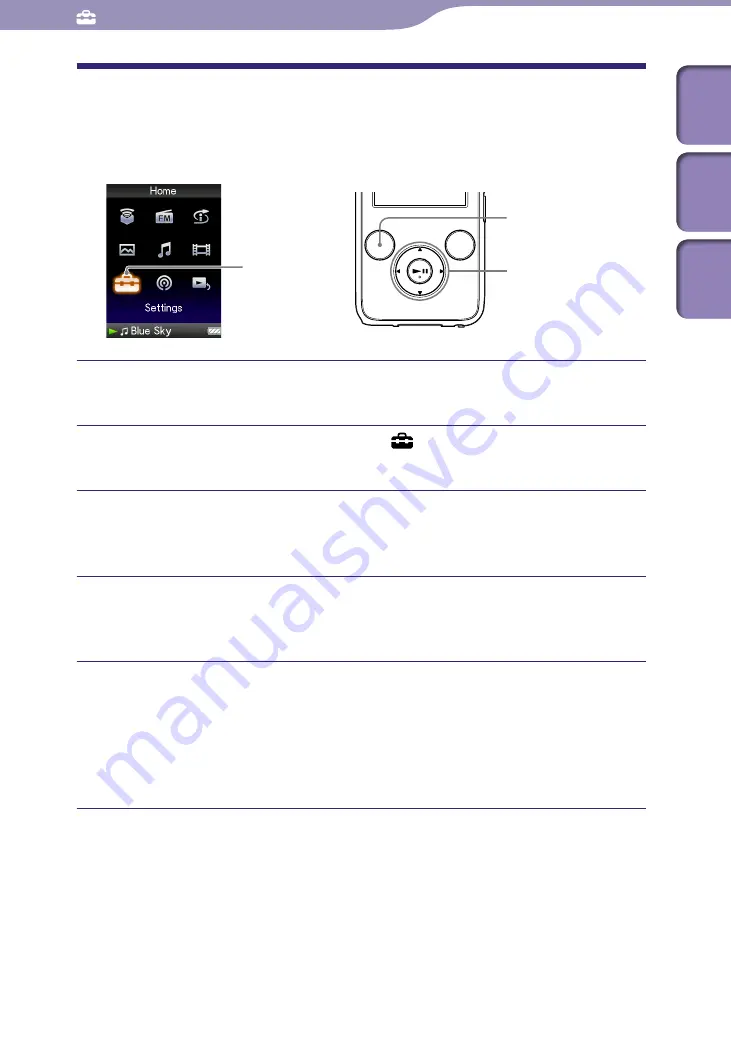
Adjusting the Brightness of the Screen 

(Brightness)

You can set the display brightness to one of 5 levels.

Settings

5-way button

BACK/HOME 
button

  Press and hold the BACK/HOME button until the Home menu 

appears.

  Press the 

/

/

/

 button to select   (Settings), and then press 

the 

 button to confirm.

  Press the 

/

/

/

 button to select “Common Settings,” and then 

press the 

 button to confirm.

The list of “Common Settings” appears.

  Press the 

/

/

/

 button to select “Brightness,” and then press the 

 button to confirm.

The brightness adjustment screen appears.

  Press the 

/

/

/

 button to select a level, and then press the 


button to confirm.

“3” is set by default.

After you have adjusted the setting level, be sure to press the 

 button to 

confirm. If you press the BACK/HOME button before you confirm, the 

setting will be canceled.

 Hints

 You can adjust the brightness of the screen while you are playing a video or photo. Press 

the OPTION/PWR OFF button, and then select “Brightness” from the option menu.

 If you adjust the brightness of the screen to a lower level, the battery will last longer (


page 127).

Table of 

Cont

ents


Menu


Inde
x

Summary of Contents for Walkman NWZ-S636F

Page 1: ... 2008 Sony Corporation 4 110 117 11 2 Operation Guide NWZ S636F S638F S639F S736F S738F S739F Table of Contents Menu Index ...

Page 2: ...ual Hints You can jump to the indicated page by clicking a page number in the table of contents in the Home menu list or in the index You can jump to the indicated page by clicking a page reference indication e g page 4 on each page To search for a reference page by keyword click the Edit menu select the Search feature of the Adobe Reader to display the navigation frame type the keyword into the S...

Page 3: ...s are displayed as a continuous roll of pages When you scroll the previous or next pages scroll up or down continuously Continuous Facing Two pages are displayed side by side with each pair part of a continuous roll of pages When you scroll the previous or next pairs of pages scroll up or down continuously Facing Two pages are displayed side by side When you scroll the display changes to previous ...

Page 4: ... What is SensMe Channels 44 Playing songs using SensMe Channels 44 Analyzing songs on the player 47 Deleting Songs from Music Library 48 Displaying the Music Option Menu 49 Setting the Music Setting the Play Mode Play Mode 52 Setting the Playback Range 54 Displaying the Now Playing Screen Each Time the Songs Switch New Song Pop Up 55 Setting the Album Display Format 56 Setting to Search by Folders...

Page 5: ...6F S738F S739F only 103 Using with external audio sources External Input Mode 105 Using as earplugs Quiet Mode 107 Adjusting the Effect of the Noise Canceling Function Set Noise Cancel level 108 Limiting the Volume AVLS Volume Limit 109 Turning Off the Beep Sound 110 Setting a Screensaver Type 111 Setting a Screensaver Time 112 Setting the Theme 113 Setting the Wallpaper 114 Adjusting the Brightne...

Page 6: ...e 114 and Theme Settings page 113 The screen illustrations within this manual are only examples SensMe Channels 44 FM Radio 95 Intelligent Shuffle 1 Time Machine Shuffle 41 Shuffle All 43 Photo Library 84 Music Library All Songs 32 Album 33 Artist 34 Genre 35 Release Year 36 Folder 37 Playlists 39 Initial Search 38 Intelligent Shuffle 41 Video Library 68 Continued 1 appears instead of Intelligent ...

Page 7: ...entation 86 Display 88 Slide Show Repeat 90 Slide Show Interval 91 Photo List Format 92 FM Radio Settings Scan Sensitivity 100 Mono Auto 101 Common Settings Unit Information 121 AVLS Volume Limit 109 Beep Settings 110 Theme Settings 113 Wallpaper Settings 114 Screensaver 111 Brightness 116 Set Date Time 117 Date Display Format 119 Time Display Format 120 Reset all Settings 122 Format 123 Language ...

Page 8: ...s sold in the U S A Please download it from the following web site http www sonycreativesoftware com download wmm_lite How to install the earbuds correctly If the earbuds do not fit your ears correctly low bass sound may not be heard To enjoy better sound quality change the size of the earbuds or adjust the earbud position to sit on your ears comfortably and fit your ears snugly At purchase M size...

Page 9: ...edia Manager for WALKMAN can transfer music photos or videos from the computer to the player and import audio data from CDs Media Manager for WALKMAN can also subscribe to RSS feeds and transfer the music and video files that have been downloaded from RSS channels For details on operation refer to the Help of the software Audio files AAC or videos can also be transferred by dragging and dropping u...

Page 10: ...s Music MP3 WMA AAC 1 WAV Photo JPEG Video MPEG 4 Simple Profile AVC H 264 AVC Baseline Profile WMV 1 2 Podcast music video 1 DRM files are not compatible 2 Some WMV files cannot be played back after transferred by Content Transfer If you retransfer them using Windows Media Player 11 they may become playable Hint ATRAC files can be transferred to the player after conversion to MP3 file format To c...

Page 11: ...se Canceling function NWZ S736F S738F S739F only The Noise Canceling function is available only when using the supplied headphones The supplied headphones can only be used for these models and cannot be used for other equipment WM PORT jack Use this jack to connect the supplied USB cable or optional peripheral devices such as supported accessories for the WM PORT NOISE CANCELING switch NWZ S736F S...

Page 12: ...ration Furthermore if you leave the player in standby mode for about a day the player turns completely off automatically If you press any button when the player is turned off the start up screen appears first then the Now Playing screen appears Note The player consumes battery power very slightly even when it is in standby mode Therefore the player might turn completely off in a short time dependi...

Page 13: ...shown below when you select Music Library Album from the Home menu Continued Music Library Album list Song list Now Playing screen Select Music Library and press the button Select Album and press the button Select your desired album and press the button Select your desired song and press the button Playback begins Press the BACK HOME button Press the BACK HOME button Press the BACK HOME button Pre...

Page 14: ... 20 Buttons Description Confirms the item of the list Press and hold to play back all songs in the selected item Moves the cursor up or down Press and hold to scroll up or down faster Changes screens or when an index is displayed moves the cursor left or right to display a list of items Displays the previous or next screen of the list when the index is not displayed List Video Buttons Description ...

Page 15: ... selected item during music operation or displays the selected item during photo operation Starts playback of the selected item during video operation Moves the cursor up or down Press and hold to scroll up or down faster Move the cursor left or right Press and hold to move the cursor left or right faster and then scroll up or down through the thumbnail screens 1 Thumbnail refers to a reduced size...

Page 16: ... playing When the button is set to Folder page 58 Starts play back from the first song of the next folder 2 the current folder or the previous folder Press the button to skip to the first song of the current folder or the previous folder Press the button to skip to the first song of the next folder Moves playback to the beginning of the current previous or next song when pressed once or repeatedly...

Page 17: ...in appears and playback pauses Press the button to scroll through the list of channels Each time you press the button the channel changes and song playback starts from the middle of the song Moves playback to the beginning of the current previous or next song when pressed once or repeatedly Press and hold to scan a playing song backwards or forwards quickly Continued Table of Contents Menu Index ...

Page 18: ...utton to scan a playing video backwards or forwards quickly During playback the speed of fast forward backward changes through 3 levels by repeatedly pressing the button 10 30 100 By pressing and holding the speed increases 1 level and by releasing returns to normal playback While pausing playback the scene moves forward or backward slightly by pressing the button 1 If there is no operation for mo...

Page 19: ...r the period set in Screensaver Timing page 112 When the song playback and a slide show accompanying it are paused and there is no operation for more than 3 minutes the screen turns off and the player enters standby mode FM Buttons Description Plays or pauses 1 FM radio Presets by pressing and holding the selected frequency Selects frequencies Selects the next receivable broadcast station by press...

Page 20: ... artist name the video title the photo title FM radio etc The icons of the play mode The play mode is set to Repeat or Shuffle page 53 Slide Show Repeat is set to On page 90 The icons of the playback range The playback range is set to Selected Range page 54 etc The icons of the sound effect setting page 60 or of the Noise Canceling function NWZ S736F S738F S739F only page 103 The icons of the vide...

Page 21: ...ton to select Now Playing and then press the button to confirm Detailed information about the currently playing content file appears Hints You can display the Now Playing screen by pressing the OPTION PWR OFF button to select Now Playing When playing videos or photos or listening to FM radio you can select Go to the song playback screen from the option menu to display the song playback screen Tabl...

Page 22: ...tion menu appears Press the button to select the item and then press the button to confirm The screen of the selected setting item appears or the selected command is performed The items of the option menu differ depending on the screen on which you press the OPTION PWR OFF button For details see the following pages Displaying the Music Option Menu page 49 Displaying the Video Option Menu page 79 D...

Page 23: ...ay shows charging is completed charging time is approx 3 hours When you use the player for the first time or if you have not used the player for a long time recharge it fully to in the remaining battery indication of the display Recharging the player The battery icon in the display changes as shown below See page 162 on battery duration As the battery power gets lower the bar of the icon decreases...

Page 24: ... interfere with the proper operation of the player We do not guarantee the recharge of the battery using personally assembled computers or modified computers If the computer enters a power saving mode such as the sleep or hibernation mode while the player is connected via the USB cable the player s battery is not charged Instead the player continues to draw power from the battery discharging it Do...

Page 25: ...standby mode and the screen turns off to save battery power If you press any button while in the standby mode the Now Playing screen etc appears and the player is ready for operation Furthermore if standby mode is retained for about a day the player turns off completely automatically If you press any button when the player is turned off the start up screen appears first then the Now Playing screen...

Page 26: ...otos videos and podcasts on the player you need to prepare the data on your computer To import the data into your computer use appropriate software For details about supported file formats see Supported file format page 159 Table of Contents Menu Index ...

Page 27: ...er 11 on your computer make sure to check whether your software or service corresponds to Windows Media Player 11 Data hierarchy may differ depending on your computer environment Some WMV files can be played back only by transferring using Windows Media Player 11 Notes Do not disconnect the USB cable while Do not disconnect appears on the player or the data being transferred may be damaged You can...

Page 28: ...However beyond the 8th level neither files nor folders will be recognized On the player Folders are displayed in the folder name order first then files are displayed in the file name order In this case upper or lower case letters are not distinguished Continued 1st 8th 7th 9th Table of Contents Menu Index ...

Page 29: ... they are transferred by dragging and dropping The latest data is at the top Hint You can set JPEG files as a thumbnails of video files by placing JPEG files in the corresponding video folders When you display the video list you can see the thumbnails small pictures to display on the menu for the video files on the player To display a thumbnail for a video file create a JPEG file horizontal 160 ve...

Page 30: ... the 2nd level will be recognized by PICTURE folder However beyond the 2nd level neither files nor folders will be recognized On the player Folders under the PICTURE folder is displayed in alphabetical order Files in the 1st level of the PICTURE folder are stored in the PICTURE folder Continued 1st 3rd 2nd 1 Data hierarchy of PICTURES is the same as the PICTURE folder Table of Contents Menu Index ...

Page 31: ...s The episode files on the 1st level will not be recognized On the 2nd level only files will be recognized and any folders will not be recognized from the level Beyond the 2nd level neither files nor folders will be recognized On the player Folders under the PODCASTS folder are displayed in alphabetical order Files in the channel folders are displayed in alphabetical order 1st 3rd 2nd Table of Con...

Page 32: ...ton until the Home menu appears Press the button to select Music Library and then press the button to confirm The Music Library screen appears Press the button to select All Songs and then press the button to confirm The song list appears Press the button to select a song and then press the button to confirm The song you selected starts to play back and the playback of songs continues in order Con...

Page 33: ... to select an album and then press the button to confirm The song list for the selected album appears Press the button to select a song and then press the button to confirm The song you selected starts to play back and the playback of songs continues in order Hints You can play all songs of a list item by selecting the item from the list and pressing and holding the button in step You can change t...

Page 34: ... album list for the selected artist appears Press the button to select an album and then press the button to confirm The song list for the selected album appears Press the button to select a song and then press the button to confirm The song you selected starts to play back and the playback of songs continues in order Hints You can play all songs of a list item by selecting the item from the list ...

Page 35: ... select an artist and then press the button to confirm The album list for the selected artist appears Press the button to select an album and then press the button to confirm The song list for the selected album appears Press the button to select a song and then press the button to confirm The song you selected starts to play back and the playback of songs continues in order Hints You can play all...

Page 36: ...he button to confirm The artist list for the selected release year appears Press the button to select an artist and then press the button to confirm The song list for the artist selected from the release year appears Press the button to select a song and then press the button to confirm The song you selected starts to play back and the playback of songs continues in order Hints You can play all so...

Page 37: ...utton to select Folder and then press the button to confirm The folder list or the song appears Press the button to select a folder or song and then press the button to confirm When you select a folder the song or folder list s appear When you select a song the playback screen appears then the song playback starts Repeat step if necessary until the desired song appears The song you selected starts...

Page 38: ...n press the button to confirm The list of categories you can search appears Press the button to select a category and then press the button to confirm A screen appears that enables you to select a character Press the button to select an initial character and then press the button to confirm When the search finishes the results are displayed When you select Artist or Album you can narrow the search...

Page 39: ...o select Music Library and then press the button to confirm The Music Library screen appears Press the button to select Playlists and then press the button to confirm The list of playlists appears Press the button to select a playlist and then press the button to confirm The song list appears Press the button to select a song and then press the button to confirm The song you selected starts to pla...

Page 40: ...screen of the currently playing song appears Press the button to display a cursor and select an item in which you want to search for songs and then press the button to confirm The following lists appear depending on the item you selected Artist The album list of the currently playing artist Album The song list of the currently playing album Genre An artist list in the same genre as the currently p...

Page 41: ...ng songs released in the same year in random order Time Machine Shuffle The player randomly selects a release year and plays all transferred songs of that year in random order Press and hold the BACK HOME button until the Home menu appears Press the button to select Intelligent Shuffle and then press the button to confirm The screen used to select a shuffle mode appears Press the button to select ...

Page 42: ...of a song by selecting it from the Music Library etc Changing the play mode Changing the playback range Notes While the animation that appears when the player is selecting a release year is displayed the controls of the player cannot be operated Songs with no release year data are not selected in Time Machine Shuffle play and are not played A shuffle play of all songs begins if none of the songs o...

Page 43: ...e button to confirm All songs are shuffled and playback starts Hints You can also select Intelligent Shuffle play from Music Library When you start Intelligent Shuffle play the play mode changes to Shuffle or Shuffle Repeat page 53 Even if you cancel Intelligent Shuffle the Shuffle or Shuffle Repeat setting for the play mode is kept Intelligent Shuffle play is automatically canceled by any of the ...

Page 44: ...d with software such as Content Transfer or Media Manager for WALKMAN For details about analysis of the software refer to Help of each software You can also analyze songs using the player page 47 Playing songs using SensMe Channels You can play songs to fit your mood activity or time of day etc by selecting channels SensMe Channels 5 way button BACK HOME button Press and hold the BACK HOME button ...

Page 45: ...ic and rhythmical section Notes Depending on the file format certain songs cannot be analyzed by 12 TONE ANALYSIS of Media Manager for WALKMAN or Content Transfer For those files perform Updating Channels from the option menu page 47 Only songs in Music Library are played You cannot play back podcast episodes using SensMe Channels According to the analysis a song may be selected by several channel...

Page 46: ...e music such as jazz bossa nova Acoustic Plays songs featured with acoustic instruments Electronic Plays songs featured with electronic instrumentals Classical Plays classical music Extreme Plays loud and powerful songs Notes The channels that do not have a song are not displayed in the list To listen to Morning Daytime Evening Night and Midnight according to the timetable Set Date Time page 117 n...

Page 47: ...arts analyzing songs When the analysis is finished the SensMe Channels screen appears To stop analyzing Press the BACK HOME button to stop analyzing The songs that had been analyzed until the point where you stopped analyzing are playable by SensMe Channels Notes If songs without analysis are transferred to the player There is an unanalyzed song Please select Updating Channels from Options menu ap...

Page 48: ... Songs from Music Library When you delete songs from Music Library use the software you used to transfer the songs or Windows Explorer For details about using the software see the Help of the software Table of Contents Menu Index ...

Page 49: ...c are available The option items shown on the option menu vary depending on the screen from which you display the option menu Option items appear on the list screen Option items Description reference page Now Playing Displays the Now Playing screen Detailed Information Displays the detailed information of a song such as playing time audio format bit rate and file name Play Plays back all songs of ...

Page 50: ... 117 1 Cover Art screen While the cover art screen is displayed you can move songs to the previous or the next one by pressing the button If the songs do not have cover art information the default picture of the player will be displayed The cover art only appears if the cover art information is included You can set cover art using the bundled Windows Media Player 11 or another transfer capable sof...

Page 51: ...Surround Customizes the VPT Surround settings page 62 Cover Art Displays a cover art page 50 Song Information Displays the detailed information of a song such as playing time audio format bit rate and file name page 50 Updating Channels Analyzes the sound pattern of the songs page 47 Clock Display Displays the current time page 117 Table of Contents Menu Index ...

Page 52: ...the button to select Music Settings and then press the button to confirm The list of Music Settings options appears Press the button to select Play Mode and then press the button to confirm The list of play modes appears Press the button to select a play mode page 53 and then press the button to confirm The list of Music Settings options reappears Hint You can also select the play mode from the No...

Page 53: ...playback range are played back in the song list order and the playback repeats Shuffle The songs within the playback range are played back in random order Shuffle Repeat The songs within the playback range are played back in random order and the playback repeats Repeat 1 Song The current song or the song selected from a song list is played back repeatedly Note When you start Intelligent Shuffle pl...

Page 54: ...ears Press the button to select the playback range and then press the button to confirm The player offers 2 types of playback range All Range Plays back all the songs in the Music Library When you want to play back albums in the Music Library in the song list order select this Selected Range appears on the display and plays back songs only in the lists from which the playback starts album list art...

Page 55: ...he button to select Settings and then press the button to confirm Press the button to select Music Settings and then press the button to confirm The list of Music Settings options appears Press the button to select New Song Pop Up and then press the button to confirm Press the button to select On and then press the button to confirm The Now Playing screen appears whenever a song switches to anothe...

Page 56: ...e cover art is not displayed depending on its file format Press and hold the BACK HOME button until the Home menu appears Press the button to select Settings and then press the button to confirm Press the button to select Music Settings and then press the button to confirm The list of Music Settings options appears Press the button to select Album Display Format and then press the button to confir...

Page 57: ...57 57 Hint You can also select the album display format on the album list screen Press the OPTION PWR OFF button on the album list screen and select Album Display Format from the option menu Table of Contents Menu Index ...

Page 58: ... the button to select Button Setting and then press the button to confirm Press the button and select the desired setting and then press the button to confirm Direct Search By pressing the button you can select an information of the song using the displayed cursor and search for songs from the selected information page 40 Default setting Folder By pressing the button the player skips folders Hints...

Page 59: ...gs and then press the button to confirm Press the button to select Music Settings and then press the button to confirm The list of Music Settings options appears Press the button to select Equalizer and then press the button to confirm The list of equalizer settings appears Press the button to select the desired setting and then press the button to confirm The selected sound setting is applied and...

Page 60: ...is not applied while playing a video or you are using the FM radio List of equalizer settings The sound settings appear on the screen as the letters in parentheses Setting icon Description None Sound quality setting is not activated Default setting Heavy Emphasizes high and low ranges for a powerful sound Pop Stresses the middle range audio ideal for vocals Jazz Emphasizes high and low ranges for ...

Page 61: ...ton to select Edit displayed under Custom 1 or Custom 2 to change a value and then press the button to confirm The setting screen appears Press the button to select a cursor for the CLEAR BASS or the frequency range setting and press the button to adjust the setting level The CLEAR BASS can be set to any of 4 sound levels and the 5 frequency ranges can be set to any of 7 sound levels Press the but...

Page 62: ... Press the button to select Settings and then press the button to confirm Press the button to select Music Settings and then press the button to confirm The list of Music Settings options appears Press the button to select VPT Surround and then press the button to confirm The list of VPT Surround settings appears Press the button to select the desired VPT Surround setting page 63 and then press th...

Page 63: ...entheses The sound becomes more vibrant in the progression from Studio Live Club to Arena Setting icon Description None VPT Surround setting is not activated Default setting Studio Creates the sound of a recording studio Live Creates the sound of a concert hall Club Creates the sound of a club Arena Creates the sound of an arena Matrix Reproduces an additional surround effect and creates a natural...

Page 64: ...ss the button to select Clear Stereo and then press the button to confirm Press the button to select the desired setting and then press the button to confirm On Activates the Clear Stereo function when you use the supplied headphones Off Disables the Clear Stereo function and plays back normal sound Default setting Notes The Clear Stereo setting is not applied while playing a video or you are usin...

Page 65: ...tton to confirm The list of Music Settings options appears Press the button to select DSEE Sound Enhance and then press the button to confirm Press the button to select the desired setting and then press the button to confirm On The DSEE 1 Sound Enhancer function is activated and plays back naturally extended sound that is close to the original sound Off Plays back normal sound Default setting 1 D...

Page 66: ...programs The DSEE Sound Enhancer function is not effective for songs with a file format that is not compressed or songs that are of a high bit rate with no treble loss In the case of songs of very low bit rate the DSEE Sound Enhancer function will not be effective Table of Contents Menu Index ...

Page 67: ...t Settings and then press the button to confirm Press the button to select Music Settings and then press the button to confirm The list of Music Settings options appears Press the button to select Dynamic Normalizer and then press the button to confirm Press the button to select the desired setting and then press the button to confirm On Minimizes the difference of the volume level between songs O...

Page 68: ...e Video List Display Format page 76 A video that has never been played back on the player appears with icon in the video list Set Continuous Playback to On when you want to play back all video files page 75 When Display is set to On page 72 the detailed information such as the video title its playback icon and the elapsed playing time etc appears while the video is playing The information disappea...

Page 69: ... the video is paused Go forward quickly Forward speed changes through 3 levels by repeatedly pressing the button 10 30 100 Press the button to exit the operation Go backward quickly Backward speed changes through 3 levels by repeatedly pressing the button 10 30 100 Press the button to exit the operation 1 Activates when Continuous Playback is set to On page 75 2 When Continuous Playback is set to ...

Page 70: ...ss and hold the BACK HOME button until the Home menu appears Press the button to select Settings and then press the button to confirm Press the button to select Video Settings and then press the button to confirm The list of Video Settings options appears Press the button to select Video Orientation and then press the button to confirm Continued Table of Contents Menu Index ...

Page 71: ...16 9 source Horizontal 4 3 source 16 9 source Hints The video orientation can be set on the Now Playing screen of the video Press the OPTION PWR OFF button and select Video Orientation from the option menu When Display is set to On page 72 the detailed information such as the video title its playback icon and elapsed playing time etc appears The information disappears if this setting is set to Off...

Page 72: ...o Settings options appears Press the button to select Display and then press the button to confirm Press the button to select the desired setting and then press the button to confirm On Displays the video title playback status or the elapsed time etc Off Hides the detailed information of the currently playing video and displays it only when you operate the player Default setting Hint The display s...

Page 73: ...K HOME button until the Home menu appears Press the button to select Settings and then press the button to confirm Press the button to select Video Settings and then press the button to confirm The list of Video Settings options appears Press the button to select Zoom Settings and then press the button to confirm Continued Table of Contents Menu Index ...

Page 74: ... aspect ratio When a 16 9 video image oblong is displayed it appears with the short side of the video image fully fit to the available display area with the right and left of the video image cut to fit Off The video image is not enlarged reduced and appears at the original resolution If video resolution is too large the left right top and bottom of the screen will be cut Auto 4 3 source 16 9 sourc...

Page 75: ...rs Press the button to select Continuous Playback and then press the button to confirm Press the button to select the desired setting and then press the button to confirm On Plays back all videos stored on the player Off Plays back one selected video Default setting Hint If you set Continuous Playback to Off the player remembers the position where each video was stopped the last time Therefore you...

Page 76: ...d then press the button to confirm Press the button to select the desired setting and then press the button to confirm Title Only Displays only video titles in the video list Title With Thumbnail Displays thumbnails video titles and the playing time Default setting Thumbnail Only Displays only thumbnails in the video list 1 Thumbnail refers to a reduced size image of one scene of a video Hints The...

Page 77: ...n to select Settings and then press the button to confirm Press the button to select Video Settings and then press the button to confirm The list of Video Settings options appears Press the button to select On Hold Display and then press the button to confirm Press the button to select the desired setting and then press the button to confirm Yes When the player is on hold the button controls are d...

Page 78: ...to confirm The video list appears Press the button to select the video to be deleted and then press the OPTION PWR OFF button The option menu appears Press the button to select Delete Video and then press the button to confirm Press the button to select Yes and then press the button to confirm The selected video will be deleted Hint You can delete videos from the Now Playing screen Press the OPTIO...

Page 79: ...deo list display format page 76 Delete Video Deletes the videos on the player page 78 Most Recent Video Starts playback of the video that was played most recently Go to the song playback screen The Now Playing screen of the last played song appears Option items appear on the Now Playing screen Option items Description reference page Play from beginning Finds the beginning of the video page 69 Zoom...

Page 80: ...d episode starts to be played back Hint If the channel includes episodes that have never been played the channel appears with icon in the channel list Also if the episode has never been played appears with the episode in the episode list Notes Podcast episodes cannot be stored in Music Library or Video Library They can be played from the Podcast Library menu The player cannot play back photo podca...

Page 81: ... to select the episode to be deleted and then press the OPTION PWR OFF button The option menu appears Press the button to select Delete This File and then press the button to confirm Press the button to select Yes and then press the button to confirm The selected episode will be deleted Hints You can also delete channels On the channel list press the button to select a channel press the OPTION PWR...

Page 82: ...nu Option items appear on the channel list screen Option items Description reference page Now Playing Displays the Now Playing screen Delete This Folder Deletes the channel on the player page 81 Option items appear on the episode list screen Option items Description reference page Now Playing Displays the Now Playing screen Detailed information Displays detailed information of the episode The disp...

Page 83: ...appear on the video episode Now Playing screen Option items Description reference page Play from beginning Finds the beginning of the video page 69 Zoom Settings Sets the zoom function page 73 Video Orientation Sets the video orientation page 70 Display Sets to display not display video information page 72 Detailed Information Displays file information such as file size resolution video audio comp...

Page 84: ...button until the Home menu appears Press the button to select Photo Library and then press the button to confirm The list of photo folders appears Press the button to select a folder and then press the button to confirm The photo list appears Press the button to select a photo and then press the button to confirm The selected photo is displayed Press the button to display the previous or next phot...

Page 85: ...Explorer drag and drop a new folder just under the PICTURES or PICTURE folder For details on data hierarchy see page 30 Notes Up to 1 000 photo folders can be displayed in the photo folder list And up to 10 000 photos can be displayed in the photo lists regardless of the number of the folders in which they are contained If the size of the photo is too large or the photo file is damaged appears and...

Page 86: ...ss and hold the BACK HOME button until the Home menu appears Press the button to select Settings and then press the button to confirm Press the button to select Photo Settings and then press the button to confirm The list of Photo Settings options appears Press the button to select Photo Orientation and then press the button to confirm Continued Table of Contents Menu Index ...

Page 87: ...ntal right or Horizontal left Displays at 320 240 pixels The operation of the 5 way button is switched according to the setting of Photo Orientation page 19 Vertical Horizontal Hint The photo orientation can be set on the Now Playing screen of the photo Press the OPTION PWR OFF button and select Photo Orientation from the option menu Table of Contents Menu Index ...

Page 88: ...to Settings options appears Press the button to select Display and then press the button to confirm Press the button to select the desired setting and then press the button to confirm On Displays the title of the current photo the shooting date playback status photo number etc Off Hides the information of the current photo Default setting Hint The display setting can be set on the Now Playing scre...

Page 89: ...tton to select a photo folder and then press and hold the button A slide show starts Hint You can start playback of a slide show by any of the following operations Press and hold the button in the photo list Press the button on the Now Playing screen of the photo Press the OPTION PWR OFF button on the photo folder list or a photo list and then select Begin slide show from the option menu Note The ...

Page 90: ... Repeat and then press the button to confirm Press the button to select the desired setting and then press the button to confirm On Displays photos in a photo folder continuously and repeatedly Off Displays photos in a photo folder continuously to the last photo then returns to the first photo and playback pauses Default setting Hint The play mode of a slide show can be set on the Now Playing scre...

Page 91: ...e list of Photo Settings options appears Press the button to select Slide Show Interval and then press the button to confirm Press the button to select the desired setting and then press the button to confirm Photos switch to the next photos at the selected interval from Short Normal default setting or Long Hint The slide show interval can be set on the Now Playing screen of the photo Press the OP...

Page 92: ...ars Press the button to select Photo List Format and then press the button to confirm Press the button to select the desired setting and then press the button to confirm Title Only Displays only a photo title in the photo list Title With Thumbnail Displays a photo title with a thumbnail image in the photo list Thumbnail Only Displays only thumbnails in the photo list Default setting 1 Thumbnail re...

Page 93: ...the photos from Photo Library use Media Manager for WALKMAN or Windows Explorer For details about using Media Manager for WALKMAN see its Help Note Media Manager for WALKMAN cannot delete photos whose name has been changed using Windows Explorer Table of Contents Menu Index ...

Page 94: ...o list display format page 92 Most Recent Photo Starts playback of the photo that was played most recently Go to the song playback screen The Now Playing screen of the last played song appears Option items appear on the Now Playing screen Option items Description reference page Photo Orientation Sets the photo orientation page 86 Display Sets to display not display photo information page 88 Detail...

Page 95: ...ACK HOME button OPTION PWR OFF button 1 Switching to the FM radio Press and hold the BACK HOME button until the Home menu appears Press the button to select FM Radio and then press the button to confirm The FM radio screen appears Depending on the country region in which you have purchased the player the screen appearing is differed Frequency Preset number Continued Table of Contents Menu Index ...

Page 96: ... Auto Preset and then press the button to confirm Press the button to select Yes and then press the button to confirm The receivable broadcast stations will be preset in order from low to high frequency Auto Preset completed appears when presetting is completed then the first preset station is ready to be received Note The Auto Preset operation will delete already preset broadcast stations To stop...

Page 97: ...he button during FM reception the previous or next broadcast station is found If the broadcast station is receivable reception is accepted If interference is prevalent or sensitivity is too high change the reception setting page 100 to Low 2 This setting is canceled if no preset stations are entered Preset the receivable stations using Auto Preset page 96 Hint The headphone cord serves as an anten...

Page 98: ...p is preset and the assigned preset number appears below the frequency Hints You can preset up to 30 stations The FM Manual Preset can be set on the FM radio screen Press the OPTION PWR OFF button and select Save to Preset from the option menu Notes The preset numbers are stored in order from low to high frequency If the preset station you intend to store has already been preset Preset already exi...

Page 99: ... for the frequency by pressing the button during FM reception Press the OPTION PWR OFF button The option menu appears Press the button to select Delete from Preset and then press the button to confirm When the preset broadcast station is deleted a message appears Table of Contents Menu Index ...

Page 100: ...s and hold the BACK HOME button until the Home menu appears Press the button to select Settings and then press the button to confirm Press the button to select FM Radio Settings and then press the button to confirm The list of FM Radio Settings options appears Press the button to select Scan Sensitivity and then press the button to confirm Press the button to select Low and then press the button t...

Page 101: ...and hold the BACK HOME button until the Home menu appears Press the button to select Settings and then press the button to confirm Press the button to select FM Radio Settings and then press the button to confirm The list of FM Radio Settings options appears Press the button to select Mono Auto and then press the button to confirm Press the button to select Mono and then press the button to confir...

Page 102: ...Preset Presets the currently tuned in broadcast station page 98 Delete from Preset Deletes a broadcast station from the preset stations page 99 Auto Preset Presets the broadcast stations automatically page 96 Scan Sensitivity Adjusts the sensitivity of the radio reception page 100 Mono Auto Changes to either monaural or stereo page 101 Clock Display Displays the current time page 117 Go to the son...

Page 103: ...ction of the arrow In the Now Playing screen appears at the bottom right of the screen Hints is displayed on the Now Playing screen of the songs or videos or the FM radio screen When the Noise canceling function is active is displayed on the screen If the headphones other than those supplied are used the Noise Canceling function will not work even if the NOISE CANCELING switch is slid in the direc...

Page 104: ...This is operational noise of the Noise Canceling function and not a malfunction You may feel the Noise Canceling function does not work or noise is louder in a quiet environment or depending on the noise In this case release the Noise Canceling function Mobile phones may affect noise In that case keep the player away from mobile phones Make sure to remove the headphones from your ears before you c...

Page 105: ...io input cable To in flight entertainment systems Connect the supplied headphone to the player and slide the NOISE CANCELING switch in the direction of the arrow Connect the audio source device and the player using the supplied audio input cable Press and hold the BACK HOME button until the Home menu appears Press the button to select Settings and then press the button to confirm Press the button ...

Page 106: ...io input cable the Noise Canceling function enters Quiet Mode automatically You can use the Noise Canceling function for certain flight services by using the supplied plug adapter page 8 Notes While using External Input Mode or Quiet Mode the screensaver does not activate Instead the screen dims after a certain period has passed When you connect the player to an external audio device be sure to co...

Page 107: ...ist of NC Settings options appears Press the button to select NC Modes and then press the button to confirm Hint If the player is connected to external audio devices through the supplied audio input cable you can switch to External Input Mode by pressing the button Notes While using External Input Mode or Quiet Mode the screensaver does not activate Instead the screen dims after certain period pas...

Page 108: ...irection of the arrow The default setting center position of slider will obtain the maximum effect The effect of the Noise Canceling function is not enhanced even if the microphone sensitivity is maximized Press and hold the BACK HOME button until the Home menu appears Press the button to select Settings and then press the button to confirm Press the button to select NC Settings and then press the...

Page 109: ...hold the BACK HOME button until the Home menu appears Press the button to select Settings and then press the button to confirm Press the button to select Common Settings and then press the button to confirm The list of Common Settings options appears Press the button to select AVLS Volume Limit and then press the button to confirm Press the button to select On and then press the button to confirm ...

Page 110: ...ton to select Settings and then press the button to confirm Press the button to select Common Settings and then press the button to confirm The list of Common Settings options appears Press the button to select Beep Settings and then press the button to confirm Press the button to select Off and then press the button to confirm To set this item to on Select On in step and then press the button to ...

Page 111: ... list of Common Settings appears Press the button to select Screensaver and then press the button to confirm Press the button to select Type and then press the button to confirm The list of screensaver types appears Press the button to select a desired type and then press the button to confirm After confirming the screen in step appears again Clock When there is no operation for a while a clock ap...

Page 112: ...ress the button to select Screensaver and then press the button to confirm Press the button to select Screensaver Timing and then press the button to confirm The list of screensaver time appears Press the button to select a desired type and then press the button to confirm After confirming the screen in step appears again You can select the setting time as After 15 sec After 30 sec default setting...

Page 113: ...to confirm Press the button to select Common Settings and then press the button to confirm The list of Common Settings appears Press the button to select Theme Settings and then press the button to confirm The list of themes appears Press the button to select a desired theme and then press the button to confirm The color scheme is changed into the selected theme Hint If Wallpaper Settings is set t...

Page 114: ...gs appears Press the button to select Wallpaper Settings and then press the button to confirm The list of wallpapers appears Press the button to select a desired wallpaper and then press the button to confirm Besides the wallpapers you can select Match Theme User s Wallpaper or User s W p dark from the list Hints If Wallpaper Settings is set to Match Theme the wallpaper changes according to the se...

Page 115: ... set it to the wallpaper by selecting User s Wallpaper or User s W p dark in step While displaying the photo press the OPTION PWR OFF button to display the option menu and then select Use This Photo as the Wallpaper Note The wallpaper is not displayed in certain screens such as settings screen etc Table of Contents Menu Index ...

Page 116: ...lect Brightness and then press the button to confirm The brightness adjustment screen appears Press the button to select a level and then press the button to confirm 3 is set by default After you have adjusted the setting level be sure to press the button to confirm If you press the BACK HOME button before you confirm the setting will be canceled Hints You can adjust the brightness of the screen w...

Page 117: ...utton to confirm Press the button to select Common Settings and then press the button to confirm The list of Common Settings options appears Press the button to select Set Date Time and then press the button to confirm The screen used to set the date and time appears Press the button to select a year and then press the button to change the value As in step adjust the settings for month date hour a...

Page 118: ...g the Date Format Date Display Format page 119 or Setting the Time Format Time Display Format page 120 Notes If the battery power is used up for example when the player is not used for a long time your settings for date and time may be reset and will be displayed instead of the current date and time The clock may gain or lose up to 60 seconds per month In this case set the clock again To listen to...

Page 119: ...on to select Common Settings and then press the button to confirm The list of Common Settings options appears Press the button to select Date Display Format and then press the button to confirm The screen used to set the display format appears Press the button to select the desired setting and then press the button to confirm You can select the format from the following 3 types YYYY MM DD The date...

Page 120: ...ress the button to confirm Press the button to select Common Settings and then press the button to confirm The list of Common Settings options appears Press the button to select Time Display Format and then press the button to confirm The screen used to set the display format appears Press the button to select the desired setting and then press the button to confirm 12 hour Displays the current ti...

Page 121: ...ss the button to select Unit Information and then press the button to confirm The list of available player information options appears Available player information Option Description Model Displays the model name of the player Firmware Displays version information for the player s firmware Total songs Displays the total number of songs 1 stored on the player Total videos Displays the total number ...

Page 122: ... Press the button to select Common Settings and then press the button to confirm The list of Common Settings options appears Press the button to select Reset all Settings and then press the button to confirm The confirmation screen to set back to the factory settings appears Press the button to select Yes and then press the button to confirm Restored factory settings appears To cancel the operatio...

Page 123: ... Press the button to select Settings and then press the button to confirm Press the button to select Common Settings and then press the button to confirm The list of Common Settings options appears Press the button to select Format and then press the button to confirm All data including songs will be deleted Proceed appears Press the button to select Yes and then press the button to confirm All da...

Page 124: ...on by pressing the BACK HOME button in step or Notes Do not format the built in flash memory using software or Windows Explorer appears instead of Intelligent Shuffle if the player accesses certain online services available only in the U S A To restore Intelligent Shuffle format the memory of the player Table of Contents Menu Index ...

Page 125: ... button BACK HOME button Press and hold the BACK HOME button until the Home menu appears Press the button to select Settings and then press the button to confirm Press the button to select Language Settings and then press the button to confirm Press the button to select a language page 126 and then press the button to confirm Continued Table of Contents Menu Index ...

Page 126: ... Italiano Messages and menus are displayed in Italian Português Messages and menus are displayed in Portuguese Русский Messages and menus are displayed in Russian 1 Messages and menus are displayed in Japanese Messages and menus are displayed in Korean Messages and menus are displayed in Simplified Chinese Messages and menus are displayed in Traditional Chinese 1 Japanese display may not be availa...

Page 127: ... power by setting as follows Settings for screen Brightness page 116 1 Type of Screensaver page 111 Blank Screensaver Timing page 112 After 15 sec New Song Pop Up page 55 Deactivate Settings for sound effect Equalizer page 59 Deactivate VPT Surround page 62 DSEE Sound Enhancer page 65 Clear Stereo page 64 Dynamic Normalizer page 67 Noise Canceling function S736F S738F S739F only page 103 Turned of...

Page 128: ...or Standardization The AAC format produces the same sound quality as that of the MP3 format with a smaller file size Linear PCM Linear PCM is an audio recording format without digital compression You can listen to the sound with the same quality as CD music by recording with this format What is bit rate Bit rate refers to the amount of data used to store each second of audio Generally higher bit r...

Page 129: ...he MPEG 4 AVC standard of the ISO International Organization for Standardization and since AVC is standardized as the MPEG 4 Part 10 Advanced Video Coding it is commonly referred to as MPEG 4 AVC H 264 or H 264 AVC WMV WMV Windows Media Video is a video compression format developed by Microsoft Corporation It was built upon MPEG 4 achieves a high compression rate and supports copy control by DRM W...

Page 130: ...interact with the built in flash memory of the player Do not disconnect the supplied USB cable while Do not disconnect that appears during data transfer is displayed The data could be damaged Do not format the built in flash memory using Windows Explorer If you format the built in flash memory format it on the player page 123 You cannot change folder names or delete the MUSIC MP_ROOT VIDEO PICTURE...

Page 131: ...da http www sony ca ElectronicsSupport For customers in Europe http support sony europe com DNA For customers in Latin America http www sony latin com index crp For customers in other countries regions http www sony asia com support For customers who purchased the overseas models http www sony co jp overseas support Download the update program to your computer from the web site Connect the player ...

Page 132: ... deleted 4 Check the information about the issue in the Help of each software 5 Look for information about the issue on one of the support Web sites For customers in the USA visit http www sony com walkmansupport For customers in Canada visit http www sony ca ElectronicsSupport For customers in Europe visit http support sony europe com DNA For customers in Latin America visit http www sony latin c...

Page 133: ...yer Follow the instructions in the displayed message and transfer data from the computer Transferred files are not in a playable format For details see Supported file format of Specifications page 159 Songs or videos may not be played back depending on the file format page 159 Photos may not be displayed depending on the file size or the file format page 159 You are placing audio MP4 files in a vi...

Page 134: ... unnecessary data to increase free space on the player After dragging and dropping in Windows Explorer data hierarchy levels do not correspond to the player page 27 When All Songs or Album is selected all the songs will appear but some songs will not appear when Folder is selected The audio files are not in folders under the MUSIC folder Place them in folders under the MUSIC folder by dragging and...

Page 135: ... close any other applications to avoid data damage Transferred files are not in a playable format For details see Supported file format of Specifications page 159 Some songs may not be played back depending on certain file specifications Noise Canceling function NWZ S736F S738F S739F only is not effective The NOISE CANCELING switch is set to the off position Slide the NOISE CANCELING switch in the...

Page 136: ...ondensation Wait a few hours to let the player dry The remaining battery power is low or insufficient Charge the battery by connecting the player to a running computer page 23 If you charge the battery and nothing changes press the RESET button to reset the player page 132 While Connecting or Connected USB MTP is being displayed you cannot operate the player Disconnect the USB connection then oper...

Page 137: ...t be played back depending on the file format page 159 Photos may not be displayed depending on the file size or the file format page 159 The volume is not loud enough AVLS Volume Limit is enabled Disable AVLS Volume Limit page 109 There is no sound from the right channel of the headphones Or the right channel sound is heard from both sides of the headphones The headphone plug is not fully inserte...

Page 138: ...er art information is not included with the data The cover art only appears if the cover art information is included You can set cover art using the bundled Windows Media Player 11 or another transfer capable software for setting cover art For details on operation refer to the Help or maker of the software Some cover art is not displayed depending on its file format The player cannot format The re...

Page 139: ...ect the correct language from Language Settings page 125 and then transfer data to the player again The screen darkens while displaying a photo There was no operation attempted for the time selected in Screensaver Timing page 112 Press any button The screen turns off There was no operation attempted for more than 3 minutes while the player was in the pause mode Press any button There was no operat...

Page 140: ...ight protected contents are played When copyright protected contents are played battery life may be shorter The player cannot charge the battery The USB cable is not connected to a USB port on your computer properly Disconnect the USB cable and then reconnect it Use the supplied USB cable The battery is charged in an ambient temperature out of the range of 5 C 41 F to 35 C 95 F Charge the battery ...

Page 141: ...an the one used for transferring Disconnect the USB cable wait a few minutes and reconnect it If the problem persists disconnect the USB cable restart the computer and then reconnect the USB cable Connecting or Connected USB MTP may not appear on the player depending on the software environment that is running on your computer Activate Windows Media Player or Windows Explorer The player is not rec...

Page 142: ...sure to check whether your software or service corresponds to Windows Media Player 11 For details on usage or support on Windows Media Player visit the following web site http support microsoft com The USB cable is not connected to a USB port on your computer properly Disconnect the USB cable and then reconnect it There is not enough free space in the built in flash memory Transfer any unnecessary...

Page 143: ...y a small amount of data can be transferred to the player There is not enough free space in the built in flash memory Transfer any unnecessary data back to your computer to increase free space Data that cannot be played on the player is stored on the player If data other than song video or photo data is stored on the player less data can be transferred Transfer back data that cannot be played on t...

Page 144: ...layed back in the shuffle play FM Radio Symptom Cause Remedy You cannot hear an FM broadcast well The receiving frequency is not fully tuned in Select the frequency manually to improve reception using the button page 100 Reception is weak and sound quality is poor The radio signal is weak Listen to the FM broadcast near a window since the signal may be weak inside buildings or in vehicles The head...

Page 145: ...ging The player also may get warm when a large amount of data is transferred This behavior is normal and not cause for a concern Set the player aside for a while to allow it to cool down The screen turns on whenever songs change New Song Pop Up is set to On Set New Song Pop Up to Off page 55 The date and time have been reset If you left the player for a while with the battery used up the date and ...

Page 146: ...l number of playlists registered to the player exceeds 65 535 playlists exceeding this number cannot be displayed Decrease the number of playlists delete the playlists using the software you used to transfer the playlists Cannot play file format is not supported You are trying to play a file that cannot be played on the player You transferred an audio file to video folders by dragging and dropping...

Page 147: ...ge 23 Noise Canceling unavailable Unable to execute External Input Mode and Quiet Mode are unavailable because the usage environment does not meet the requirement for those functions Make sure that the NOISE CANCELING switch is set to the activated position page 103 and the supplied headphones are used Not enough free space in memory Delete files to ensure free space The player s available capacit...

Page 148: ...e device s memory was not formatted correctly Please re format using Settings menu The built in flash memory was not formatted properly The built in flash memory was formatted on a computer Select Settings Common Settings Format to format the built in flash memory again page 123 Unable to set photo as wallpaper The selected photo cannot be designated as the wallpaper Make sure whether the photo is...

Page 149: ...ng measures Reorient or relocate the receiving antenna Increase the separation between the equipment and receiver Connect the equipment into an outlet on a circuit different from that to which the receiver is connected Consult the dealer or an experienced radio TV technician for help You are cautioned that any changes or modifications not expressly approved in this manual could void your authority...

Page 150: ...potentially negative consequences for the environment and human health which could otherwise be caused by inappropriate waste handling of the battery The recycling of the materials will help to conserve natural resources In case of products that for safety performance or data integrity reasons require a permanent connection with an incorporated battery this battery should be replaced by qualified ...

Page 151: ... body or clothes wash it off immediately If you do not it may cause burns or injury If you get burned or injured by the liquid from the battery consult a doctor Do not pour water or put any foreign object in the player Doing so may cause fire or electric shock If this occurs turn off the player immediately disconnect the USB cable from the player and consult your nearest Sony dealer or Sony Servic...

Page 152: ...void warping the cabinet or causing the player to malfunction Make sure not to sit down with the player in your back pocket Make sure not to put the player into a bag with the headphones earphones cord wrapped around it and then subject the bag to strong impact The earbuds may deteriorate due to long term storage or use Do not expose the player to water The player is not waterproof Remember to fol...

Page 153: ...dvise against continuous loud and extended play If you experience a ringing in your ears reduce the volume or discontinue use Do not turn the volume up high all at once especially when using headphones Turn up the volume gradually so that loud sound will not hurt your ears Caring for others Keep the volume at a moderate level This will allow you to hear outside sounds and to be considerate to the ...

Page 154: ...sult On the LCD Do not apply strong force to the surface of the LCD This may cause a distortion in colors or brightness or cause a malfunction of the LCD If you use the player in a cold location images may appear with black bands around them This is not a malfunction of the player On cleaning Clean the player s case with a soft cloth such as a cleaning cloth for eyeglasses If the player s case bec...

Page 155: ...esignated Please note that due to continued efforts to improve quality the software specifications may be changed without notice Operation of this player with software other than that provided is not covered by the warranty The ability to display the languages on supplied software will depend on the installed OS on your computer For better results please ensure that the installed OS is compatible ...

Page 156: ...rly on device This is due to The capacity of the connected player The player is not functioning normally Content information is written in language or character that are not supported by the player About the customer support Web site If you have any questions or issues with this product or would like information on compatible items with this product visit the following web sites For customers in t...

Page 157: ...nes Corporation Apple Macintosh and iTunes are trademarks of Apple Inc registered in the U S and other countries QuickTime and the QuickTime logo are trademarks or registered trademarks of Apple Inc used under license there from Pentium is a trademark or a registered trademark of Intel Corporation This software is based in part on the work of the Independent JPEG Group THIS PRODUCT IS LICENSED UND...

Page 158: ...red trademarks of their respective holders In this manual TM and marks are not specified This product is protected by certain intellectual property rights of Microsoft Corporation Use or distribution of such technology outside of this product is prohibited without a license from Microsoft or an authorized Microsoft subsidiary Content providers are using the digital rights management technology for...

Page 159: ...rate 1 411 kbps Sampling frequency 2 44 1 kHz Video Includes podcasts 1 Video Formats Codec Frame rate Max 30 fps Resolution Max QVGA 320 240 AVC H 264 AVC Media File format MP4 file format Memory Stick video format File extension mp4 m4v Profile Baseline Profile Level Max 1 3 Bit rate Max 768 kbps MPEG 4 Media File format MP4 file format Memory Stick video format File extension mp4 m4v Profile Si...

Page 160: ...otos in the MP3 format Other playable audio file format song numbers and times may differ from MP3 format NWZ S636F S736F NWZ S638F S738F Bit rate Songs Time Songs Time 48 kbps 2 450 163 hr 20 min 5 050 336 hr 40 min 64 kbps 1 800 120 hr 00 min 3 750 250 hr 00 min 128 kbps 915 61 hr 00 min 1 850 123 hr 20 min 256 kbps 455 30 hr 20 min 950 63 hr 20 min 320 kbps 365 24 hr 20 min 760 50 hr 40 min NWZ...

Page 161: ...y vary A portion of the memory is used for data management functions Output headphones Frequency response 20 to 20 000 Hz when playing data file single signal measurement FM radio FM Frequency range 87 5 to 108 0 MHz IF FM 128 kHz Interface Headphone Stereo mini jack WM PORT multiple connecting terminal 22 pins Hi Speed USB USB 2 0 compliant Operating temperature 5 C to 35 C 41 F to 95 F Power sou...

Page 162: ...k at MP3 128 kbps Approximately 40 hours Approximately 30 hours Playback at WMA 128 kbps Approximately 40 hours Approximately 30 hours Playback at AAC LC 128 kbps Approximately 38 hours Approximately 29 hours Playback at Linear PCM 1 411 kbps Approximately 43 hours Approximately 32 hours Video Playback at MPEG 4 384 kbps Approximately 10 hours Approximately 9 0 hours Playback at AVC 384 kbps Appro...

Page 163: ...lities using WDM To create original CDs a CD R RW drive is required Sound board USB port Hi Speed USB is recommended Microsoft NET Framework 2 0 or 3 0 QuickTime 7 3 Internet Explorer 6 0 or 7 0 Windows Media Player 10 or 11 Windows Media Player 11 recommended Some computers that already have Windows Media Player 10 installed may encounter file limitation AAC video files etc that can be transferre...

Page 164: ... Information 121 Initialize Format 123 Intelligent Shuffle 6 41 Interval 91 J Jazz 60 JPEG 129 160 Index Continued Symbols 5 way button 11 13 Repeat 53 Shuffle 53 Shuffle Repeat 53 Repeat 1 song 53 Button Setting 58 Heavy 60 Pop 60 Jazz 60 Unique 60 Custom 1 60 Custom 2 60 Studio 63 Live 63 Club 63 Arena 63 Matrix 63 Karaoke 63 A AAC 128 AAC LC 159 Accessories 8 Adobe Reader 3 Album Display Format...

Page 165: ...yback Range 54 Playlists 39 Play Mode 52 53 Podcast 80 Pop 60 Power 12 127 140 Q Quiet Mode 107 R Recharging 23 Release Year 36 Remaining battery 23 Repeat 53 RESET the player 132 Reset all Settings 122 RESET button 12 S Scan Sensitivity 100 Screensaver 111 Search for songs 32 album 33 artist 34 genre 35 initial letter 38 playlists 39 release year 36 song name 32 Selected Range 54 SensMe Channels ...

Page 166: ...21 Troubleshooting 132 Turning off the player manually 127 U Unique 60 Updating Channels 47 Upgrading 131 USB cable 8 V Video format 129 Video Library 6 68 Video List Display Format 76 Video Orientation 70 VOL button 11 Volume 67 VPT Surround 62 W Wallpaper Settings 114 Windows Explorer 130 Windows Media Player 9 WM PORT 11 121 WMA 128 159 WMV 129 Z Zoom 73 Table of Contents Menu Index ...

Reviews: