background image

15

Selecting the Picture 
Viewing Mode

You can select the picture viewing mode that best suits the 
type of video source or room conditions.
You can save and use different preset modes for 2D/3D 
respectively.

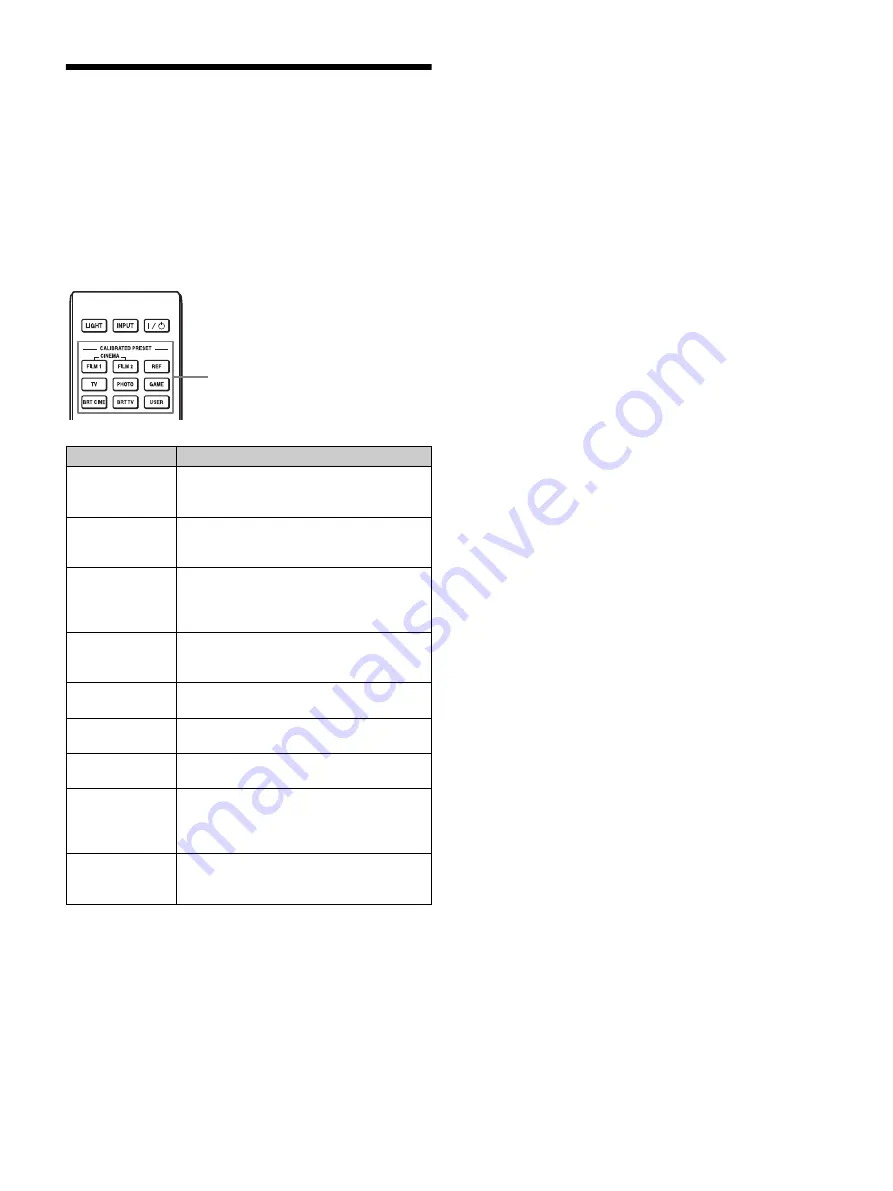
Press one of the CALIBRATED PRESET buttons.

Setting items

Description

CINEMA FILM 1 Picture quality suited to reproducing the 

highly dynamic and clear images typical of 
master positive film.

CINEMA FILM 2 Picture quality suited to reproducing the rich 

tone and color typical of a movie theater, 
based on the “CINEMA FILM 1.”

REF

A picture quality setup suitable for when you 
want to reproduce faithfully the original 
image quality, or for enjoying image quality, 
without any adjustment.

TV

Picture quality suited for watching TV 
programs, sports, concerts, and other video 
images.

PHOTO

Ideal for projecting still images taken with a 
digital camera.

GAME

Picture quality suited to gaming, with well-
modulated colors and fast response.

BRT CINE

Picture quality suited for watching movies in 
a bright environment, such as a living room.

BRT TV

Picture quality suited for watching TV 
programs, sports, concerts, and other video 
images in a bright environment, such as a 
living room.

USER

Adjusts the picture quality to suit your taste 
then saves the setting. The factory default 
setting is the same as “REF.”

CALIBRATED PRESET buttons

Summary of Contents for VPL-VW760ES

Page 1: ... Instructions Before operating the unit please read this manual supplied Quick Reference Manual and Safety Regulations thoroughly and retain them for future reference VPL VW760ES VPL VW885ES 4 732 479 11 1 2017 Sony Corporation ...

Page 2: ...y Settings Lock 28 Installation Menu 29 Information Menu 31 About the Preset Memory 31 Using Network Features Displaying the Control Window of the Unit with a Web Browser 32 Operating the Control Window 33 Switching the Page 33 Setting the Access Limitation 33 Confirming the Information Regarding the Unit 33 Error Handling Troubleshooting 34 About Indicators 36 Message Lists 37 Others Updating the...

Page 3: ... d HDMI 1 HDMI 2 connector page 10 e TRIGGER 1 TRIGGER 2 connector page 29 f IR IN connector Inputs the signals to control the projector g REMOTE connector Connects to a computer etc for remote control h USB connector page 38 Others i Ventilation holes intake j Remote control detector page 6 Location of Controls Connectors ...

Page 4: ...dby button page 7 b INPUT button page 11 c MENU button page 16 d M m arrow ENTER button page 16 e LENS button page 6 Others f Remote control detector page 6 g Ventilation holes exhaust h AC IN socket page 7 i Projector suspension support attaching hole page 52 j Front feet adjustable page 8 k Ventilation holes intake Control panel ...

Page 5: ...T button page 17 i M m arrow enter button page 16 j MENU button page 16 k MOTIONFLOW button page 19 l ASPECT button page 13 m COLOR SPACE button page 21 n COLOR TEMP button page 19 o GAMMA CORRECTION button page 20 p 3D button page 11 q REALITY CREATION button page 18 r ADVANCED IRIS button This function is not provided in this projector s CONTRAST ENHANCER button page 19 t SHARPNESS button page 2...

Page 6: ...nifications This is not a malfunction of the unit Adjusting the Picture Position Project an image on the screen and then adjust the picture position Tips The 1 On Standby INPUT and MENU buttons on the side panel of the unit have the same functions as those on the remote control The M m arrow ENTER button of the unit has the same function as the M m arrow enter button on the remote control The LENS...

Page 7: ...ge 27 Adjust the lens by using buttons on the remote control or the control panel of the unit Never make adjustments by directly turning the lens with your hands which may cause damage or malfunction to the unit 4 Adjust the picture size Press the LENS ADJUSTMENT ZOOM button to display the Lens Zoom adjustment window test pattern Then adjust the size of the picture by pressing the M m button To ma...

Page 8: ...tagon area illustrated below For details see Projection Distance and Lens Shift Range page 47 Range of movement of the projected picture To adjust the tilt of the installation surface If the unit is installed on an uneven surface use the front feet adjustable to keep the unit level If the unit is tilted up or down the projected image may be trapezoidal Be careful not to catch your finger when turn...

Page 9: ...9 Lens adjustment window test pattern 1 78 1 16 9 2 35 1 1 85 1 1 33 1 4 3 The dashed lines show the screen sizes of each aspect ratio ...

Page 10: ...ly When connecting an HDMI cable to the unit make sure the V mark on the upper part of the HDMI input of the unit and the v mark on the connector of the cable are faced at each other If the picture from equipment connected to the unit with an HDMI cable is not correct check the settings of the connected equipment If you set your computer such as a notebook type to output the signal to both compute...

Page 11: ...ages such as from 3D games and 3D Blu ray Discs using the optional Active 3D Glasses TDG BT500A 1 Turn on the HDMI equipment for 3D compatibility connected to the unit then play the 3D content For details on how to play 3D content refer to the operating instructions for the connected equipment 2 Turn on the unit and project the 3D video image For details on how to project the image see Projecting ...

Page 12: ...ommunication range the 3D glasses may not be able to display the images properly Also the distance varies depending on the environment of the room and installation environment of the unit Top or side view Using the Picture Position You can store up to five combinations of lens settings focus picture size picture position aspect ratio and blanking These settings can be recalled In the factory prese...

Page 13: ...angle of two or more aspects using lens zoom install the unit within the specified parameters referring to Projection distance page 48 With some setting positions the range of lens shift may be restricted even though the unit is installed within the specified parameters Selecting the Aspect Ratio According to the Video Signal You can select an aspect ratio best suited for the video signal received...

Page 14: ...original image Note that if the unit is used for profit or for public viewing modifying the original picture by switching the aspect may constitute an infringement of the rights of authors or producers which are legally protected Note Original image Recommended setting and resultant images 1 78 1 16 9 1 33 1 4 3 1 33 1 4 3 with side panels Normal 2 35 1 V Stretch When using an anamorphic lens 16 9...

Page 15: ...itable for when you want to reproduce faithfully the original image quality or for enjoying image quality without any adjustment TV Picture quality suited for watching TV programs sports concerts and other video images PHOTO Ideal for projecting still images taken with a digital camera GAME Picture quality suited to gaming with well modulated colors and fast response BRT CINE Picture quality suite...

Page 16: ... appears 1 Press MENU The menu window appears 2 Press M m to select a menu item and press or The items that can be set or adjusted with the selected menu appear The item presently selected is shown in white 3 Press M m to select an item you want to set or adjust and press or The setting items are displayed in a pop up menu in a setting menu in an adjustment menu or in the next menu window Pop up m...

Page 17: ...ect Reset from the Picture menu When the screen display appears select Yes using and press All of the following settings are reset to its factory preset value Reality Creation Cinema Black Pro Motionflow Contrast Brightness Color Hue Color Temp Sharpness and Expert Setting on the Picture menu To reset the items that have been adjusted Select an item in the menu screen and display the pop up menu t...

Page 18: ...ght Cinema Picture quality suited for watching movies in a bright environment such as a living room Bright TV Picture quality suited for watching TV programs sports concerts and other video images in a bright environment such as a living room User You can adjust the picture quality to suit your taste and save the setting The factory default setting is the same as Reference Tip Any adjustments to p...

Page 19: ... is available when a signal with a resolution of 4096 2160 is input Contrast CONTRAST Adjusts the contrast Higher values increase the sharpness in images while lower values decrease the sharpness You can make adjustments by pressing the CONTRAST button on the remote control When the HDR signal is input with HDR10 HDR Reference HLG or Auto set for HDR Contrast HDR appears instead of Contrast Bright...

Page 20: ...t parts of images High Middle Low You can adjust the smooth gradation effect Off The smooth gradation function is not applied Tip This item is not available for 3D signals Film Mode According to the film source you have selected make a setting for playback Auto Suitable for reproducing the original picture movement Normally set this to Auto Off Plays back the picture in progressive format without ...

Page 21: ...pear too bright or too dark When setting HDR10 or HDR Reference compare the picture quality in both modes and select the one that optimally displays the average brightness and tone of the bright parts Color Space COLOR SPACE Converts the color space BT 709 An ITU R BT 709 color space which is used for high definition television broadcast or Blu ray Disc The color space is equivalent to sRGB BT 202...

Page 22: ...kes a few minutes for Pre Check or Adjust to complete When Pre Check or Adjust starts the screen position may shift as the lens returns to its factory default position After completion the screen returns to its previous position automatically If the environment such as the brightness of the room changes while performing Pre Check or Adjust measurement may be affected If the Pre Check or Adjust fun...

Page 23: ... 9 subtended screen angle with the Picture Position function make sure that the installation position is suitable page 12 The Picture Position function is not guaranteed to reproduce the lens settings precisely Aspect ASPECT You can set the aspect ratio of the picture to be displayed for the current input signal page 13 1 85 1 Zoom A 1 85 1 aspect ratio picture is displayed in its original aspect ...

Page 24: ...sing the M m button Adjust the amount of blanking using the button Off Turns off the Blanking function Tips Depending on the aspect ratio setting right left blanking may not be available Blanking setting is stored for each of the five Picture Positions Adjust the blanking after selecting the Picture Position Final adjusted values are stored automatically Setting items Description ...

Page 25: ...rt settings On You can turn on the power from a PC or a terminal which is connected to a network Off Turns off the Remote Start function Tips To use the function the unit should be connected to the network in advance page 30 To turn on the power with the Remote Start function a special command should be sent from a PC or a terminal For details consult with qualified Sony personnel When the Remote ...

Page 26: ...ecommended and the video source The menu display has a ghost while a 3D video image is displayed and is best viewed with the 3D glasses 3D Depth Adjust For adjusting the depth of the 3D video images on the projection surface The setting can be made only when a 3D Format other than Simulated 3D is selected We recommend that 3D Depth Adjust be set to 0 The 3D video images may be difficult to perceiv...

Page 27: ...r Tip While the test pattern is displayed it is only displayed in green to allow you to adjust the focus easily Settings Lock Locks menu item settings to prevent operational error page 28 Off Cancels the Settings Lock Level A Group 1 items below are not displayed on the menu and are not available Level B Group 1 and Group 2 items below are not displayed on the menus and are not available Setting i...

Page 28: ...ation Film Mode Gamma Correction Color Correction Clear White x v Color HDR Color Space Input Lag Reduction Advanced Picture menu Auto Calibration Setup menu Status Language Menu Position High Altitude Mode Remote Start Network Management Power Saving Function menu Dynamic Range Test Pattern Installation menu Image Flip Lens Control Anamorphic Lens Trigger Select IR Receiver Panel Alignment Networ...

Page 29: ...ch page 23 and outputs a 12 V signal from the TRIGGER 1 or TRIGGER 2 connector 2 35 1 Zoom Works with the Aspect setting s 2 35 1 Zoom page 23 and outputs a 12 V signal from the TRIGGER 1 or TRIGGER 2 connector IR Receiver Selects the remote control detectors IR Receiver on the front and rear of the unit Front Rear Activates both the front and rear detectors Front Activates the front detector only...

Page 30: ...Auto DHCP The IP address is assigned automatically from the DHCP server such as a router Manual Specifies the IP address manually When Manual is selected for IP Address Setup input IP Address Subnet Mask and Default Gateway Select each item with the M m button then press button Select the frame to input with the button and input the value with the M m button When all items are entered select Apply...

Page 31: ...n the computer input signal parts of projection image may be hidden or displayed incorrectly Items Description Model Name Displays the model name Serial No Displays the serial number Signal type Displays the resolution of the input signal which you are selecting When input signals with 3D information are input the type of input signals and the 3D format are displayed Color Format Displays the colo...

Page 32: ... 11 The menu displays only English If the browser of your computer is set to Use a proxy server when you have access to the unit from your computer click the check mark to set accessing without using a proxy server AMX DDDP is not compatible with IPv6 These network functions are available when the unit is turned on Displaying the Control Window of the Unit with a Web Browser 1 Connect the LAN cabl...

Page 33: ...sword The name of the administrator is preset to root The password can be changed in the Password page in the Setup page When you change the password input a new password after deleting the password that was set The password of the administrator and user should be 8 to 16 characters that includes both alphabet and numeric characters Alphabet is case sensitive The default password Projector cannot ...

Page 34: ...s too bright or too dark This symptom may occur when a signal level other than those of HDMI standard is input Switch the output level of the connected equipment or switch the Dynamic Range on the Function menu of the unit 26 The picture is too dark Adjust Contrast or Brightness on the Picture menu properly 19 The picture is not clear Adjust the focus 7 If the lens is clouded with dew condensation...

Page 35: ...selector AV amplifier external equipment If the 3D signal is not input confirm the specifications and or settings of the AV selector AV amplifier external equipment When the viewing position is too far from the unit the 3D glasses may not be able to display the images properly 12 The screen size is not appropriate Set the zooming magnification to low or watch the image from farther away from the s...

Page 36: ...abnormality of the light source and light source power Turn off then turn on the power after a while If the symptom persists consult qualified Sony personnel Six times The unit detects a drop impact If there is abnormality on the unit consult with qualified Sony personnel If there are no abnormalities on the unit disconnect the AC power cord and check that the ON STANDBY indicator turns off then c...

Page 37: ... 4 When using the unit at high altitude set High Altitude Mode to On When temperature inside the unit remains high High Altitude Mode is switched to On in 1 minute then the fan speed increases 25 Power Saving Mode is set Projector will automatically enter Standby Mode in 1 minute Power Saving is set to Standby If no signal is input the power turns off after 1 minute and the projector goes into sta...

Page 38: ...k from the original images because this function converts the video images Note that if the unit is used for profit or for public viewing displaying 2D video images as 3D video images by converting to the simulated 3D may constitute an infringement of the rights of authors or producers which are legally protected NOTICES AND LICENSES FOR SOFTWARE USED IN THIS PRODUCT Refer to Software License Info...

Page 39: ...I connectors HDCP 2 2 2 TRIGGER connectors 2 mini jack DC 12 V Max 100 mA REMOTE connector RS 232C D sub 9 pin male LAN connector RJ45 10BASE T 100BASE TX IR IN connectors Minijack USB connector Type A DC 5 V Max 500 mA Outside dimensions w h d 560 mm 223 mm 496 mm 22 1 16 inches 8 25 32 inches 19 17 32 inches without protrusions Mass Approx 20 kg 44 lb Power requirements AC 100 V to 240 V 4 3 A t...

Page 40: ...g 720 50p 1280 720p 75 000 50 000 20 1080 24p Frame packing 1080 24p 1920 1080p 53 946 23 976 26 640 480 VESA 60 31 469 59 940 H Neg V Neg 32 800 600 VESA 60 37 879 60 317 H Pos V Pos 37 1024 768 VESA 60 48 363 60 004 H Neg V Neg 45 1280 960 VESA 60 60 000 60 000 H Pos V Pos 47 1280 1024 VESA 60 63 974 60 013 H Pos V Pos 50 1400 1050 SXGA 65 317 59 978 H Neg V Pos 55 1280 768 1280 768 60 47 776 59...

Page 41: ...7 50 55 Input Signals and Adjustment Setting Items Item Input signal Component signal Video GBR signal Computer signal Reality Creation z z Laser Light Setting z z z Contrast Enhancer z z Motionflow 1 z z Contrast z z z Brightness z z z Color z z Hue z z Color Temp z z z Sharpness z z NR z excluding preset memory numbers 18 to 20 71 and 72 z excluding preset memory numbers 18 to 20 71 and 72 MPEG ...

Page 42: ...tems z Adjustable can be set Not adjustable cannot be set 1 Dynamic Control cannot be selected 2 For further details refer to the tables in Aspect Mode page 43 Item Input signal Component signal Video GBR signal Computer signal Aspect 1 z z Note Compatible 3D Signals Resolution 3D signal format 720 60p 720 50p Side by Side format Over Under format Frame packing 1080 60i 1080 50i Side by Side forma...

Page 43: ... page 43 Selectable items vary depending on the type of input signal or 3D format For details see the tables below Items that cannot be selected are not displayed in the menu 2D 1 Not displayed in the menu as fixed at Normal Item 3D signals Over Under Side by Side Simulated 3D Reality Creation z z z Laser Light Setting 1 z z z Motionflow z z z NR z MPEG NR z Smooth Gradation z Film Mode 2 z z x v ...

Page 44: ...z z Normal z z z z V Stretch z z z z Squeeze z z z z Stretch Motionflow Acceptable signals 1920 1080 1280 720 720 480 720 576 3840 2160 4096 2160 Others Preset memory number page 40 5 to 8 10 to 14 74 75 93 to 95 76 to 79 96 26 32 37 45 47 50 55 Impulse z z z Combination z z Smooth High z z Smooth Low z z True Cinema z z Acceptable signals 1920 1080 1280 720 3D format Frame packing Over Under Side...

Page 45: ...HDMI 1 3D 7 8 10 to 14 18 to 20 71 72 HDMI 2 3D Item Storage conditions Calib Preset For each input connector Reset For each input connector and Calib Preset Reality Creation Laser Light Setting Contrast Enhancer Motionflow Contrast Brightness Color Hue Color Temp D93 D55 Custom 1 5 Gain R For each Color Temp D93 D55 and Custom 1 5 Gain G Gain B Bias R Bias G Bias B Sharpness For each input connec...

Page 46: ...each Color Space Green Blue Cyan Red Magenta Green Input Lag Reduction For each input connector and Calib Preset Item Storage conditions Aspect For Picture Position 1 85 1 2 35 1 or Custom 1 3 Blanking Item Storage conditions ...

Page 47: ...cross at right angles is aligned with the center of the projected image and full width or full height of the projected image is regarded as 100 VS Vertical lens shift range up VS Vertical lens shift range down HS Horizontal lens shift range right HS Horizontal lens shift range left Projection distance L Projected image Front of the lens Lens shift range Projected image Center of the lens 50 50 Cen...

Page 48: ...3 m 1 80 0 95 71 37 2 32 4 77 91 187 100 2 54 m 2 25 1 18 88 47 2 90 5 97 115 235 120 3 05 m 2 70 1 42 106 56 3 49 7 18 138 282 150 3 81 m 3 37 1 78 133 70 4 38 8 98 173 353 200 5 08 m 4 49 2 37 177 93 5 85 11 99 231 472 Projection distance L minimal length Projection distance L maximal length L 0 029432 D 0 0434 L 1 158727 D 1 7084 L 0 060197 D 0 0420 L 2 369978 D 1 6545 1 90 1 85 80 31 31 VS 85 ...

Page 49: ...h Height 80 2 03 m 1 77 1 00 70 39 2 44 5 01 96 197 100 2 54 m 2 21 1 25 87 49 3 05 6 28 121 247 120 3 05 m 2 66 1 49 105 59 3 67 7 55 145 297 150 3 81 m 3 32 1 87 131 74 4 60 9 44 181 371 200 5 08 m 4 43 2 49 174 98 6 15 12 61 242 496 Projection distance L minimal length Projection distance L maximal length L 0 030934 D 0 0434 L 1 217856 D 1 7084 L 0 063269 D 0 0420 L 2 490916 D 1 6545 85 80 33 3...

Page 50: ...5 195 100 2 54 m 2 34 0 99 92 39 3 02 6 22 119 244 120 3 05 m 2 80 1 19 110 47 3 64 7 47 143 294 150 3 81 m 3 51 1 49 138 59 4 55 9 35 180 368 200 5 08 m 4 67 1 99 184 78 6 08 12 48 240 491 Projection distance L minimal length Projection distance L maximal length L 0 030617 D 0 0434 L 1 205377 D 1 7084 L 0 062621 D 0 0420 L 2 465393 D 1 6545 2 35 1 Video display area Projection area 105 99 31 31 V...

Page 51: ...e cabinet Unit mm inches 223 8 25 32 230 9 1 16 128 5 1 32 560 22 1 16 280 11 1 32 280 11 1 32 Center of the lens 79 7 3 1 8 326 12 27 32 Front of the cabinet 81 5 3 7 32 81 5 3 7 32 142 5 19 32 142 5 19 32 147 7 5 13 16 150 6 5 15 16 425 8 16 3 4 496 19 17 32 15 7 5 8 41 9 1 21 32 Front of the lens Front of the cabinet ...

Page 52: ...nit mm inches Side view Unit mm inches 150 5 29 32 75 2 15 16 8 5 16 Ceiling The bottom surface of the mount bracket Center of the lens 175 6 7 8 128 5 1 32 Center of the supporting pole Front of the cabinet 496 19 17 32 263 3 10 3 8 218 3 8 19 32 130 5 1 8 45 1 25 32 ...

Page 53: ...mmended tightening torque tension when turning a screw towards the direction of rotation 1 4 0 2 N m Front of the cabinet 260 4 10 1 4 215 4 8 15 32 130 5 1 8 Upper ceiling mount bracket Center of the supporting pole The center of the supporting pole is different from that of the unit Unit Insert nut M5 Screw hole The maximum length of screw The minimum length of screw ...

Page 54: ...Sony Corporation ...

Reviews: