Troubleshooting
65
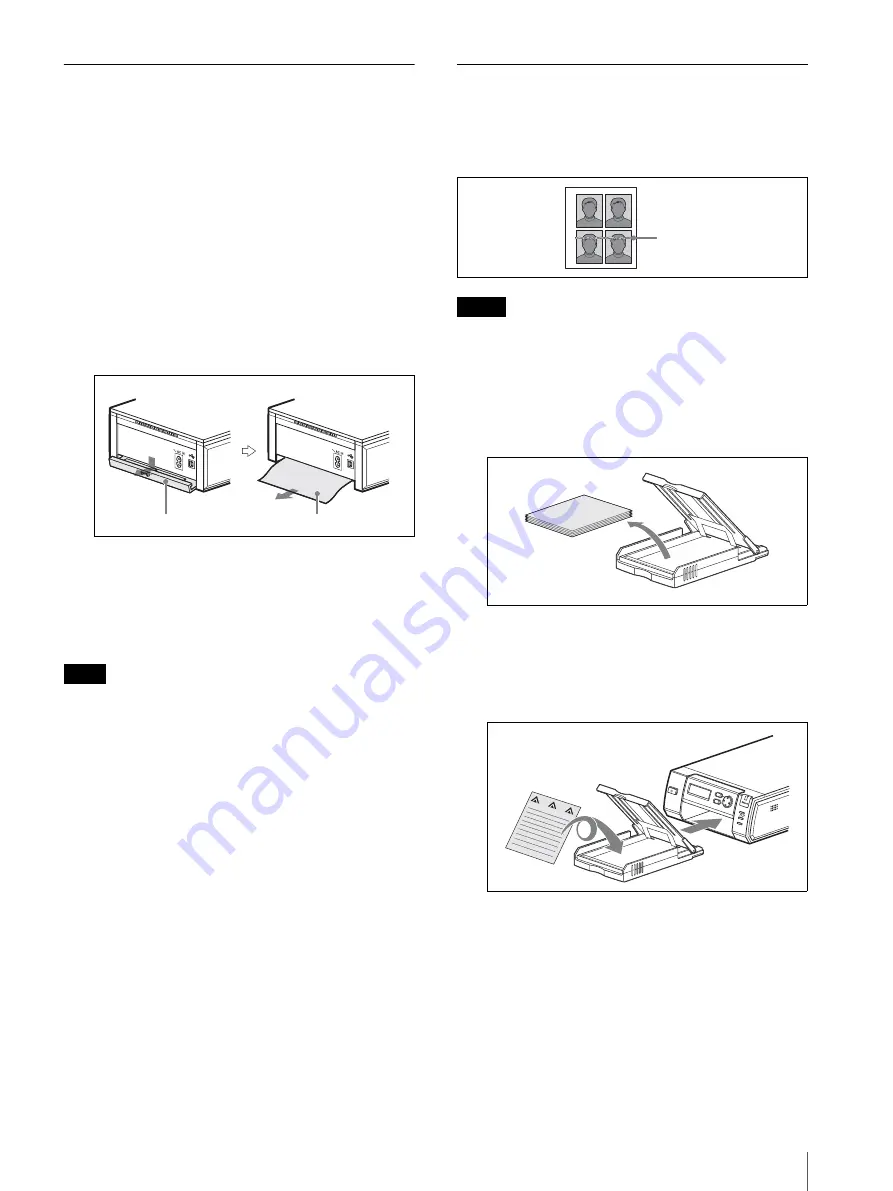
Removing Jammed Paper
If a paper jam occurs while printing is in progress, the
ALARM lamp lights, an error message appears, and
printing stops.
Perform the following steps to remove the jammed
paper.
1
Press the
1
button on the printer to switch to
standby mode.
2
Remove the paper tray, and then remove any
jammed paper.
3
Remove the paper jam cover on the rear panel, and
check that there is no jammed paper. If there is any
jammed paper, remove it.
4
Reattach the paper jam cover.
5
Insert the paper tray.
6
Turn on the printer.
Note
If you are unable to remove the jammed paper, contact
your nearest Sony dealer.
Cleaning the Inside of the Printer
If white lines or dots appear on printed pictures, clean
the inside of the printer using the supplied cleaning
cassette and the protective sheet included with the
printing pack.
Notes
• Only perform cleaning if there are white lines or dots
on the printed pictures.
• When the printer is printing pictures normally,
cleaning will not improve print quality.
1
Remove the paper tray from the printer, and then
remove the paper from the tray.
2
Place the protective sheet in the tray so that the
unprinted side is facing up, make sure the arrows on
the bottom of the tray and arrows on the printed side
of the sheet are pointing in the same direction, and
then insert the paper tray into the printer.
Paper jam cover
Jammed paper
White lines
PUS
H OP
EN
EXEC
MENU
ALARM
DIGITAL PHO
TO PRINTER
Summary of Contents for UPX-C300
Page 140: ...Index 140 ...
Page 211: ......


