9 |Installation & User Manual – Professional Player
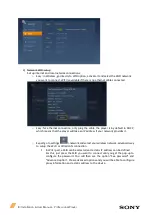
In Wired LAN, it is possible to select DHCP mode to retrieve automatically an
IP address or to define a static IP address. Note that it is mandatory to define
a gateway and DNS address even if there is no in the network otherwise the
device will not be fully configured in the network part.
Proxy settings can be configured, a host name or an IP address can be defined
and a port. Bypass proxy addresses can be configured. In Ethernet IP mode,
you select if you want to use a DHCP or Static IP connection.
3.
Players final configuration with TEOS
To finalize the installation of the player we recommend adding it into TEOS and sending content to it.
First, make sure that network player is configured.
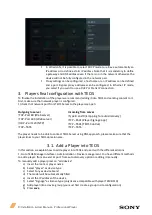
1) check that network port from TEOS Server to the player are open:
Outgoing to server
•
TCP -Port 80 (Web server)
•
TCP -Port 443 (Web server)
•
UDP –Port 123 (NTP)
•
TCP –5555
The player needs to be able to contact TEOS Server using DNS approach, please make sure that the
player links to your TEOS domain name.
3.1.
Add a Player into TEOS
In this section we explain how to add a player into TEOS and use it with the different add-ons.
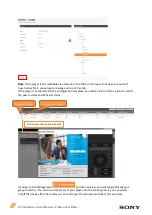
1. Go to TEOS Manage Interface > Administration > Device management. You have different methods
to add a player: from an excel import, from auto discovery option or adding it manually.
To manually add a player press on "add device"
a)
Insert the room or player name
b)
Select "player" as device type
c)
Select Sony as device brand
d)
The model will be automatically filled
e)
Insert the IP address of the device
f)
Select "Signage" as license type (only license compatible with player TEM-DS10)
g)
Add player into a device group (you must first create a group in site configuration)
h)
Press
save
Incoming from server
•
Type 8 and 0 (icmp ping for auto discovery)
•
TCP –6541 (Player Signage app)
•
TCP –5541 (TEOS Control)
•
TCP –5555


