


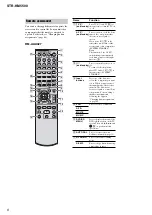
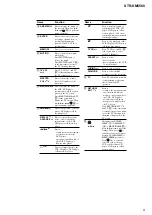

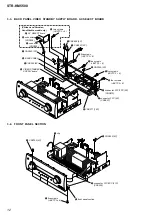


STR-KM5500
14
SECTION 4
TEST MODE
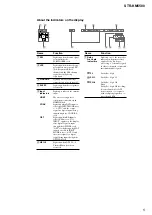
TUNER AM STEP CHANGE (9 kHz/10 kHz) MODE
(Chiliean and Peruvian models only)
The AM tuning interval can be changed over 9 kHz or 10 kHz.
Procedure:
1. Press the [
?/1
] button to turn on the main power.
2. Press [TUNER] repeatedly to select “AM”.
3. Press [AMP MENU].
“1-LEVEL” appears on the display.
4. Press
[
V
/
v
] repeatedly to select “4-TUNER”.
5. Press
[ ] or [
b
] to enter the menu.
6. Press
[
V
/
v
] repeatedly to select “AM STEP”.
7. Press
[ ] or [
b
] to enter the parameter.
8. Press [
V
/
v
] repeatedly to select the “AM” tuning scale you
want.
Note
All AM preset stations will be erased when you change the tuning scale.
FL CHECK MODE
All
fl
uorescent segments are tested. When this test is activated, all
segments turn on at the same time, then each segment turns on one
after another.
Procedure:
1. When pressing the [MULTI STEREO] and [A.F.D.] buttons,
press the [
?/1
] button to turn on the main power.
2. All segments turn on.
L
SP B
EQ
S-AIR MEM
RDS
D.RANGE SLEEP
FM
AM
m ft.
C
R
SL
S
SR
SB SBR
SBL
SW LFE SP A
DEX
PLII x
ST HDMI
SAT CAT
OPT
COAX
ANALOG
k Hz
DTS-ES
NEO:6
96/24
dB
MHz
3. Turn the [INPUT SELECTOR] dial.
4. Test pattern 1 turn on.
EQ
MEM
D.RANGE
FM
m
SR
SB SBR
SBL
SW LFE
DEX
II x
ST
SAT CAT
OPT
DTS
96/24
dB
MHz
5. Turn the [INPUT SELECTOR] dial once again.
6. Test pattern 2 turn on.
L
SP B
S-AIR
RDS
SLEEP
AM
ft.
C
R
SL
S
SP A
PL
HDMI COAX
ANALOG
k Hz
-ES
NEO:6
7. Turn the [INPUT SELECTOR] dial once again. All segments
turn off.
8. Every turning of the [INPUT SELECTOR] dial turns on each
segment one after another on the same order.
S.F. CLEAR MODE
The preset sound
fi
led is cleared when this mode is activated. Use
this mode before returning the product to clients upon completion
of repair.
Procedure:
1. While pressing the [A.F.D.] button, press the [
?/1
] button to
turn on the main power.
2. The message “S.F CLR.” appears and initialization is per-
formed.
VERSION CHECK MODE
When this mode is used the model, the destination and the software
version number are displayed.
Procedure:
1. While pressing the [NIGHT MODE] and [GAME] buttons, press
the [
?/1
] button to turn on the main power.
2. The model, the distination and the software version number
appear.
KEY CHECK MODE
This mode is used to check the key.
Procedure:
1. While pressing the [MUSIC] and [MOVIE] buttons, press the
[
?/1
] button to turn on the main power.
2. The message “REST 06” appears.
3. Every pressing of any button other than the [
?/1
] button counts
down the buttons. The buttons which are already counted once
are not counted again.
4. When all buttons are pressed, the message “REST 00” ap-
pears.
SWAP ALL MODE
When this mode is used, output the audio signal of front L/R chan-
nel to all channel.
Procedure:
1. While pressing the [MULTI STEREO] and [MOVIE] buttons,
press the [
?/1
] button to turn on the main power.
2. The message “SWP. ALL” appears.
3. After a few seconds, “SWAP” appears. (No change while dis-
played.)
SHIPMENT MODE
All preset contents are cleared when this mode is activated. Use
this mode before returning the product to clients upon completion
of repair.
Procedure:
1. While pressing the [NIGHT MODE] and [MULTI STEREO] but-
tons, press the [
?/1
] button to turn on the main power.
2. The message “CLEARING” appears.
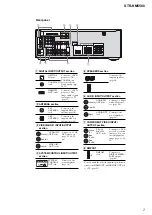
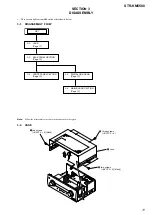
DCAC FACTORY TEST MODE
DCAC Factory Test mode have two stages:
1. DCAC DSP Data Line Checking
2. DCAC board Checking
DSP Data Line
Check
Start
Pass
Pass
Auto Cal Mic
Check
END
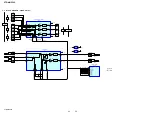
Factory Test System Setup
SPK Front Left
DCAC MIC
Receiver
1. When power off :
While pressing the [GAME] and [MOVIE] buttons, press the
[
?/1
] button to turn on the main power .
“DCAC FTM” appears.
Afterward, press the [NIGHT MODE] to start DCAC factory
test mode.


