51
Projector
Chapt
er 1 Us
e
r Guid
e
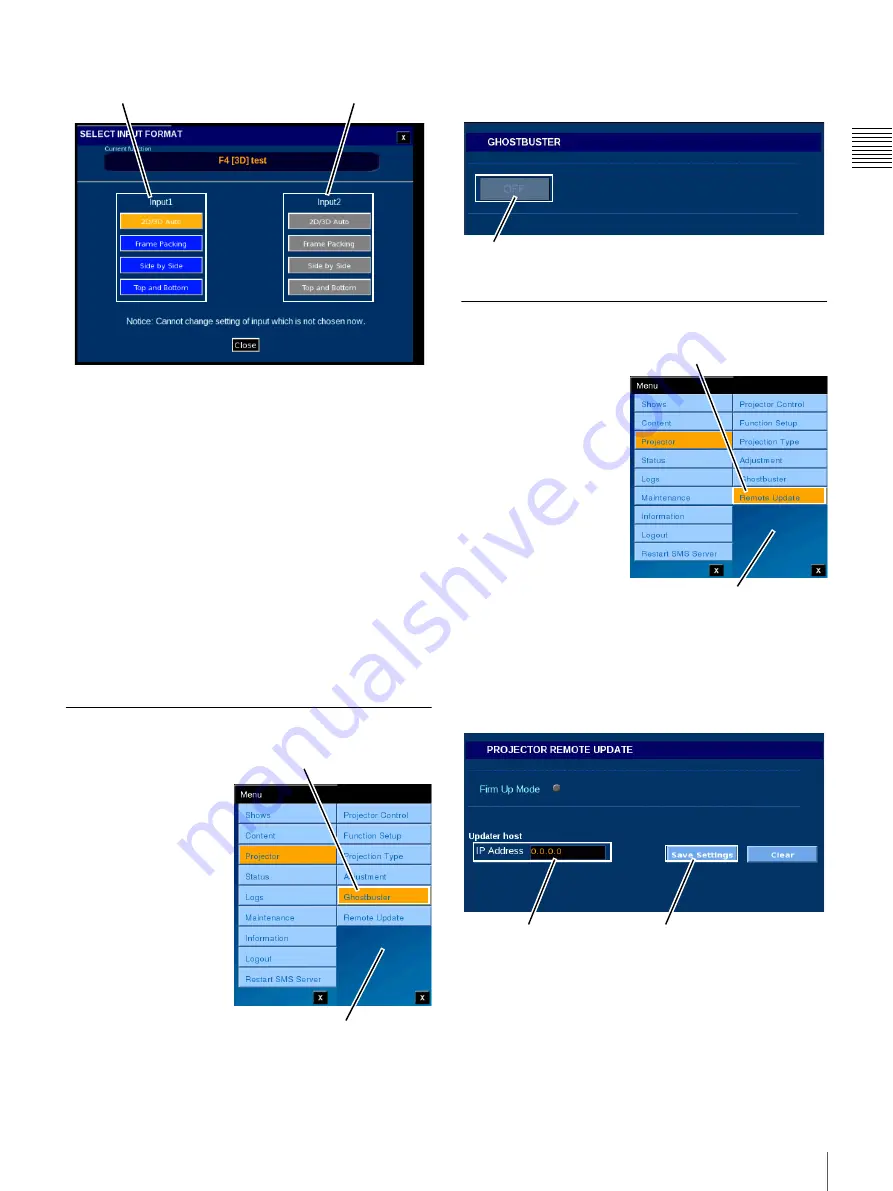
The 3D format for Input1 (Input A) is specified on the left
and the format for Input2 (Input B) on the right.
The currently selected 3D format is displayed in orange,
and the selectable 3D formats are displayed in blue. If a
board is not installed, or is installed but is not recognizable,
the corresponding formats are displayed in gray.
Tap a blue button to select the 3D format of the input signal
for the specified input (Input1/Input2).
Select the topmost
2D/3D Auto
for normal operation. Use
this button for systems that cannot recognize 3D formats.
You can change the 3D format for each input. However,
when changing input format, it is necessary that the target
input be selected on the projector (the image from the input
for which you wish to change format is displayed by the
current projector).
Ghostbuster
To access
GHOSTBUSTER, tap
Menu
, tap
Projector
and
then tap
Ghostbuster
.
The Ghostbuster function can be verify ON/OFF.
The function can only be enabled or disabled during Lamp
ON status.
Projector Remote Update
To make settings for
updating the projector
software via the network,
tap Menu, Projector,
Projector Remote
Update in sequence. The
PROJECTOR REMOTE
UPDATE pane appears.
Here you can make settings for remotely updating the
projector software via the network. To specify the IP
address of the server where the software is located, tap the
IP Address field. The Enter Address popup window
appears. You can enter the IP address here.
Input1 (Input A)
3D format
Input2 (Input B)
3D format
Tap Ghostbuster
Projector Menu
ON/OFF
Tap Remote Update
Projector menu
IP Address
Save Settings
Summary of Contents for Screen Management System
Page 81: ...Sony Corporation ...


