


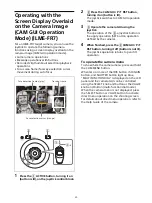


51
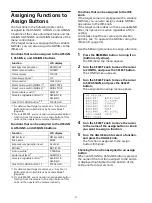
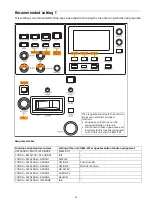
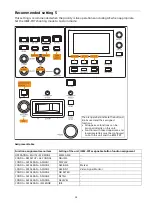
Assigning Functions to
Assign Buttons
The functions in the following table can be
assigned to the ASSIGN 1, ASSIGN 2, and ASSIGN
3 buttons of the color adjustment block and the
ASSIGN 4, ASSIGN 5, and ASSIGN 6 buttons of the
menu control block.
If the target camera is equipped with a variable
ND filter, you can also assign the ND filter to the
IRIS knob.
Functions that can be assigned to the ASSIGN
1, ASSIGN 2, and ASSIGN 3 buttons
*1 For details about target cameras, see “Function of
Buttons/Knobs in Each Block by Camera Model”
*2 For an ILME-FR7, you can assign an assignable button
function from the camera to an assign button of this
unit and then operate the camera indirectly.
Functions that can be assigned to the ASSIGN
4, ASSIGN 5, and ASSIGN 6 buttons
*1 For details about target cameras, see “Function of
Buttons/Knobs in Each Block by Camera Model”
*2 For an ILME-FR7, you can assign an assignable button
function from the camera to an assign button of this
unit and then operate the camera indirectly.
Functions that can be assigned to the IRIS
knob
If the target camera is equipped with a variable
ND filter, you can also assign variable ND filter
operations to the IRIS knob.
If the target camera does not have a variable ND
filter, iris operation is active regardless of this
setting.
For details about the set value and selection
options, see “To operate the ND filter using the
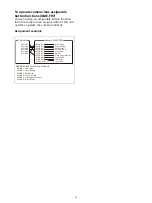
Use the following procedure to assign a function.
1
Press the RM MENU button, turning it on
(button is lit yellow).
The RM menu top menu appears.
2
Turn the SELECT knob to move the cursor
to CONFIG, and press the SELECT button.
The CONFIG menu appears.
3
Turn the SELECT knob to move the cursor
to SW ASSIGN, and press the SELECT
button.
The assign button setup menu appears.
4
Turn the SELECT knob to move the cursor
to the name of the assign button or knob
you want to assign a function.
5
Turn the VALUE knob to select a function,
and press the VALUE knob.
The function is assigned to the assign
button/IRIS knob.
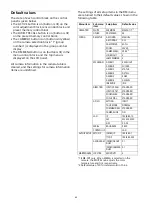
Checking the function assigned to an assign
button
When an ASSIGN 1 to ASSIGN 6 button is pressed,
the name of the function assigned to the button
is displayed highlighted on the bottom of the
LCD panel for a few seconds.
Function
LCD display
Backlight compensation
BACKLIGHT
Flicker compensation
FLICKER
Status display
STATUS
Clear Image Zoom
*1
CIZ
Teleconvertor
*1
TELE CONV
Preset mode switch (MODE 1)
*1
MOD1-TRCE
Preset mode switch (MODE 2)
*1
MOD2-TRCE
Screen display switch
*1
DISPLAY
Camera assignable button
*1 *2
ASSIGN 1 to
ASSIGN 9
Lens FOCUS HOLD button
*1 *2
FOCUS HLD
Function
LCD display
DETAIL level
DETAIL LEVEL
Knee point
KNEE
Exposure compensation level
AE LEVEL
ND filter
*1
ND FILTER
Picture profile
*1
P PROFILE
Audio input level
*1
AUDIO LVL
Camera assignable button
*1 *2
ASSIGN 1 to
ASSIGN 9
Lens FOCUS HOLD button
*1 *2
FOCUS HLD
Summary of Contents for RM-IP500
Page 86: ...Sony Corporation ...