background image

17

H

ook

up
s and

 Se
tti

n

gs

A

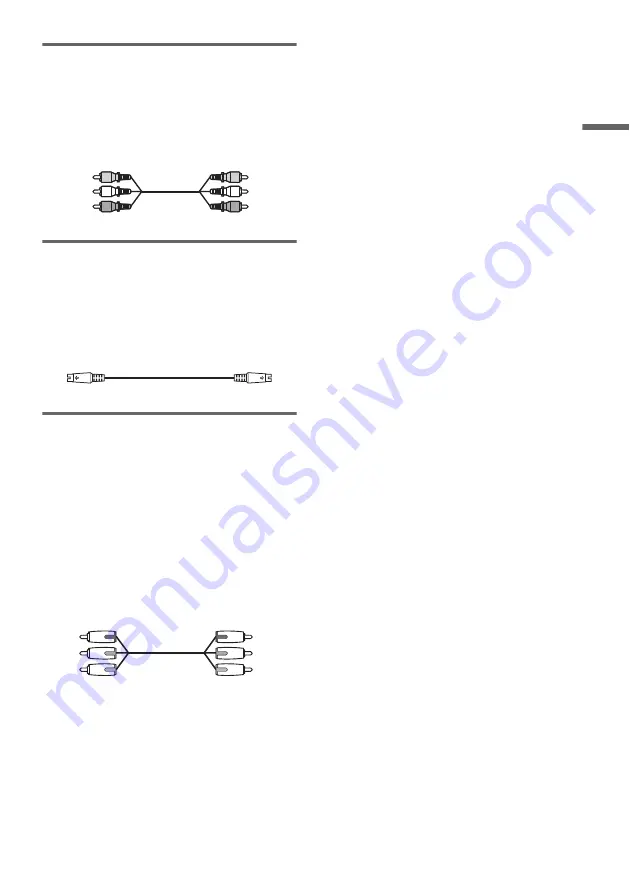
 Connecting to a video input jack

Connect the yellow plug of the audio/video cord 
(supplied) to the yellow (video) jack. You will 
enjoy standard quality images.
Note that you cannot use the PROGRESSIVE 
button with this connection.

B

 Connecting to an S VIDEO input 

jack

Connect an S-video cord (not supplied). You will 
enjoy high quality images.
Note that you cannot use the PROGRESSIVE 
button with this connection.

C

 Connecting to component video 

input jacks (Y, P

B

, P

R

)

Connect the COMPONENT VIDEO OUT jacks 
using a component video cord (not supplied) or 
three video cords (not supplied) of the same kind 
and length. You will enjoy accurate color 
reproduction and high quality images.
If your TV accepts progressive 480p format 
signals, you must use this connection and then 
press PROGRESSIVE on the remote to send 
progressive video signals. For details, see “Using 
the PROGRESSIVE button” (page 18).

When playing “wide screen” images

Some recorded images may not fit your TV 
screen. To change the aspect ratio, see page 87.

If you are connecting to a VCR

Connect your VCR to the LINE IN (VIDEO) jack 
on the recorder (page 29).

If your TV has a CONTROL S jack

You can control the recorder by pointing the 
remote at your TV. This feature is convenient 
when you place the recorder and the TV away 
from each other. 
After connecting the recorder to other equipment 
in pattern 

A

B

, or 

C

 above, connect the 

CONTROL S IN jack to your TV’s CONTROL S 
(OUT) jack using a control S cord (not supplied). 
See the instructions supplied with the TV to be 
connected. Note that your TV’s input will not 
automatically switch to this recorder when you 
play a disc.

Yellow

White (L)

Red (R)

Yellow

White (L)

Red (R)

Green

Blue

Red

Green

Blue

Red

,

continued

Summary of Contents for RDR-HX900

Page 1: ...2 187 189 11 2 2004 Sony Corporation DVD Recorder Operating Instructions RDR HX900 ...

Page 2: ...an outlet on a circuit different from that to which the receiver is connected Consult the dealer or an experienced radio TV technician for help VCR Plus and PlusCode are registered trademarks of Gemstar Development Corporation The VCR Plus system is manufactured under license from Gemstar Development Corporation In the United States TV GUIDE and other related marks are registered marks of Gemstar ...

Page 3: ... only unless otherwise authorized by Macrovision Reverse engineering or disassembly is prohibited Copy guard function Since the recorder has a copy guard function programs received through an external tuner not supplied may contain copy protection signals copy guard function and as such may not be recordable depending on the type of signal If you have any questions or problems concerning your reco...

Page 4: ...de On Screen System 33 Using the Title List 37 Using the Disc Info Screen disc settings 39 Checking the Play Information and Playing Time 41 How to Enter Characters 43 Recording 45 Before Recording 45 Timer Recording TV GUIDE Manual VCR Plus 46 Checking Changing Canceling Timer Settings 49 Recording Without the Timer 50 Recording From a VCR or Similar Device 53 Playback 54 Playing 54 Chasing Playb...

Page 5: ...2 About i LINK 103 Guide to Parts and Controls 105 Glossary 109 Language Code List 111 Cable Box Satellite Receiver Brand Code 112 Index 117 About this manual In this manual the internal hard disk drive is written as HDD and disc is used as a general reference for the HDD DVDs or CDs unless otherwise specified by the text or illustrations Instructions in this manual describe the controls on the re...

Page 6: ...he titles on the disc including recording date channel recording mode and thumbnail image page 37 The recorder will automatically take program label information from the TV Guide On Screen data and display it as the title name page 37 not available in some areas 103 CH 103 Promotional Panel Promotional Panel LISTINGS 8 05 PROMOTIONS SORT ALPHABETICAL SPORTS MOVIES All Fantasy Action Horror Adventu...

Page 7: ...m the HDD Dubbing HDD y DVD Create copies of your favorite titles for safekeeping by dubbing them to a DVD or make a copy of your friend s recordings by dubbing them to the HDD page 72 Automatically dub DV Digital8 tapes DV Digital8 Dubbing DV t HDD DVD Connect your digital video camera to the DV IN jack and automatically dub the entire contents or just selected scenes to a DVD disc page 77 A list...

Page 8: ...t free up disc space Type Disc Logo Icon used in this manual Formatting new discs Compatibility with other DVD players finalizing Hard disk drive internal Formatting unnecessary DVD RW Automatically formatted Playable on DVD RW compatible players automatically finalized DVD RW VR mode Format in VR mode page 40 Playable only on VR mode compatible players finalization unnecessary Video mode Format i...

Page 9: ...s Editing Features Rewrite page 45 Auto Chapter page 91 Manual Chapter page 68 Record 16 9 sizes page 51 Change title name page 65 Delete title page 66 A B Erase page 66 Playlist page 68 Yes Yes Yes Yes Yes Yes Yes No Yes Yes No No Yes Yes Yes No Yes Yes Yes Yes Yes Yes Yes Yes Yes Yes No Yes 2 Yes Yes No No No Yes No No Yes Yes 3 No No No Yes No Yes 2 Yes Yes 3 No No continued ...

Page 10: ...corded in a color system other than NTSC such as PAL or SECAM z Hint This DVD recorder can play 8 cm CDs and 8 cm DVDs as well Type Disc Logo Icon used in this manual Characteristics DVD VIDEO Discs such as movies that can be purchased or rented VIDEO CD VIDEO CDs or CD Rs CD RWs in VIDEO CD Super VIDEO CD format CD Music CDs or CD Rs CD RWs in music CD format that can be purchased DATA CD CD ROMs...

Page 11: ...Please be aware that among those discs there are some that do not conform to the CD standard and may not be playable by this product Notes You cannot mix VR mode and Video mode on the same DVD RW To change the disc s format reformat the disc page 40 Note that the disc s contents will be erased after reformatting You cannot shorten the time required for recording even with high speed discs Also you...

Page 12: ...nect the set top box controller and set the code number and output channel page 24 After setting up the cable box satellite receiver control check that the recorder can correctly control the cable box or satellite receiver page 28 Note to CATV system installer in USA This reminder is provided to call the CATV system installer s attention to Article 820 40 of the NEC that provides guidelines for pr...

Page 13: ...ne1 Input in Video Setup to S Video or Component page 89 If you connect an S video cord to the LINE IN 3 jack set Line3 Input in Video Setup to S Video page 89 VHF UHF IN COMPONENT VIDEO IN LINE IN DIGITAL OUT VIDEO S VIDEO COAXIAL OPTICAL PCM DTS DOLBY DIGITAL AUDIO R L 1 3 LINE OUT COMPONENT VIDEO OUT VIDEO S VIDEO AUDIO R L 1 2 Y PB PR Y PB PR AC IN OUT SET TOP BOX CONTROL CONTROL S IN G LINK A...

Page 14: ...UHF IN COMPONENT VIDEO IN LINE IN DIGITAL OUT VIDEO S VIDEO COAXIAL OPTICAL PCM DTS DOLBY DIGITAL AUDIO R L 1 3 LINE OUT COMPONENT VIDEO OUT VIDEO S VIDEO AUDIO R L 1 2 Y PB PR Y PB PR AC IN OUT SET TOP BOX CONTROL CONTROL S IN G LINK VHF UHF IN OUT ANT IN TO TV SET TOP BOX CONTROL to VHF UHF IN Wall DVD recorder to VHF UHF OUT to antenna input Antennacable supplied Signal flow TV to SET TOP BOX C...

Page 15: ... this hookup you can record any channel by selecting the channel on the recorder VHF UHF IN COMPONENT VIDEO IN LINE IN DIGITAL OUT VIDEO S VIDEO COAXIAL OPTICAL PCM DTS DOLBY DIGITAL AUDIO R L 1 3 LINE OUT COMPONENT VIDEO OUT VIDEO S VIDEO AUDIO R L 1 2 Y PB PR Y PB PR AC IN OUT SET TOP BOX CONTROL CONTROL S IN G LINK VHF UHF IN OUT DVD recorder TV to antenna input to VHF UHF IN to VHF UHF OUT Ant...

Page 16: ... COAXIAL OPTICAL PCM DTS DOLBY DIGITAL AUDIO R L 1 3 LINE OUT COMPONENT VIDEO OUT VIDEO S VIDEO AUDIO R L 1 2 Y PB PR Y PB PR AC IN OUT SET TOP BOX CONTROL CONTROL S IN G LINK VIDEO AUDIO INPUT L R CONTROL S INPUT S VIDEO PR PB Y COMPONENT VIDEO IN B A C Audio video cord supplied Component video cord not supplied yellow TV projector or AV amplifier receiver TV projector or AV amplifier receiver gr...

Page 17: ...se this connection and then press PROGRESSIVE on the remote to send progressive video signals For details see Using the PROGRESSIVE button page 18 When playing wide screen images Some recorded images may not fit your TV screen To change the aspect ratio see page 87 If you are connecting to a VCR Connect your VCR to the LINE IN VIDEO jack on the recorder page 29 If your TV has a CONTROL S jack You ...

Page 18: ...V does not accept progressive signals or your TV is connected to jacks other than the COMPONENT VIDEO OUT jacks LINE OUT VIDEO or S VIDEO z Hint When you select progressive signal output you can fine tune the signal according to the type of software you are watching page 88 Notes Consumers should note that not all high definition television sets are fully compatible with this product and may cause...

Page 19: ...COAXIAL OPTICAL PCM DTS DOLBY DIGITAL AUDIO R L 1 3 LINE OUT COMPONENT VIDEO OUT VIDEO S VIDEO AUDIO R L 1 2 Y PB PR Y PB PR AC IN OUT SET TOP BOX CONTROL CONTROL S IN G LINK VIDEO AUDIO INPUT L R LINE OUT VIDEO S VIDEO AUDIO R L 1 2 B A DIGITAL OUT COAXIAL OPTICAL PCM DTS DOLBY DIGITAL AV amplifier receiver with a decoder red TV projector or AV amplifier receiver Audio video cord supplied Signal ...

Page 20: ...Digital or DTS 2 decoder and a digital input jack use this connection Connect using a coaxial or optical digital cord not supplied Surround effect Dolby Digital 5 1ch DTS 5 1ch 1 Manufactured under license from Dolby Laboratories Dolby Pro Logic and the double D symbol are trademarks of Dolby Laboratories 2 DTS and DTS Digital Out are trademarks of Digital Theater Systems Inc Notes After you have ...

Page 21: ...side the battery compartment When using the remote point it at the remote sensor on the recorder Notes If the supplied remote interferes your other Sony DVD recorder or player change the command mode number for this recorder page 23 Use the batteries correctly to avoid possible leakage and corrosion Do not touch the liquid with bare hands should leakage occur Observe the following Do not use a new...

Page 22: ...witch is set to TV the remote performs the following Code numbers of controllable TVs If more than one code number is listed try entering them one at a time until you find the one that works with your TV 1 Turns your TV on or off VOL Adjusts the volume of your TV CH Selects the channel on your TV TV VIDEO Switches your TV s input source Number buttons and SET Selects the channel on your TV 1 2 3 4...

Page 23: ...ng them one at a time until you find the one that works with your AV amplifier receiver If you have a Sony DVD player or more than one Sony DVD recorder If the supplied remote interferes with your other Sony DVD recorder or player set the command mode number for this recorder and the supplied remote to one that differs from the other Sony DVD recorder or player The default command mode setting for...

Page 24: ...ngs do not appear in the TV Guide On Screen system as soon as you complete Easy Setup m m m m m m m SETUP Settings Video Audio Features Options Easy Setup Tuner Preset Area Setup Clock Set Top Box Control Language Settings Video Audio Features Options Easy Setup Format DVD Dimmer Auto Display Command Mode Factory Setup VR Normal On DVD3 SETUP Settings Video Audio Features Options Easy Setup Format...

Page 25: ... code number Use M m to select the number or letter for Canada and to move the cursor 7 Press ENTER The Setup Display for selecting the language used in the on screen display appears 8 Select a language and press ENTER The display for setting the clock appears If the clock data has already been received go to step 10 9 Enter the current date and time Press M m to set the month and press Set the da...

Page 26: ...V select Antenna If you use a cable connection without a cable box select Cable 16Press ENTER The Tuner Preset function automatically starts searching for all of the receivable channels and presets them To set the channels manually see page 85 After the Tuner Preset is finished the Setup Display for selecting the aspect ratio of the connected TV appears 17Select the setting that matches your TV ty...

Page 27: ...er and press ENTER If your AV amplifier receiver has a DTS decoder select On Otherwise select Off 23Press ENTER when Finish appears Easy Setup is finished All connections and setup operations are complete If you use the cable box satellite receiver control check that the control works correctly see below To return to the previous step Press O RETURN z Hint If you want to run Easy Setup again selec...

Page 28: ...ck the settings at Set Top Box Control in Settings Setup page 86 If more than one code number is listed for your cable box satellite receiver try entering them one at a time in step 12 of Easy Setup until you find the one that works with your cable box satellite receiver Check the connection and position of the set top box controller page 13 If your cable box or satellite receiver still does not o...

Page 29: ...jacks If the equipment has an S video jack or component output jacks you can use an S video cord or component video cord instead of an audio video cord VHF UHF IN COMPONENT VIDEO IN LINE IN DIGITAL OUT VIDEO S VIDEO COAXIAL OPTICAL PCM DTS DOLBY DIGITAL AUDIO R L 1 3 LINE OUT COMPONENT VIDEO OUT VIDEO S VIDEO AUDIO R L 1 2 Y PB PR Y PB PR AC IN OUT SET TOP BOX CONTROL CONTROL S IN G LINK LINE OUTP...

Page 30: ...f an audio video cord z Hint When the connected equipment outputs only monaural sound use audio cables that distribute monaural sounds to left right channels not supplied Notes Do not connect the yellow LINE IN VIDEO jack when using an S video cord Do not connect the output jack of this recorder to another equipment s input jack with the other equipment s output jack connected to the input jack of...

Page 31: ...en Be sure to connect your VCR to the DVD recorder and your TV in the order shown below To watch videotapes watch the tapes through a second Line input on your TV Do not connect more than one type of video cord between the recorder and your TV at the same time VCR DVD recorder TV VCR DVD recorder TV LINE IN 1 LINE IN 2 ...

Page 32: ...er receives the TV Guide On Screen data Sub menu The sub menu appears when you select an item from a list menu e g a title from the Title List menu and press ENTER The sub menu displays options applicable only to the selected item The displayed options differ depending on the situation and disc type Select an option by pressing M m and ENTER Example The Title List menu TOOLS The TOOLS menu appears...

Page 33: ...the timer for recording page 46 If you find a program that you want to watch in the future set it as a Favorite You can later tune in to that program directly by pressing the blue button on the remote when the program begins broadcasting For more information see Navigating the TV Guide On Screen system page 34 1 2ch 1 00PM 2 00PM 2 5ch 8 00PM 9 00PM 3 12ch 9 00AM 9 30AM 4 3ch 8 00PM 8 30PM 5 25ch ...

Page 34: ...system The TV Guide On Screen system is not compatible with satellite and terrestrial digital broadcasts Your cable box s channel may suddenly change even if the recorder is turned off This is because the set top box control has changed the channel to receive the TV Guide On Screen data Navigating the TV Guide On Screen system 1 Press TV GUIDE TV Guide On Screen appears 2 Press M m to move the cur...

Page 35: ...am and press ENTER The TV Guide On Screen system disappears and the channel changes to the selected program You can also use the number buttons Direct Dialing to select a program When LISTINGS is selected enter the channel number of the program you want to watch using the number buttons on the remote then press ENTER To find a program alphabetically or by category 1 Select SORT in the Main Menu Ba...

Page 36: ...nge channel lineup from SETUP and press ENTER Then select a different channel lineup if available To turn off the TV Guide On Screen system Press TV GUIDE or EXIT on the remote z Hints Press the PAGE buttons to change the program list by page Each time you turn on the power the TV Guide On Screen system automatically appears on your TV screen To turn off this function select SETUP from the Main Me...

Page 37: ... date z red Indicates that the title is currently being recorded Indicates that the title is currently being dubbed Indicates the protected title NEW Indicates that the title is newly recorded not played back HDD only RW RWVR RWVideo R R HDD 1 2 3 4 5 6 7 8 9 0 TOOLS M m ENTER CURSOR MODE Z OPEN CLOSE ZOOM TITLE LIST HDD DVD With the recording side facing down 1 2ch 1 00PM 2 00PM 2 5ch 8 00PM 9 00...

Page 38: ...d press ZOOM 2 Select a title whose thumbnail picture you want to change and press ENTER 3 Select Set Thumbnail from the sub menu and press ENTER The selected title starts to play in the background 4 While watching the playback picture press H PLAY X PAUSE or m M to select the scene you want to set for a thumbnail picture and press ENTER The scene is set for the title s thumbnail picture To turn o...

Page 39: ...most recent titles were recorded DVD only G Continuous Rem Time Remainder approximate The longest continuous recording time in each of the recording modes Disc space bar Remaining disc space total disc space H Disc setting buttons page 40 Disc Name Protect Disc Finalize Unfinalize Erase All Format Available settings differ depending on the disc type z Hint For DVD RWs and DVD RWs Video mode you ca...

Page 40: ...atically created which can be displayed on other DVD equipment Before finalizing check the differences between the disc types in the table below Differences between the disc types 1 Press TOOLS while the disc is in the recorder The TOOLS menu appears 2 Select Disc Info and press ENTER The Disc Information display appears RWVR RWVideo RW R R HDD Disc Information DiscName Close Media DVD RW Format V...

Page 41: ...not play even if the discs are finalized The recorder may not be able to finalize the disc if it was recorded on another recorder Checking the Play Information and Playing Time You can check the playing time and remaining time of the current title chapter or track Also you can check the disc name recorded on the DVD CD Press DISPLAY repeatedly Each time you press the button the display changes as ...

Page 42: ... CDs z Hints If DTS is set to Off in Audio Setup the DTS track selection option will not appear on the screen even if the disc contains DTS tracks page 90 When Auto Display is set to On default in Options Setup page 94 playback information automatically appears when the recorder is turned on etc Notes The recorder can only display the first level of a CD s text such as the disc name The letters or...

Page 43: ...he right of the screen and select A upper case a lower case or Symbol and press ENTER The characters of the selected type are displayed 2 Press M m to select the character you want to enter and press ENTER The selected character appears at the top of the display Example Input Title Name The type of characters will change according to the language you select in Easy Setup Some languages allow you t...

Page 44: ...d press ENTER To erase all of the characters select Clear All and press ENTER 4 Select Finish and press ENTER To cancel the setting select Cancel To use the number buttons You can also use the number buttons to enter characters 1 In step 2 above press the number buttons repeatedly to select a character Example Press the number 3 button once to enter D Press the number 3 button three times to enter...

Page 45: ...s DVD Contents beyond this time will not be recorded Press REC MODE repeatedly to switch the recording modes HQ recording mode HQ records pictures in higher quality than HQ on the HDD Set HQ Setting in Features Setup to HQ page 93 Maximum recording time is 21 hours HQ appears in the display Note Situations below may cause slight inaccuracies with the recording time Recording a program with poor re...

Page 46: ...e following Turn on the cable box connect the set top box controller and set Set Top Box Control in the Settings setup to On Do not operate your cable box or satellite receiver just before or during a timer recording This may prevent the accurate recording of a program Recording using the TV Guide On Screen system TV GUIDE You can use the TV Guide On Screen system to set the timer to record a prog...

Page 47: ...e 49 Rec Mode Adjust If there is not enough available disc space for the recording the recorder automatically adjusts the recording mode to enable the entire program to be recorded Set Rec Mode Adjust in Features Setup to On page 93 Auto Title Erase HDD only If there is not enough space for a timer recording the recorder automatically erases old titles recorded on the HDD Set Auto Title Erase in F...

Page 48: ...mer recording starts To confirm change or cancel a timer recording See Checking Changing Canceling Timer Settings page 49 To stop recording during timer recording Open the remote s cover and press x REC STOP Note that it may take a few seconds for the recorder to stop recording Rec Mode Adjust If there is not enough available disc space for the recording the recorder automatically adjusts the reco...

Page 49: ...V Guide On Screen system turned off press SCHEDULE The SCHEDULE list appears 2 Press M m to select the program you want to change then press ENTER 3 Press M m to select the item you want to adjust Start early by Press the number buttons to start the recording by up to 99 minutes in advance End late by Press the number buttons to extend the recording by up to 99 minutes Quality Press the blue butto...

Page 50: ...ify setting A for instance if you extend the recording time then setting A becomes the last timer recording you set and will have priority over setting B If the end and start time of two timer settings are the same The end of program A or the beginning of program B will be cut Recording Without the Timer 1 Press HDD or DVD to select a media When you selected DVD insert a recordable DVD 2 Press CH ...

Page 51: ...s advances the time in 30 minute increments The maximum duration is six hours The time counter decreases minute by minute to 0 00 then the recorder stops recording power does not turn off Even if you turn off the recorder during recording the recorder continues to record until the time counter runs out To cancel the Quick Timer Press z REC repeatedly until the counter appears in the front panel di...

Page 52: ...strong Rec Video Equalizer Contrast weak 3 0 3 strong Brightness dark 3 0 3 bright Color light 3 0 3 deep Hue red 3 0 3 green Repeat steps 2 and 3 to adjust any other items Notes If one program contains two picture sizes the selected size is recorded However if the 16 9 signal cannot be recorded as 16 9 it is recorded as 4 3 When playing a 16 9 size picture recorded as 4 3 the image is fixed to 4 ...

Page 53: ...g to discs other than the HDD or DVD RWs VR mode 5 Press X REC PAUSE to set this recorder to record pause 6 Insert the source tape into the connected equipment and set to playback pause 7 At the same time press X REC PAUSE on this recorder and the pause or play button on the connected equipment Recording starts To stop recording press x REC STOP on this recorder If you connect a digital video came...

Page 54: ...tons and press ENTER Then follow the instructions in the menu press H PLAY when Press SELECT appears The PBC function of Super VCDs does not work with this recorder Super VCDs are played in continuous play mode only To stop playback Press x STOP To resume playback from the point where you stopped the disc Resume Play When you press H PLAY again after you stop the disc the recorder resumes playback...

Page 55: ...digit password using the number buttons 3 Press ENTER to select OK The recorder starts playback To register or change the password see Parental Control DVD VIDEO only page 92 To lock the disc tray Child Lock You can lock the disc tray to prevent children from ejecting the disc When the recorder is in standby mode press O RETURN ENTER and then 1 on the remote LOCKED appears in the front panel displ...

Page 56: ...ects stereo or monaural audio tracks SUBTITLE Selects a subtitle language when pressed repeatedly ANGLE Selects an angle when pressed repeatedly If various angles multi angles for a scene are recorded on the disc appears in the front panel display 1 2 3 4 5 6 7 8 9 0 Z OPEN CLOSE X PAUSE AUDIO m M PREV NEXT INSTANT REPLAY INSTANT ADVANCE ANGLE SUBTITLE SUR H PLAY PROGRESSIVE DVD RWVR HDD CD VCD DA...

Page 57: ...IVE Switches the type of video output signal to interlace or progressive format page 18 INSTANT REPLAY INSTANT ADVANCE Replays the scene briefly fast forwards the scene PREV NEXT Goes to the beginning of the previous next title chapter scene track All discs fast reverse fast forward Fast reverses fast forwards the disc when pressed during playback Search speed changes as follows fast reverse fast ...

Page 58: ...the recorder Set the sound to Stereo using the AUDIO button when you play DTS sound tracks on a CD page 56 Notes on playing DVDs with a DTS sound track DTS audio signals are output only through the DIGITAL OUT COAXIAL or OPTICAL jack When you play a DVD with DTS sound tracks set DTS to On in Audio Setup page 90 Adjusting the picture quality 1 Press TOOLS during playback The TOOLS menu appears 2 Se...

Page 59: ...ise found in the disc may become more apparent In this case it is recommended that you use the BNR function with the DVE function If the condition still does not improve set the DVE level to 1 or Off Adjusting the sound quality 1 Press TOOLS during playback The TOOLS menu appears 2 Select Audio Settings and press ENTER 3 Select an item and press ENTER Surround TVS DVD VIDEO only Selects one of the...

Page 60: ...ram while recording programs Playback continues even if a timer recording starts Use this function as follows While recording to the HDD Play another title on the HDD Play a previously recorded program on a DVD by pressing DVD While recording to a DVD Play a previously recorded program on the HDD by pressing HDD While recording to a DVD RW VR mode 1 Play another title on the same DVD RW VR mode di...

Page 61: ...the disc select the title or track by entering its number You can also search for a scene using the time code 1 Press TOOLS during playback The TOOLS menu appears 2 Select a search method and press ENTER Title Search for DVDs Chapter Search for HDD DVDs Track Search for CDs DATA CDs Search for VIDEO CDs Album Search for DATA CDs Time Search for HDD DVDs Searches for a starting point by entering th...

Page 62: ...d order See Playback order of MP3 audio tracks About MP3 audio tracks MP3 is audio compression technology that satisfies certain ISO MPEG regulations You can play back DATA CDs CD ROMs CD Rs CD RWs recorded in MP3 MPEG1 Audio Layer 3 format However the discs must be recorded according to ISO9660 Level 1 Level 2 or Joliet format for the recorder to recognize the tracks You can also play discs recor...

Page 63: ...illustration Proceeding to the next or another album may take some time The recorder may not be able to play some DATA CDs created in the Packet Write format The recorder will play any data with the extension MP3 even if they are not in MP3 format Playing this data may generate a loud noise which could damage your speaker system The recorder does not conform to audio tracks in MP3PRO format The pl...

Page 64: ...DVD RW VR mode editing either the original recording called the original or the playback information created from the original called a Playlist Since each is different in nature and offers different merits read the following and select the one that better suits your needs To edit original titles Edits made to the original titles are final If you plan to retain an unaltered original recording crea...

Page 65: ...hat the disc s control information is full erase unnecessary titles Editing a Title This section explains the basic edit functions Note that editing is irreversible To edit a DVD RW VR mode without changing the original recordings create a Playlist title page 68 Note When editing a DVD R DVD R or DVD RW Video mode finish all editing before finalizing the disc You cannot edit a finalized disc 1 Pre...

Page 66: ...for setting point B appears 3 Select point B by pressing m M and press ENTER The display asks for confirmation To reset either point A or B select Change A or Change B and go to step 2 or 3 4 Select OK and press ENTER The scene is erased and the display asks whether to erase another scene To continue select Yes and repeat from step 2 To finish select No z Hint A chapter mark is inserted after the ...

Page 67: ...s TITLE LIST 2 Press TOOLS and select Disc Map and press ENTER The Disc Map appears To check the open space select the space by pressing When b or B appears on either side of the screen you can scroll sideways by pressing 3 Select a title by pressing and press ENTER The display for selecting titles to be erased appears To cancel the selection press ENTER again When the title is protected the displ...

Page 68: ...ombines with the previous chapter Notes If a message appears and indicates that no more chapter marks can be added you may not be able to record or edit When dubbing any chapter marks you enter will be erased Creating and Editing a Playlist Playlist edit allows you to edit or re edit without changing the actual recordings A Playlist title can contain up to 50 scenes For details see Edit options fo...

Page 69: ...r Change OUT and repeat step 8 or 9 To view the selected scene select Preview 10Select OK and ENTER The selected section is captured as a scene and the display asks whether you want to continue To continue select More and repeat the steps above To capture a scene from another title select New Title 11When you finish capturing scenes select No more and press ENTER The Scene List menu appears with a...

Page 70: ...laylist 2 Select Number in the Sort column and press ENTER The titles are sorted in order of title number 3 Select a title and press ENTER The sub menu appears 4 Select Move Title and press ENTER 5 Select a new location for the title by pressing M m and press ENTER The title moves to the new location Dividing a Playlist title Divide Title 1 Press TITLE LIST to turn on the Title List Playlist menu ...

Page 71: ... of the selections select Reset All 5 Select OK and press ENTER The list of titles to be combined appears To change the selection select Change and go to step 3 6 Select OK and press ENTER The display for selecting a title name from among the selected titles appears To enter a new name select Enter Text and follow the explanations on page 43 7 Select a name and press ENTER The titles are combined ...

Page 72: ...riginally recorded picture size is retained z Hints You can dub a Playlist title on a DVD RW VR mode as an original title on the HDD When dubbed from a DVD to the HDD the picture size and the sound types originally recorded are retained Notes The recorder may not function as described depending on the disc status Follow the instructions that appear on the screen When a message appears and indicate...

Page 73: ...uch as possible Dynamic VBR Dubbing About VBR VBR Variable Bit Rate is an effective method of allocating a suitable bit amount per second Fine detail pictures or dynamically moving pictures are assigned a larger amount while static pictures are assigned less for optimum picture quality z Hint When you dub an edited title using the Rec Mode Conversion Dubbing method pauses between scenes are smooth...

Page 74: ...wing display appears after step 8 Select Auto Dub Mode and press ENTER to start dubbing To manually select another dubbing mode select Reset and go to step 7 To stop dubbing Press TOOLS to turn on the TOOLS menu Or while the Title List menu is displayed press ENTER to display the sub menu Select Stop Dubbing and press ENTER When asked for confirmation select Yes and press ENTER z Hints If disc spa...

Page 75: ...ngs and press ENTER The following display for making the adjustments appears To re select titles select Change and go to step 6 of Dubbing Multiple Titles Dub Selected Titles above To have the recorder adjust the dubbing mode so all of the selected titles fit in select Auto mode A Total size of the selected titles B Direction of dubbing C Available space on the disc to be dubbed approximate D Info...

Page 76: ...es fit in The same dubbing mode is set for all of the titles If disc space is insufficient for the selected dubbing mode the following display appears after step 8 of Dubbing Multiple Titles Dub Selected Titles page 75 Select Auto Dub Mode and press ENTER If you have selected only one title select OK To stop dubbing Press TOOLS to turn on the TOOLS menu Select Stop Dubbing and press ENTER When ask...

Page 77: ...to record or edit from a DV Digital8 format tape Operation is straightforward because the recorder will fast forward and rewind the tape for you you do not need to operate your digital video camera Do the following to start using the DV Edit functions of this recorder See the instruction manual supplied with the digital video camera as well before connecting Notes The DV IN jack is for input only ...

Page 78: ...nd audio channel when recording with your digital video camera You are ready to start dubbing Select one of the dubbing methods on the following pages z Hints You can turn off the recorder during dubbing The recorder completes dubbing even after being turned off You can adjust the settings for the recording picture before recording See Adjusting the recording picture quality and size page 51 Notes...

Page 79: ...ing using the DV IN jack page 77 and press ONE TOUCH DUBBING on the remote The recorder rewinds the tape and then starts recording the tape contents When the recording is finished the recorder rewinds the tape in the digital video camera To stop during recording Open the remote s cover and press x REC STOP Note that it may take a few seconds for the recorder to stop recording z Hints If you set Fi...

Page 80: ...ne becomes a chapter on the disc Auto Scene Chaptering function For other discs the recorder divides the title in either 6 or 15 minute intervals according to the setting in Auto Chapter in Features Setup 1 Follow steps 1 to 5 of Preparing for recording using the DV IN jack page 77 and press SYSTEM MENU 2 Select DV D8 EDIT and press ENTER The display asks if you want to start selecting scenes If y...

Page 81: ...or confirmation select OK Preview Plays the selected scene Change IN Changes the start of the scene Repeat from step 4 Change OUT Changes the end of the scene Repeat from step 5 8 When you finish editing the Scene List select OK and press ENTER The display for entering the title name appears To enter a new name select Enter and follow the explanations on page 43 9 Select OK and press ENTER The def...

Page 82: ...ess x REC STOP Note that it may take a few seconds for the recorder to stop recording Notes The disc may not be recorded as programmed if the tape s time code is not sequential or there are blanks between the recordings on the tape In this case see Recording From a VCR or Similar Device page 53 The start and end points of a program may be different from what you have set if the source DV Digital8 ...

Page 83: ... appears Example Video setup 4 Select the item you want to set up and press ENTER Available options for the item appear Example TV Type 1 2 3 4 5 6 7 8 9 0 M m ENTER SYSTEM MENU SYSTEM MENU TITLE LIST TV GUIDE SCHEDULE DV D8 EDIT DUBBING SETUP SETUP Settings Video Audio Features Options Easy Setup Tuner Preset Area Setup Clock Set Top Box Control Language Settings Video Audio Features Options Easy...

Page 84: ...llite receiver You cannot select Tuner Preset when you set Set Top Box Control to On Auto Preset Automatically presets the receivable channels The recorder can receive VHF channels 2 to 13 UHF channels 14 to 69 and unscrambled CATV channels 1 to 125 First we recommend that you preset the receivable channels in your area using automatic presetting methods 1 Follow steps 1 to 3 of Using the Setup Di...

Page 85: ...ENTER On Turns on the Auto Fine Tuning function Normally select this Off Allows you to adjust the picture manually 8 Select On to turn on AFT and press ENTER To preset or disable another channel repeat from step 3 If the Auto Fine Tuning function does not work effectively select Off in step 7 and press ENTER When the fine tuning bar appears press to obtain a clearer picture and press ENTER 9 To pr...

Page 86: ...ol is set to On you can make the following settings Note that when you change Set Top Box Control to On or Off all of the timer recording settings will be canceled Brand Code See Cable Box Satellite Receiver Brand Code page 112 for the brand code for your cable box or satellite receiver and enter the code using the number buttons and ENTER Connection Selects the connection you used for your cable ...

Page 87: ...d Video Settings Video Video settings will adjust items related to the image such as size and color Choose the settings according to the type of TV tuner or decoder connected to the DVD recorder 1 Press SYSTEM MENU while the recorder is in stop mode 2 Select SETUP and press ENTER 3 Select Video and press ENTER The Video Setup appears with the following options The default settings are underlined T...

Page 88: ...n order for these images to appear natural on your screen when output in PROGRESSIVE mode the progressive video signal needs to be converted to match the type of DVD software that you are watching You can fine tune the progressive 480p video signals that are output when you press PROGRESSIVE PROGRESSIVE lights up Note that you must connect to a progressive format TV using the COMPONENT VIDEO OUT j...

Page 89: ... in stop mode 2 Select SETUP and press ENTER 3 Select Audio and press ENTER The Audio Setup appears with the following options The default settings are underlined Auto Stereo This function is effective only when Tuner Audio is set to Main Tuner Audio Selects the sound to be recorded Note If no SAP sound is received the main sound is recorded regardless of the setting On Turns on the screen saver f...

Page 90: ...OPTICAL or COAXIAL jacks To set the digital output signal The following setup items switch the method of outputting audio signals when you connect a component such as an amplifier receiver with a digital input jack For connection details see Connecting the Audio Cords page 19 Select Dolby Digital and DTS after setting Digital Out to On On Select this when the playback sound from the speakers is di...

Page 91: ...Auto Chapter The selected interval should only be used as an approximation to create chapters This function is not available when dubbing DV Digital8 format tapes to HDD and DVD RWs VR mode Chapter marks are automatically entered where the recordings start on the tape pages 79 80 D PCM Select this when the recorder is connected to an audio component lacking a built in Dolby Digital decoder You can...

Page 92: ... limitation Discs rated higher than the selected level will be restricted 6 Select the level and press ENTER The Parental Control setting is complete To cancel the Parental Control setting for the disc set Level to Off in step 6 To change the password select Password in step 3 and press ENTER When the display for registering a password appears enter a new four digit password using the number butto...

Page 93: ...115 Finland 2165 France 2174 Germany 2109 India 2248 Indonesia 2238 Italy 2254 Japan 2276 Korea 2304 Malaysia 2363 Mexico 2362 Netherlands 2376 New Zealand 2390 Norway 2379 Pakistan 2427 Philippines 2424 Portugal 2436 Russia 2489 Singapore 2501 Spain 2149 Sweden 2499 Switzerland 2086 Thailand 2528 United Kingdom 2184 Auto Automatically finalizes the disc following One Touch Dubbing Manual Allows y...

Page 94: ... to their default settings Note that all of your previous settings will be lost 1 After step 3 above select Factory Setup and press or ENTER The display for selecting a group of settings appears 2 Select the group of settings you want to return to default from Settings Video Audio Features Options Parental Control and All and press or ENTER 3 Select Start and press ENTER The selected settings retu...

Page 95: ...ogram 1 Press SYSTEM MENU while the recorder is in stop mode 2 Select SETUP and press ENTER 3 Select Easy Setup and press ENTER 4 Press ENTER 5 Select Start and press ENTER 6 Follow the instructions for Easy Setup page 24 from step 5 Settings Video Audio Features Options Easy Setup Easy Setup SETUP ...

Page 96: ...s recorded on the HDD which is due to the characteristics of HDD and is not a malfunction TV program reception does not fill the screen Set the channel manually in Tuner Preset in Settings Setup page 84 Select the correct source using the INPUT SELECT button or select a channel of any TV program using the CH buttons TV program pictures are distorted Reorient the TV antenna Adjust the picture see t...

Page 97: ...ide On Screen data may not be available in some areas TV Guide On Screen does not appear if you connect your TV using the video or S video jacks and press the PROGRESSIVE button on the remote even if your TV accepts progressive signals The Time Lock function on your cable box is activated Set this function to off The channel number in the program listing does not match the broadcast station There ...

Page 98: ... the menu to start playback The recorder starts playing the disc automatically The DVD VIDEO features an auto playback function Playback stops automatically If the DVD has an auto pause signal the recorder stops playback at the auto pause signal Some functions such as Stop Search or Slow motion Play cannot be performed Depending on the DVD you may not be able to do some of the operations above See...

Page 99: ...s not complete or did not start from the beginning There was a power failure during recording Should the power failure continue for more than one hour reset the clock page 86 There is not enough HDD or DVD disc space for the recording Contents previously recorded were erased Data that has been recorded on a DVD with a PC will be erased from the disc when the disc is inserted Auto Title Erase in Fe...

Page 100: ...uring recording Leave the recorder on until RECOVERY disappears from the front panel display HDD ERROR appears in the front panel display The hard disk error occurred Press down 1 on the recorder for ten seconds to restart the recorder If this does not resolve the problem format the recorder s HDD by pressing down the HDD button on the recorder for more than ten seconds until WELCOME appears in th...

Page 101: ... any type of abrasive pad scouring powder or solvent such as alcohol or benzine About repairing the hard disk drive It may be necessary to access data stored on the hard disk for testing purposes there is no intention to copy or store the data titles or any other information If replacement or initialization format is required the hard disk will be formatted at our discretion In this case please no...

Page 102: ...A 1 A to W W 1 to W 84 Video reception Frequency synthesizer system Audio reception Split carrier system Antenna 75 ohm antenna terminal for VHF UHF Timer Clock Quartz locked Timerindication 12 hour cycle digital Power back up duration 1 hour Video recording format MPEG Video Audio recording format applicable bit rate Dolby Digital 2 ch 256 kbps When you play PCM sound tracks with a 96 kHz samplin...

Page 103: ...gital serial interface for handling digital video digital audio and other data in two directions between equipment having the i LINK jack and for controlling other equipment i LINK compatible equipment can be connected by a single i LINK cable Possible applications are operations and data transactions with various digital AV equipment When two or more i LINK compatible equipment are connected to t...

Page 104: ...er second or the amount of data that can be sent or received in one second For example a baud rate of 100 Mbps means that 100 megabits of data can be sent in one second i LINK functions on this recorder For details on how to dub when this recorder is connected to other video equipment having DV jacks see page 77 The DV jack on this recorder can only input DVC SD signals It cannot output signals Th...

Page 105: ...IMER REC indicator 46 E remote sensor 21 F A open close button 46 G H play button 54 X pause button 54 x stop button 54 H TV GUIDE button 34 46 I z REC button 50 X REC PAUSE button 50 x REC STOP button 50 J M m ENTER button 32 K SYSTEM MENU button 32 TOOLS button 32 L O RETURN button 32 M previous next buttons 56 N CHANNEL buttons 50 O REC MODE button 45 P INPUT SELECT button 53 77 Q DVD button in...

Page 106: ...on 34 47 SCHEDULE button 49 Blue button 34 Green button 34 info button 34 TIMER button 48 H SYSTEM MENU button 32 TITLE LIST button 37 54 65 TOOLS button 32 I CURSOR MODE button 37 J O RETURN EXIT button 32 34 K TOP MENU button 54 L PREV previous NEXT buttons 56 M z REC button 50 X REC PAUSE button 50 x REC STOP button 50 N REC MODE button 45 O INPUT SELECT button 53 77 P ANGLE button 56 SUR surro...

Page 107: ... m M search buttons 56 wk H PLAY button 54 The button has a tactile dot X PAUSE button 54 x STOP button 54 wl CHAPTER MARK ERASE buttons 68 e DISPLAY button 41 52 TIME TEXT button 42 ea COMMAND MODE switch DVD 1 2 3 23 Use the tactile dot as a reference when operating the recorder continued ...

Page 108: ...g Dimmer to Power Save in Options Setup page 94 Rear panel A VHF UHF IN OUT jacks 14 B SET TOP BOX CONTROL jack 13 14 C LINE IN AUDIO L R VIDEO 1 3 jacks 13 29 D LINE IN S VIDEO 1 3 jacks 13 29 E COMPONENT VIDEO IN Y PB PR jack 13 29 F DIGITAL OUT COAXIAL OPTICAL jacks 20 G LINE OUT AUDIO L R VIDEO 1 2 jacks 16 20 H LINE OUT S VIDEO 1 2 jacks 16 I COMPONENT VIDEO OUT Y PB PR jacks 16 J AC IN termi...

Page 109: ...ecording format that is comparable to the DVD VIDEO format DVD RW page 8 A DVD RW is a recordable and rewritable disc that is the same size as a DVD VIDEO The DVD RW has two different modes VR mode and Video mode DVDs created in Video mode have the same format as a DVD VIDEO while discs created in VR Video Recording mode allow the contents to be programmed or edited DVD R page 8 A DVD R read plus ...

Page 110: ...list page 64 Playback information created from the actual recordings on a DVD RW VR mode A Playlist leaves the original titles as they are and contains only the information needed to control playback A Playlist title takes up very little disc space Progressive format page 18 Compared to the Interlace format that alternately shows every other line of an image field to create one frame the Progressi...

Page 111: ...ish 1283 Javanese 1287 Georgian 1297 Kazakh 1298 Greenlandic 1299 Cambodian 1300 Kannada 1301 Korean 1305 Kashmiri 1307 Kurdish 1311 Kirghiz 1313 Latin 1326 Lingala 1327 Laothian 1332 Lithuanian 1334 Latvian Lettish 1345 Malagasy 1347 Maori 1349 Macedonian 1350 Malayalam 1352 Mongolian 1353 Moldavian 1356 Marathi 1357 Malay 1358 Maltese 1363 Burmese 1365 Nauru 1369 Nepali 1376 Dutch 1379 Norwegian...

Page 112: ... Bell Howell 0014 Bell Atlantic 0641 Bell South 0899 Bestlink 0303 Betavue 0022 British Telecom 0003 BVS 0641 Cable Healthcare 0769 0058 Cable Star 0056 Cabletenna 0022 0039 Cableview 0022 Century 0153 0618 0008 0315 Citation 0017 Citizen 0153 0315 0078 0242 Clearmaster 0883 ClearMax 0883 1247 Colour Voice 0031 0025 Comband 0233 0232 Comtec 0274 Comtronics 0060 0040 Comtronics Eagle 0040 0060 Cont...

Page 113: ... 0069 Millennium 0618 0153 Memorex 0000 Mitsubishi 0003 Cable box brand Code number Motorola 0476 0276 1476 0810 1376 1254 0400 1106 Movie Time 0156 0078 0063 0203 MS 0069 0015 1018 0303 MultiVision 0012 Myrio 1117 NET 0274 Next Level 0764 1316 1315 1314 Nexus 0770 Northcoast 0671 0314 Nova Vision 0277 0008 Novabeam 0277 Novaplex 0618 0277 0017 0008 NSC 0156 0070 0203 0063 0400 0012 0618 0022 0637...

Page 114: ...e 0769 0058 Spectravision 0058 Sprucer 0021 0307 0010 0144 Standard Components 0203 0096 0155 Starcom 0003 0015 0047 0014 0098 0305 Cable box brand Code number Stargate 0015 0040 0770 0865 0797 0305 0014 Starquest 0015 StarSight 0542 0422 Stealth 0274 Stellar One 0807 Storm 1018 0637 Suena Madritel 1230 Supercable 0276 Supermax 0883 Sylvania 0001 Tandy 0258 Tatung 0097 Teac 1018 Technics 0029 Tekn...

Page 115: ...ber AlphaStar 0772 Atlantic Telephone 1333 Bell ExpressVu 0775 Century 0856 Chaparral 0216 Crossdigital 1109 DirecTV 0749 0566 0392 1749 0099 1109 1076 1442 1856 0247 1142 1639 0724 0639 0819 Dish Network System 0775 1005 1170 Dishpro 0775 1005 Echostar 0775 1170 1005 Expressvu 0775 Galaxis 0863 GE 0566 General Instrument 0361 0869 0627 GOI 0775 Gradiente 0856 Hitachi 0819 0749 Houston Tracker 077...

Page 116: ...0566 QNS 1367 RadioShack 0869 RCA 0566 0392 0143 0855 Samsung 1109 1276 Sky 0856 0099 1856 Sony 0639 1639 Star Choice 0869 Star Trak 0869 0772 Thomson 0566 0392 Tivo 1142 1442 Toshiba 0790 0749 1749 1285 UEC 1333 1358 Uniden 0724 0722 Video Cipher II Plus 0361 Zenith 0856 1856 Satellite receiver brand Code number ...

Page 117: ... 52 58 Combine Titles 71 Command Mode 24 94 COMPONENT VIDEO IN 13 29 COMPONENT VIDEO OUT 16 Connecting the antenna cable 12 the audio cords 19 the video cords 16 Connection 86 Contrast 52 58 CONTROL S 17 Controlling TVs with the remote 22 Copy protection 46 109 Copy Free 46 Copy Never 46 Copy Once 46 CPRM 8 Creating chapters 68 Cursor mode 38 D DATA CD 10 Digital Out 90 Digital video camera 77 Dim...

Page 118: ...menu 32 On Screen Menus 32 Options 94 Original 38 64 110 OSD language 87 25 P Page mode 38 Parental Control 55 92 Parental control settings 91 Parts and controls 105 Pause Mode 88 PB Video Equalizer 58 PBC 54 Play Beginning 54 Play mode 42 Playable discs 10 Playback 54 Freeze Frame 56 Resume Play 54 Slow motion play 56 Playback picture quality 58 Playing status bar 42 Playlist 38 64 68 110 Power c...

Page 119: ...l picture 38 Time Search 61 TIME TEXT 42 Timer recording 46 check change cancel 49 manual setting 48 Rec Mode Adjust 47 48 VCR Plus 48 Title 37 110 TITLE LIST 54 Title List 37 Sort 38 Thumbnail 38 Zoom 37 Title Name 66 Title number 42 Title Search 61 TOOLS 32 TOP MENU 54 Track 110 Track number 42 Track Search 61 Troubleshooting 96 Tuner Audio 89 Tuner Preset 26 84 TV Guide On Screen system 33 46 T...

Page 120: ...Sony Corporation Printed in Malaysia Printed on 100 recycled paper using VOC Volatile Organic Compound free vegetable oil based ink 2 187 189 11 2 ...

Reviews: