47
Re
cor
d
in
g
adjustment, set the ND filter to 2. If
flashes during the iris automatic
adjustment, set the ND filter to 3.
The ND filter indicator will stop flashing
and remain on the screen.
If
flashes, set the ND filter
E
to
OFF. The ND filter icon will disappear
from the screen.
b
Notes
• If you change the ND filter
E
during recording,
the movie and sound may become distorted.
• When adjusting the iris manually, the ND filter
icon does not flash even if the light level should
be adjusted with the ND filter.
• If the camcorder cannot detect the ND filter
position (OFF/1/2/3),
flashes on the screen.
Make sure that the ND filter is set correctly.
z
Tip
• While recording a bright subject, diffraction
may occur if you close the aperture further
down, resulting in a fuzzy focus (this is a
common phenomenon with video cameras). The
ND filter
E
suppresses this phenomenon and
gives better recording results.
Adjusting the color
tone
You can adjust and fix the white balance
according to the lighting conditions of
recording environment.
You can store white balance values in
memory A (
A) and memory B (
B),
respectively. Unless a white balance is
readjusted, values will remain even after the
power has been turned off.
When you select PRESET, [OUTDOOR],
[INDOOR] or [MANU WB TEMP] is
selected, according to which one you
previously set with [WB PRESET] in the
(CAMERA SET) menu.
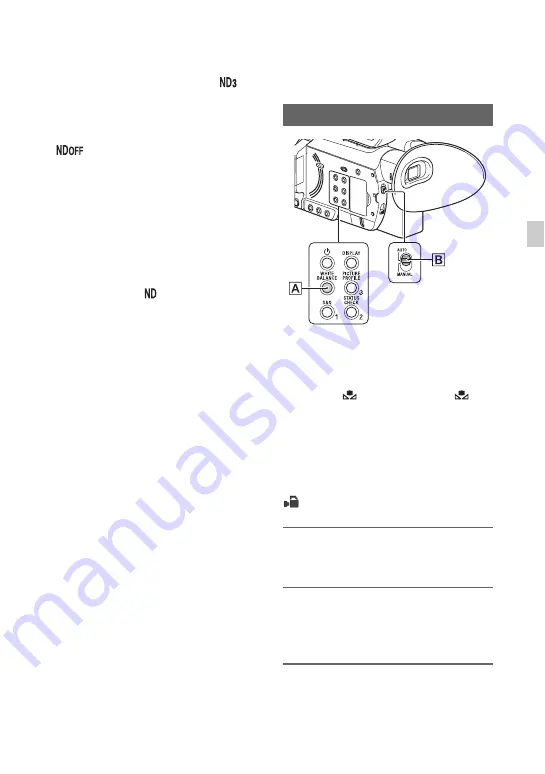
1
Set the AUTO/MANUAL switch
B
to MANUAL.
2
Press the WHITE BALANCE
button
A
.
The white balance value is highlighted.
3
Turn the MANUAL dial to select
PRESET, A, or B.
Adjusting the white balance
Continued
,