Useful Functions
40
Record
ing
was from SP 1440×1080/23.98P to SP 1440×1080/
59.94i).
• The Setup and PICTURE PROFILE menus cannot be
operated during Rec Review.
The camcorder has five assignable buttons
to which you can assign various functions for
convenience.
To change functions
Use “Assign Button”
of the OTHERS
menu.
The assigned functions can be viewed on the
“Button/Remote Status Screen” (page 90)
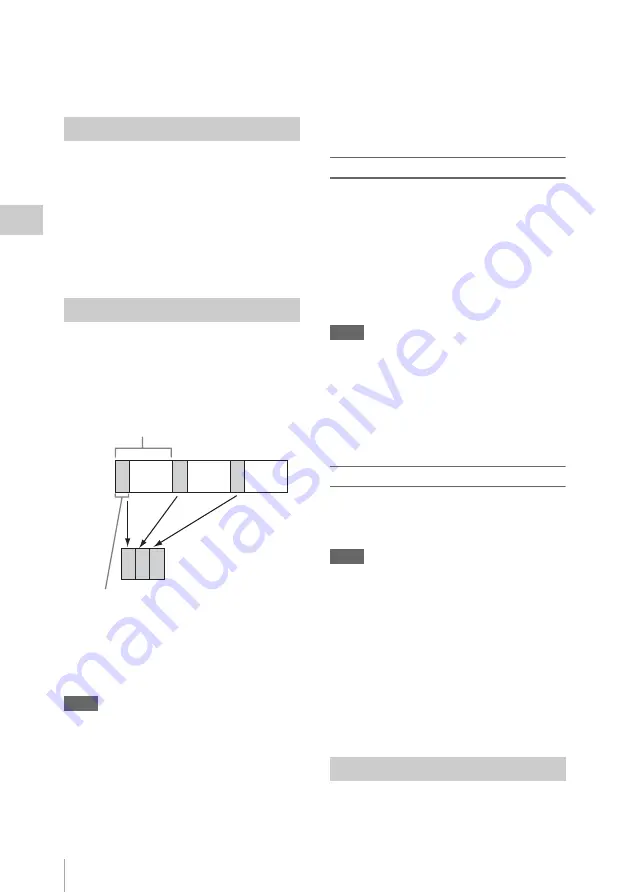
The Interval Recording (time-lapse recording)
function is especially effective for shooting
objects that move very slowly.
The specified number of frames are automatically
recorded at the specified intervals.
It is recommended to fix the camcorder to a tripod
or equivalent and use the IR Remote Commander
to start/stop recording rather than pressing the
REC START/STOP button of the camcorder.
Notes
• Audio cannot be recorded in Interval Recording mode.
• Interval Recording cannot be set to “On”
simultaneously with Frame Recording, Picture Cache
Recording, Slow & Quick Motion, Clip Continuous
Recording, Simultaneous Recording in the 2 slots, or
Proxy Recording. When you set Interval Recording to
“On,” these other functions are forcibly set to “Off.”
• Interval Recording mode cannot be used when
of the OTHERS
menu is set to “HQ 1280×720/23.98P” (in UDF HD
Mode and FAT HD Mode) or “SP 1440×1080/23.98P”
(in FAT HD Mode).
• Interval Recording mode cannot be used when the
items “DVCAM” or “HDV” are set for “SDI/HDMI/
i.LINK I/O Select”
of the VIDEO SET
menu, and the video format of “Format” in “System”
of the OTHERS menu is set to other than
“HQ mode/23.98P.”
Preparatory settings
Before starting Interval Recording, make the
necessary settings of the CAMERA SET menu
in advance.
When the video light compatible with the Multi
Interface Shoe is mounted, you can set “Pre-
Lighting” in “Interval Rec” of the CAMERA SET
menu to “On” so that the light turns on
automatically approximately 2 seconds before
recording.
Notes
• While “Pre-Lighting” is set to “On”, the video light
remains on with “Interval Time” set to “3sec” or less,
even if “Rec Link” or “Rec Link + Stby” in “Video
Light Set” is set.
• While “Pre-Lighting” is set to “Off,” the video light
remains off, even if you start recording with “Rec
Link” in “Video Light Set” set. If “Rec Link + Stby” in
“Video Light Set” is set, the video light remains dimly-
lit.
Performing Interval Recording
When the preparatory settings are completed, you
can start recording.
Press the REC START/STOP button.
Notes
• You cannot change the “Interval Time” and “Number
of Frames” settings while Interval Recording is in
progress. To change them, pause recording.
• After starting Interval Recording, Rec Review
operation is disabled, even during an interval.
• The timecode is recorded in Rec Run mode
during Interval Recording.
• Some extra frames may be recorded if you stop
recording or switch the card slot while recording is
halted in Interval Recording mode.
• “Setting” for “Interval Rec” is automatically set to
“Off” when you set the power switch to OFF, while the
“Interval Time” and “Number of Frames” settings are
maintained.
The Frame Recording function is especially
effective for clay animation recording.
Assignable Buttons
Interval Recording
Number of frames for one recording session
(Number of Frames)
Recording interval (Interval Time)
Frame Recording
Summary of Contents for PXW-X200
Page 180: ......


