36
Step 4: Installing an IP Converter
3
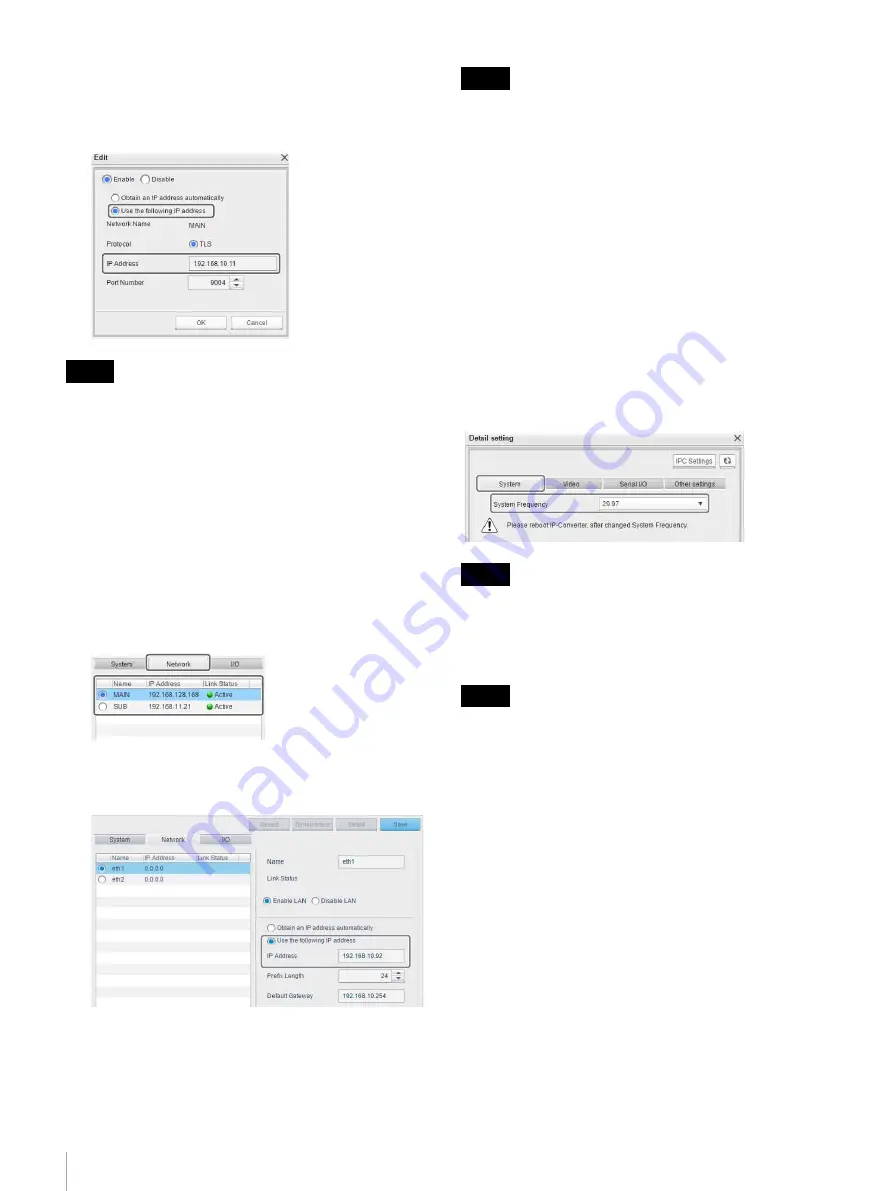
Select [Use the following IP address], and enter the IP
address.
4
Click the [OK] button.
• Do not change port numbers.
• For connections using two optical fiber cables (safety
priority or uncompressed transmission priority), set the
IP address of both [MAIN] and [SUB].
• For connections using only one optical fiber (cost
priority), when changing the sub address setting, select
[Disable] and [Use the following IP address], and
specify an IP address in the [Edit] dialog.
Configuring a static IP address for an IP
converter
1
Select the [MAIN] or [SUB] address from the list on
the [Network] tab of the [Edit Virtual Device] screen.
2
Select [Use the following IP address], and enter the IP
address.
• For connections using two optical fiber cables (safety
priority or uncompressed transmission priority), set the
IP address of both [MAIN] and [SUB].
• If [Use the following IP address] is selected for the
[MAIN] address, also select [Use the following IP
address] for the [SUB] address.
• For connections using only one optical fiber (cost
priority), when changing the sub address setting, select
[Disable LAN] and [Use the following IP address], and
specify an IP address.
Setting the system frequency
You can set the system frequency of an IP converter to
25 Hz or 29.97 Hz.
Set the system frequency in [System Frequency] on the
[System] tab of the [Detail setting] screen (default:
29.97 Hz).
• Set the IP converters in all ORs to the same system
frequency.
• Always restart the IP converters after changing the
system frequency.
If the system frequency is changed, the system frequency
in the Network GenLock mode settings must also be
changed
Setting the IP converter connection type
(source/destination)
You can set the IP converter for connection to a source
device or destination device.
Set the connection type in [Direction] on the [Video] tab of
the [Detail setting] screen (default: Destination).
Notes
Notes
Notes
Tip


