23
Step 3: Installing an NSM Server
1
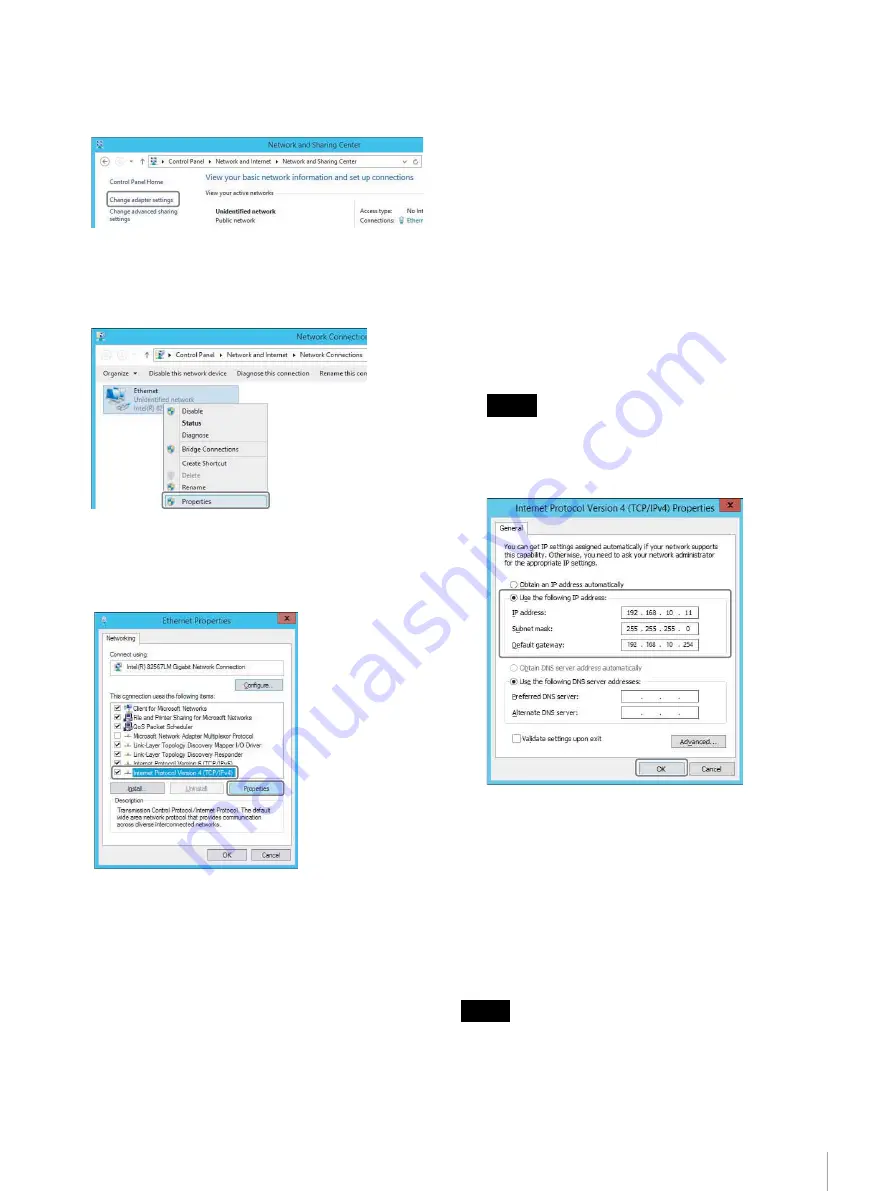
Select [Control Panel] > [Network and Internet] >
[Network and Sharing Center] > [Change adapter
settings].
The [Network Connections] dialog appears.
2
Right-click the network connection (NIC) to use, and
select [Properties].
The [Ethernet Properties] dialog appears.
3
Select [Internet Protocol Version 4 (TCP/IPv4)], and
click the [Properties] button.
The [Internet Protocol Version 4 (TCP/IPv4)
Properties] dialog appears.
4
Select [Use the following IP address], and enter the
following IP address and subnet mask.
Safety priority or uncompressed
transmission priority
Main
IP address: 192.168.10.11
Subnet mask: 255.255.255.0
Default gateway: Enter the address of the network
switch
Sub
IP address: 192.168.11.11
Subnet mask: 255.255.255.0
Default Gateway: Setup not required
Cost priority
Main
IP address: 192.168.10.11
Subnet mask: 255.255.255.0
Default gateway: Enter the address of the network
switch
MGMT
IP address: 10.10.0.101 or 10.10.0.102
Subnet mask: 255.255.255.0
Default Gateway: Setup not required
Leave other settings with their default values.
5
Click the [OK] button.
Setting the DHCP server
IP converters are in DHCP mode by default. Accordingly,
a DHCP server must be configured in order to connect the
Network System Manager and IP converters to the
network.
• Use the DHCP server that comes with Windows Server
2012 is recommended.
• First add a DHCP server using [Server Manager] > [Add
roles and features], and make the server configurable.
Only use DHCP mode on the IP converter the first time it
is connected. For subsequent operation, change the IP
converter setting to static IP address mode in Network
System Manager.
Note
Note


