P
re
parat
io
n
Loading Paper
13
3
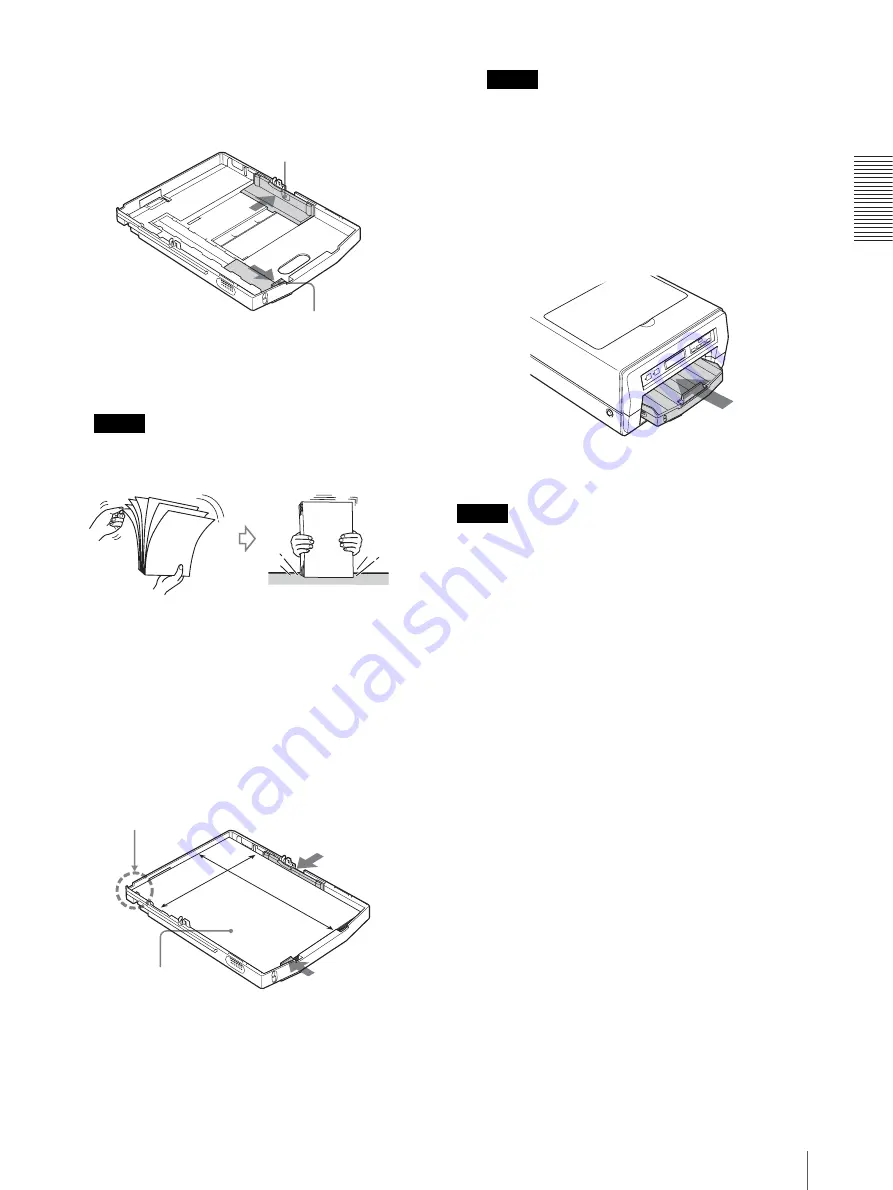
Move the paper guides (vertical and horizontal) to
the ends.
4
Riffle the paper so that it is even.
Note
Be careful not to touch the printing surface.
5
When plain paper is used, place the paper in the
auto sheet feeder tray so that the printing surface
faces down. When Sony High Quality Paper is
used, place the paper in the auto sheet feeder tray so
that the more whitish side faces down. Then, secure
the paper in place by sliding the paper guides
inward towards the paper.
Notes
• Place the paper against the back of the auto sheet
feeder tray towards the left side.
• Place the paper with the long side placed
vertically and the short side horizontally.
6
Reattach the cover to the auto sheet feeder tray and
insert it into the printer.
Notes
• When printing, be sure to pull out the output support
completely. If it is pull out halfway, the paper may
jam.
• The number of sheets which the automatic paper
feeding tray can hold depends on the type of paper in
use. For detailed information on the maximum
number of sheets which can be loaded, see page 11.
• Do not mix different types of paper in the auto sheet
feeder tray.
• To remove jammed paper, push the READY button,
blinking in orange. The jammed paper is
automatically ejected. Should the jammed paper
remain after you have pushed the READY button, see
“If the Paper Jams” on page 56.
• Do not use paper listed in “Unsuitable paper” on page
• Do not pull the paper out when printing has started and
the paper is being fed. Doing so is likely to result in
malfunctions or paper jams.
• It is often difficult to feed paper from the auto sheet
feeder tray, or sometimes it may be fed at an angle,
depending on the usage circumstances. In such a case,
add one sheet of the same type of paper in the auto
sheet feeder tray and try to print again.
• The paper may warp depending on the circumstances
and the warped paper may stick up out from the auto
sheet feeder tray. In this case, the printer will not be
able to feed the paper. Try to make the warped paper
lie flat or reduce the number of sheets set in the auto
sheet feeder tray.
Paper guide (horizontal)
Paper guide (vertical)
Place the paper in the
auto sheet feeder tray
with facing the printing
surface down.
Set the paper securely
at this point.


