Sony LBT-ZTX7 - Compact Hi-fi Stereo System, Operating Instructions Manual
The Sony LBT-ZTX7 Compact Hi-fi Stereo System delivers exceptional audio performance in a sleek design. Unlock its full potential with the comprehensive Operating Instructions Manual, available for free download at manualshive.com. This manual provides step-by-step guidance to ensure seamless setup and optimal use of this impressive stereo system.
Share
Download


Reviews:
No comments
Related manuals for LBT-ZTX7 - Compact Hi-fi Stereo System

CY-VHD9401N
Brand: Panasonic Pages: 41

SSC-21WEB
Brand: Samsung Pages: 40

D2xC2LD2 Series
Brand: E2S Pages: 13

D2xC1
Brand: E2S Pages: 14

P139-HD
Brand: Eagle Copters Pages: 11

BIM-BAM GNT-921
Brand: Zamel Pages: 6
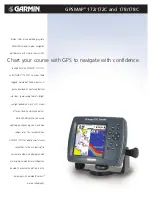
GPSMAP 172
Brand: Garmin Pages: 2

FUSION Apollo MS-WB670
Brand: Garmin Pages: 44

HL
Brand: M86 Security Pages: 96

SRM 450
Brand: Mackie Pages: 6

SR1530
Brand: Mackie Pages: 6

SA1521
Brand: Mackie Pages: 12

Fussion Series 3000
Brand: Mackie Pages: 8

Fussion Series 3000
Brand: Mackie Pages: 8

Art Series ART300
Brand: Mackie Pages: 6

Art Series ART200A
Brand: Mackie Pages: 2

SB600
Brand: Salus Pages: 2

dmc1 Finish-Out
Brand: M&S Systems Pages: 8


