background image

87

Tr

oub

le

sh

o

o

ting

“---” is displayed on the LCD screen.

• Bars will be displayed for the camera data of the movies recorded with [COLOR BAR] set to 

[ON].

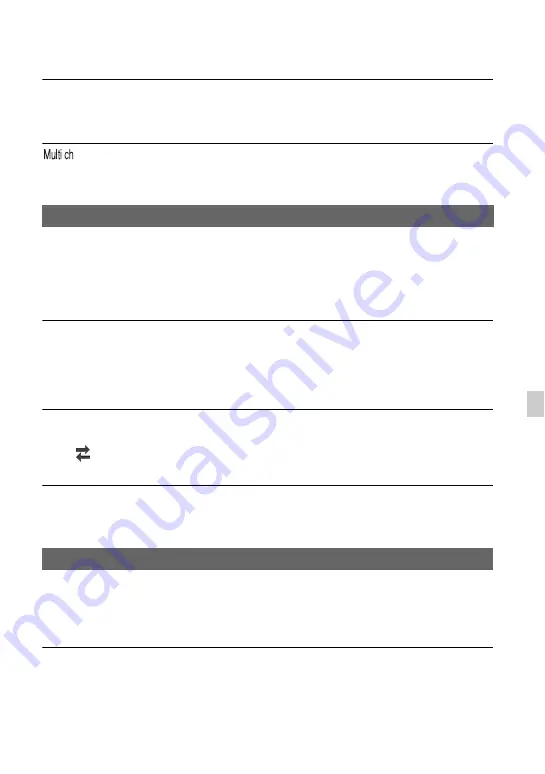
 appears on the LCD screen.

• This appears when you play back movies recorded with 5.1ch surround sound. 5.1ch 

surround sound is down-mixed to 2ch stereo and played back on your camcorder.

Neither image nor sound is played back on the TV connected with the HDMI 
cable.

• Images are not output from the HDMI OUT jack, if copyright protection signals are recorded 

in the images.

• Signals are not output from the HDMI OUT jack when the USB jack is connected.

Neither image nor sound is played back on the TV, projector, or AV amplifier 
connected with the HDMI cable.

• If you cannot view images or hear sound on the TV, projector, or AV amplifier connected 

with the HDMI cable, try disconnecting and connecting the HDMI cable, or turn on your 
camcorder again.

The image appears distorted on the 4:3 TV.

• This happens when viewing a movie recorded in the 16:9 (wide) mode on a 4:3 TV. Select 

 (REC/OUT SET) 

t

 [VIDEO OUT] 

t

 [DOWN CONVERT TYPE] 

t

 the 

appropriate down conversion type (p. 68).

Black zone appears at top and bottom of a 4:3 TV screen.

• This happens when viewing a movie recorded in the 16:9 (wide) mode on a 4:3 TV. This is 

not a malfunction.

Time code and other information appear on the display of the connected 
device.

• Set [DISPLAY OUTPUT] to [LCD PANEL] when you connect a device with the A/V 

connecting cable (sold separately) (p. 74).

Copy cannot be done correctly using the A/V connecting cable (sold 
separately).

• The A/V connecting cable (sold separately) is not connected properly. Make sure that the 

A/V connecting cable (sold separately) is connected to the input jack of the device.

Connecting to TV

Copying/Editing/Connecting to other devices

Continued 

,

Summary of Contents for HXR-MC2500

Page 1: ...34 11 1 Solid State Memory Camcorder Operating Guide HXR MC2500 Table of Contents Getting Started Recording Playback Editing Using the Menu Connecting with another device Troubleshooting Additional Information ...

Page 2: ...layback conditions The LCD screen is manufactured using extremely high precision technology so over 99 99 of the pixels are operational for effective use However there may be some tiny black points and or bright points white red blue or green in color that appear constantly on the LCD screen These points are normal results of the manufacturing process and do not affect the recording in any way On ...

Page 3: ...s on a TV a TV of the appropriate color system for the country region is required Television programs films video tapes and other materials may be copyrighted Unauthorized recording of such materials may be contrary to the copyright laws Because of the way that the image device CMOS sensor reads out image signals the following phenomena may occur The subjects passing by the frame rapidly might app...

Page 4: ...llustrating the operating procedures Change the screen language before using your camcorder if necessary p 77 Design and specifications of recording media and other accessories are subject to change without notice The screen displays used in this manual are those of the PAL model See the bottom of the camcorder to confirm whether it is NTSC or PAL system Read this first Continued ...

Page 5: ...lish a connection with the camcorder Near Field Communication NFC is an international standard for short range wireless communication technology D Slide cover 22 E Lens G Lens F Lens hood G Grip belt H Tripod receptacle Attach the tripod sold separately the length of the screw must be less than 5 5 mm 7 32 in to the tripod receptacle using a tripod screw Body Continued ...

Page 6: ... F ASSIGN1 PEAKING button 46 71 G MANUAL button 28 H WHT BAL button 36 I WB SET button 37 Attaching the lens hood Align the marks on the lens hood to those on the camcorder and turn the lens hood in the direction of the arrow 2 until it is locked Identifying parts and controls Continued ...

Page 7: ...d Turn the lens hood cover in the direction of the arrow as illustrated while pressing the lever on the lens hood cover z Tips If you attach or remove a 62 mm 2 1 2 in PL filter or MC protector remove the lens hood Continued ...

Page 8: ... 23 F ASSIGN 2 FOCUS MAGNIFIER button 46 G ON STANDBY switch 19 H Memory card slot 22 I Access lamp 24 J MIC cable holder K HDMI OUT jack Output only 53 The available video signals are read and the appropriate output format is selected and output automatically L USB jack mini AB Output only M AUDIO OUT VIDEO OUT jack 81 To attach a shoulder strap Attach a shoulder strap sold separately to the hook...

Page 9: ...s hood release lever 7 D Eyecup 21 E Viewfinder lens adjustment lever 21 F Hook for the Shoulder belt Attach the Shoulder belt sold separately G BATT battery RELEASE button 18 H Battery pack 17 I CHG charge lamp 17 J DC IN jack 17 Continued ...

Page 10: ...10 A LCD screen 21 B V v B b SET buttons C THUMBNAIL button 48 D MENU button E Manual ring 33 Identifying parts and controls Continued ...

Page 11: ...ng 27 Indicator Meaning Recording media REC STBY Recording status 23 E Warning 89 Upper left Upper right Bottom Center N Playback indicator 48 Processing Relay recording Indicator Meaning 0min Estimated remaining recording time Recording playback media 00 00 00 00 Time code hour minute second frame Indicator Meaning Face detection ON PEAKING 71 ZEBRA 71 STEADYSHOT 66 9 Manual focus 28 F3 5 Iris 34...

Page 12: ... the recording media They are not displayed while recording However you can check them by selecting DISPLAY SET t DATA CODE and choosing the data that you want to display or by pressing the ASSIGN button to which the DATA CODE function is assigned during playback p 51 MI SHOE VIDEO LIGHT 67 REC LEVEL MODE 69 MIC SELECT 70 Indicator Meaning Screen indicators Continued ...

Page 13: ...d face Face detection 29 Changing the recording setting 31 Selecting the recording format 31 Setting the DV MODE DV mode 31 Assigning frequently used menu items to the Manual ring 33 Adjusting the brightness 34 Adjusting the iris 34 Adjusting the gain 34 Adjusting the shutter speed 35 Adjusting the exposure 36 Adjusting the color tone 36 Adjusting the white balance 36 Useful functions 38 Recording...

Page 14: ...otecting movies Protect 56 Dividing a movie 57 Deleting movies 58 Formatting the recording media 59 Deleting all data from the memory card and internal memory 59 Repairing the image database file 60 Operating the menu 61 Menu items 63 CAMERA SET menu 65 Settings to adjust your camcorder to the recording conditions STEADYSHOT etc REC OUT SET menu 68 Recording settings input and output settings REC ...

Page 15: ...ge quality DV disc with a recorder etc 81 Troubleshooting 83 Warning indicators and messages 89 Recording time of movies 93 Using your camcorder abroad 95 File folder structure on the recording media 96 Maintenance and precautions 97 About the AVCHD format 97 About the memory card 97 About the InfoLITHIUM battery pack 98 About handling of your camcorder 100 Specifications 102 Index 107 Connecting ...

Page 16: ... 1 Operating Guide 2 Software Downloads When the unit is used with a PC connection download device drivers plug ins and application software where applicable from the Sony Professional products web site Sony Professional products web site homepage U S A http pro sony com Canada http www sonybiz ca Latin America http sonypro latin com Europe Middle East and Africa http www pro sony eu Japan http ww...

Page 17: ...ch the battery pack by sliding it in the direction of the arrow while pressing it until it clicks 3 Connect the AC Adaptor and power cord from the camcorder to an outlet The CHG lamp lights up and charging starts The CHG lamp turns off when the battery is fully charged Disconnect the AC Adaptor from the DC IN jack Charging time Approximate time minute required when you charge a fully discharged ba...

Page 18: ... 1 and remove the battery pack 2 On the battery pack Turn the power off before changing the battery pack The CHG lamp flashes during charging under the following conditions The battery pack is not attached correctly The battery pack is damaged The battery pack is worn out On the AC Adaptor Do not short circuit the DC plug of the AC Adaptor or battery terminal with any metallic objects This may cau...

Page 19: ... you use your camcorder for the first time z Tips If you do not use your camcorder for about 3 months the built in rechargeable battery gets discharged and the date and time settings may be cleared from the memory In that case charge the rechargeable battery and then set the date and time again See Charging the pre installed rechargeable battery p 101 When you set the date and time again press the...

Page 20: ... ON to move the time forward 1 hour You can set any year up to the year 2037 Midnight is indicated as 12 00 AM and noon as 12 00 PM NTSC model z Tips The date and time are automatically recorded on the selected recording media and can be displayed during playback DATA CODE p 51 Step 3 Turning on the camcorder and setting the date and time Continued ...

Page 21: ...ns adjustment lever at the right of the viewfinder until the image is sharp When the picture in the viewfinder is hard to see If you cannot see the picture in the viewfinder clearly under bright circumstances use the supplied eyecup To attach the eyecup stretch it slightly and fit it over the groove of the eyecup attached to the camcorder You can attach the eyecup facing either the right or left s...

Page 22: ...t the exFAT file system used for Memory Stick XC HG Duo media and SDXC memory cards Confirm in advance that the connecting equipment is supporting the exFAT file system If you connect equipment not supporting the exFAT file system and the format screen appears do not perform the format All the data recorded will be lost Open the cover and insert the memory card with the notched edge in the directi...

Page 23: ...card and the internal memory The factory setting of recording movies is AVCHD Do the following steps to record movies 1 Press the latches on both sides of the lens cap and remove it Recording movies REC START STOP button on the handle LCD screen REC START STOP button Continued ...

Page 24: ... about 13 hours continuously If a movie file size exceeds 2 GB while recording in DV or AVCHD format the camcorder automatically divides the file and creates a new one The menu settings saved when you turn the camcorder off The access lamp lights up while the settings are being stored If you remove the battery pack or the AC Adaptor before turning off the power the settings may return to the defau...

Page 25: ...corder is not possible You can re combine relay recorded movies using the dedicated application software p 16 To record movies using both the internal memory and memory card Simultaneous recording You can record movies on both of these recording media simultaneously Press MENU t select REC OUT SET t REC SET t SIMUL RELAY REC t SIMULTANEOUS REC with the V v B b SET button You can start and stop rec...

Page 26: ... time when either REC START STOP button is pressed REC BUTTON HANDLE REC BUTTON Recording in the internal memory starts and stops when the REC START STOP button is pressed and on the memory card when the REC START STOP button on the handle is pressed REC BUTTON HANDLE REC BUTTON Recording in the memory card starts and stops when the REC START STOP button is pressed and on the internal memory when ...

Page 27: ...t is within 80 cm about 2 5 8 feet from your camcorder Be sure to keep your finger on the power zoom lever A C If you move your finger off the power zoom lever A C the operation sound of the power zoom lever may also be recorded If you set the RING SETTING to ZOOM you can adjust the zoom by rotateing the Manual ring B p 33 b Notes Turn the Manual ring B at a moderate speed If you turn it too fast ...

Page 28: ...he LCD screen 3 Rotate the Manual ring A to focus on 9 changes to when the focus cannot be adjusted any farther 9 changes to when the focus cannot be adjusted any closer To restore automatic adjustment Press the MANUAL button B to set the focus to automatic 9 disappears and the automatic focus adjustment is restored z Tips The focal length information the distance at which the subject is in focus ...

Page 29: ...t setting is OFF FACE DETECTION is available only with automatic focus 1 Press the MENU button D 2 Select CAMERA SET t FACE DETECTION t ON or OFF with the V v B b SET button C When the faces are detected frames appear on the LCD screen 3 Press the V v B b button C move the selection cursor orange colored frame to select the priority face then press the SET button again The frame on the priority fa...

Page 30: ...ACE DETECTION to OFF z Tips You can assign this function to an ASSIGN button p 46 To make it easy to detect faces record under the following conditions Record in a moderately bright place Do not obscure the face with a hat mask sunglasses etc Face the front of the camera Adjusting the focus Continued ...

Page 31: ...ing lines 60 50 Frame rate i Scanning system FX Recording mode Frame rate displayed NTSC model The frame rate displayed on the LCD screen differs from the actual frame rate b Notes Movies recorded with the recording mode set to PS or FX on REC FORMAT can be saved on an external media device only p 79 z Tips The recording format of 720 60i HQ NTSC model or 720 50i HQ PAL model is automatically sele...

Page 32: ... mode is selected REC OUT SET WIDE REC CANCEL DV MODE b Notes When you switch from DV mode to another settings made in DV mode are initialized If a movie file exceeds 2 GB during recording the camcorder divides the recording into separate files by creating a new file s automatically However the divided files are displayed as a single movie on the screen of the camcorder Canceling the DV MODE 1 Pre...

Page 33: ...al ring 1 Press and hold the MANUAL button B down for a few seconds The RING SETTING screen is displayed 2 Rotate the Manual ring A and select the item to be assigned 3 Press the MANUAL button B Items you can control with the Manual ring FOCUS p 28 ZOOM p 27 GAIN p 34 IRIS p 34 SHUTTER SPEED p 35 AE SHIFT p 36 Select RESET to reset the items adjusted manually to the default settings ...

Page 34: ...asing F value The volume of the light decreases the more that you close the aperture increasing F value To temporarily adjust the iris automatically 1 Assign IRIS PUSH AUTO to the ASSIGN 1 ASSIGN 2 button p 44 2 Hold the ASSIGN 1 ASSIGN 2 button down The iris is adjusted automatically for as long as you hold the button down To adjust the iris automatically Press the MANUAL button B while the iris ...

Page 35: ...ars on the LCD screen For example 100 appears on the LCD screen when you set the shutter speed to 1 100 second The larger the value on the LCD screen is the faster the shutter speed is z Tips It is difficult to focus automatically at a lower shutter speed Manual focusing with your camcorder attached to a tripod is recommended When recording under fluorescent lamps sodium lamps or mercury lamps the...

Page 36: ... memory A A and memory B B respectively Unless a white balance is readjusted values will remain even after the power has been turned off When you select preset white balance OUTDOOR INDOOR or MANU WB TEMP is selected according to which one you previously set with WB PRESET in the CAMERA SET menu z Tips You can assign WB PRESET to an ASSIGN button p 46 1 Press the WHT BAL button A repeatedly Each t...

Page 37: ... model then try adjusting the white balance again z Tips When you press the WB SET button B while A or B appears the white balance saved in the memory appears for about 3 seconds To adjust the white balance automatically Press the WHT BAL button A repeatedly until the white balance indicator disappears Setting value Example of recording conditions outdoor OUTDOOR When recording a night scene neon ...

Page 38: ...n off the power of the camcorder with a remote controller sold separately connected to the REMOTE jack The supplied video light diffuser reduces the glare and softens light b Notes The color temperature varies slightly depending on the temperature of the white LED Adjust the white balance of the camera manually before recording You can make optimal recordings in various situations 1 Press the MENU...

Page 39: ...n of the camcorder enables you to operate the camcorder remotely by a smartphone Setting Recording conditions Night Scene NIGHT SCENE Shoots a night view with a proper exposure using a tripod sold separately Sunrise Sunset SUNRISE SUNSET Shoots the scenes under the glow of sunset sunrise vividly Fireworks FIREWORKS Shoots fireworks with optimal exposure Landscape LANDSCAPE Shoots distant subjects ...

Page 40: ...t iOS Search for Content Browser Mobile in the App Store then install it You need iOS 7 0 or later You cannot use the NFC One touch when you use iOS b Notes You need an NFC compatible smartphone or tablet computer in order to use the NFC One touch function of the camcorder Proper operation of the Wi Fi function detailed in this manual is not guaranteed for all smartphones or tablet computers Opera...

Page 41: ...amcorder The smartphone cannot be connected to the camcorder when AIRPLANE MODE is set to ON Set AIRPLANE MODE to OFF p 76 You can control some of the camcorder s movie shooting functions remotely with a smartphone To start CTRL W SMARTPHONE using the NFC function see p 40 1 Press the MENU button 2 Select NETWORK SET t CTRL W SMARTPHONE with the V v B b SET button 3 Connect the smartphone to the c...

Page 42: ... p 46 Functions operable by CTRL W SMARTPHONE Recording start stop Touch focus Available when using manual focus Zoom Iris adjustment While the smartphone is connected to the camcorder CLOSE cannot be selected b Notes You cannot perform other operations during touch focus 1 Select Settings on your smartphone then select Wi Fi and the SSID displayed on the camcorder 2 Input the password displayed o...

Page 43: ...ect 4 Return to the Home screen then starts Content Browser Mobile For details on how to operate Content Browser Mobile after it starts refer to the Help section in Content Browser Mobile 1 Select Settings on the iPhone or iPad then select Wi Fi and the SSID displayed on the camcorder 2 Input the password displayed on the camcorder first time only Connecting without using the NFC function iPhone i...

Page 44: ...ast 2 time code digits of the frames in multiples of 4 between 0 and 23 PAL model 00 00 00 00 23 59 59 24 4 Set other digits by repeating step 3 5 Press the V v B b button select OK then press the SET button To reset the time code You can reset the time code 00 00 00 00 Select RESET in step 2 of Presetting the time code 1 Press the MENU button press the V v B b SET button and select TC UB SET t UB...

Page 45: ... from the top to the end of the most recently recorded scene then returns to standby mode To stop reviewing the last scene Press the ASSIGN button during playback The camcorder returns to standby mode b Notes If you edit the movie or remove the recording media after you stop recording the LAST SCENE REVIEW function may not work correctly Reviewing the most recently recorded scene LAST SCENE REVIEW...

Page 46: ...2 FOCUS MAGNIFIER p 29 Functions you can assign to the ASSIGN buttons no function FOCUS MAGNIFIER p 29 LAST SCENE REVIEW p 45 WB PRESET p 37 STEADYSHOT p 66 AUTO MODE SET p 38 SCENE SELECTION SET p 38 IRIS PUSH AUTO p 34 FACE DETECTION p 29 COLOR BAR p 67 VOLUME p 69 HISTOGRAM p 70 ZEBRA p 71 PEAKING p 71 MARKER p 71 CAMERA DATA DISPLAY p 72 AUDIO LEVEL DISPLAY p 72 DATA CODE p 73 TC UB DISPLAY p ...

Page 47: ... b SET button A 3 Press the V v B b SET button A select the ASSIGN button that you want to set then press the SET button 4 Press the V v B b button A select the function that you want to assign then press the SET button 5 Press the V v B b button A to select OK then press the SET button ...

Page 48: ...48 Playback Playback 1 Open the LCD panel THUMBNAIL button Playing back movies ...

Page 49: ...the lower part of the LCD screen ADate and time of recording started BResolution CFrame rate DRecording mode EDuration FTime code of recording started Time code will not be displayed correctly when you play back recording media with no time code or recording media with time code that your camcorder does not support GDOLBY DIGITAL recording Appears when audio is recorded in DOLBY DIGITAL i appears ...

Page 50: ... fast reverse during playback are 5 times faster than normal playback speed When you play back a DV file recorded with a camcorder other than this camcorder the F value may not be displayed correctly To adjust the volume Press the MENU button and select AUDIO SET t VOLUME to adjust the volume To return to the recording mode Press the THUMBNAIL button On playing back movies Movies recorded using th...

Page 51: ...Press the MENU button and press the V v B b SET button to select DISPLAY SET DISPLAY OUTPUT ALL OUTPUT p 74 You can display information including date time and camera data automatically stored during recording on the screen during playback 1 Press the MENU button B while playing back a movie 2 Press the V v B b buttons to select DISPLAY SET t DATA CODE and choose the data that you want to display ...

Page 52: ... the iris gain or shutter speed automatically adjusted appears during playback of the movie recorded with the iris gain or shutter speed manually adjusted F SteadyShot b Notes When you play back the memory card on other devices the camera data may be displayed incorrectly Confirm the correct camera data on your camcorder Changing checking the settings in your camcorder Continued ...

Page 53: ...image quality depends on the type of monitor or TV or the jacks used to make the connection RCA Cable sold separately HDMI Cable sold separately Monitor TV Signal flow To HDMI input jack To BNC jack To AUDIO IN jack BNC Cable sold separately Continued ...

Page 54: ...s converted to interlace or progressive through pull down conversion If you display the edit screen while outputting signals to a monitor or TV the menu may not be displayed correctly HD DV HDMI setting Output resolution HDMI OUT VIDEO OUT HD 1080p 480i 1080p No output 720p 480i 720p No output 1080i 480i 1080i No output 480p 480p No output 480i 480i No output DV 1080p 480i 480i No output 720p 480i...

Page 55: ...High Definition Multimedia Interface is an interface for transferring uncompressed digital audio and video signals between a TV and a connected device By connecting a cable from the camcorder s HDMI OUT jack to your TV you can enjoy high image quality video and digital audio ...

Page 56: ...he selected thumbnail To protect another movie repeat step 2 You can select up to 100 movies at one time Press the REC START STOP button to preview the selected movie To return to the thumbnail screen press the V v B b buttons to select and press the SET button 4 Press the V v B b SET buttons to select OK t OK t OK To undo the protection of movies Press the V v B b buttons to select a movie to be ...

Page 57: ...e movies once they are divided Do not remove the battery pack the AC Adaptor or the recording media that contains the movies from your camcorder during the operation It may damage the recording media A slight difference may occur from the point where you select X and the actual dividing point as your camcorder selects the dividing point based in about half second increments Movies recorded in stan...

Page 58: ...ia and recover all the recordable space of the media format the media p 59 1 Press the MENU button when the thumbnail screen is displayed 2 Press the V v B b SET buttons to select EDIT t DELETE 3 Press the V v B b buttons to select a movie to be deleted then press the SET button is displayed on the selected thumbnail You can select up to 100 movies at one time Press the REC START STOP button to pr...

Page 59: ...l data from the memory card and internal memory If a memory card and the internal memory is used repeatedly garbage data accumulate which may prevent the image data from being written at the fixed speed In this case recording may stop suddenly If this happens empty the memory card and internal memory to avoid the writing error Emptying the memory card and internal memory can erase more data than o...

Page 60: ...ecks the database information and the consistency of movies on the recording media and repairs if any inconsistencies found b Notes Connect your camcorder to the wall outlet wall socket using the supplied AC Adaptor to prevent your camcorder from running out of power during the operation 1 Press the MENU button 2 Press the V v B b SET buttons to select OTHERS t REPAIR IMAGE DB FILE 3 Press the V v...

Page 61: ...played on the LCD screen 1 Press the MENU button B The menu screen appears 2 Press the V v B b SET buttons A to select the desired menu CAMERA SET p 65 REC OUT SET p 68 AUDIO SET p 69 DISPLAY SET p 70 TC UB SET p 74 NETWORK SET p 76 OTHERS p 77 EDIT p 56 3 Press the V v B b SET buttons A to select the item that you want to set Continued ...

Page 62: ...e MENU button to hide the menu screen To return to the previous screen select RETURN b Notes The available menu items vary depending on the context of your camcorder during recording or playback Items and setting values not available due to other settings are grayed out Operating the menu Continued ...

Page 63: ...CENE SELECTION SET NIGHT SCENE SUNRISE SUNSET FIREWORKS LANDSCAPE BPORTRAIT SPOTLIGHT BEACH AUTO BACK LIGHT BOFF ON FACE DETECTION BOFF ON MI SHOE VIDEO LIGHT BPOWER LINK REC LINK REC LINK STBY AUTO COLOR BAR ON OFF BOFF ON TONE BOFF ON REC OUT SET p 68 REC SET REC FORMAT AVCHD NTSC model 1080 60p PS B1080 60i FX 1080 60i FH 1080 30p FX 1080 30p FH 1080 24p FX 1080 24p FH 720 60p FX 720 60p FH 720...

Page 64: ...F ON ON ZEBRA POINT ZEBRA ON OFF BOFF ON LEVEL 70 100 100 B70 PEAKING ON OFF BOFF ON COLOR BWHITE RED YELLOW LEVEL HIGH BMIDDLE LOW MARKER ON OFF BOFF ON CENTER BON OFF ASPECT BOFF 4 3 13 9 14 9 15 9 1 66 1 1 85 1 2 35 1 SAFETY ZONE BOFF 80 90 GUIDEFRAME BOFF ON FOCUS MAG RATIO 4 0 8 0 B 4 0 8 0 CAMERA DATA DISPLAY OFF BON AUDIO LEVEL DISPLAY BON OFF ZOOM DISPLAY BBAR NUMBER FOCUS DISPLAY BMETER F...

Page 65: ...ALIZE EDIT PROTECT DIVIDE DELETE DIRECT COPY CAMERA SET menu Settings to adjust your camcorder to the recording conditions STEADYSHOT etc The default settings are marked with B See page 61 for details on selecting menu items You can assign the functions to the ring p 33 B FOCUS ZOOM GAIN IRIS SHUTTER SPEED AE SHIFT You can select the upper limit for the Auto Gain Control AGC B OFF 24dB 0dB 3dB inc...

Page 66: ...e range where is displayed z Tips Clear image zoom maintains an image quality that is close to the original The face detection function will not be effective while using the digital zoom You can set the camera shake reduction when shooting B STANDARD Uses the camera shake reduction when shooting under relatively stable conditions ACTIVE Uses the camera shake reduction with more powerful effect OFF...

Page 67: ...rding media and outputs audio tone signals This function helps you to adjust colors when you view movies recorded with your camcorder on a TV or a monitor b Notes This function is automatically set to OFF when you switch the format perform the function by the MENU button or turn off the camcorder You cannot change the setting during recording or the focus magnifier operation x TONE B OFF Does not ...

Page 68: ...U button t select REC OUT SET with the V v B b SET buttons REC SET MEDIA SELECT x HDMI RESOLUSION You can select the resolution of the output signal from the HDMI jacks NTSC model 1080p 480i 720p 480i B 1080i 480i 480p 480i PAL model 1080p 576i 720p 576i B 1080i 576i 576p 576i z Tips See page 54 on the output resolution of the signal for each connecting cable x DOWN CONVERT TYPE You can select a d...

Page 69: ...ormation on HDMI output signal ON Overlaps the time code information on HDMI output signal The data is transmitted as digital data not as a projected image and the connected device identifies the time data by referencing the transmitted digital data If the frame rate is 24p 2 3 pulldown is performed and the converted information is automatically added and transmitted AUDIO SET menu Settings for th...

Page 70: ...nized with video before output MIC SELECT AUDIO OUTPUT TIMING DISPLAY SET menu Display settings MARKER DISPLAY OUTPUT etc The default settings are marked with B See page 61 for details on selecting menu items The histogram displays the luminance distribution that shows how many pixels of a particular brightness exist in the image B OFF Does not display the histogram ON Displays a histogram A line ...

Page 71: ...RED YELLOW x LEVEL You can select a peaking sensitivity HIGH BMIDDLE LOW b Notes The enhanced outlines will not be recorded on the recording media z Tips You can focus more easily using this function in combination with the expanded focus function p 29 You can assign ON OFF to an ASSIGN button p 46 x ON OFF B OFF Does not display markers ON Displays markers Markers are not recorded on the recordin...

Page 72: ... The setting changes in the order 4 0 t 8 0 t OFF with each press of the ASSIGN 2 button FOCUS MAGNIFIER button OFF Does not display the iris gain and shutter speed settings B ON Constantly displays the iris gain and shutter speed settings on the LCD screen z Tips The settings appear on the LCD screen during the manual adjustment regardless of the settings of this function indicates that the setti...

Page 73: ...n REC FORMAT when the shutter speed is 1 24 the shutter angle is 360 degrees PAL model With a frame rate of 50 selected in REC FORMAT when the shutter speed is 1 50 the shutter angle is 360 degrees With a frame rate of 25 selected in REC FORMAT when the shutter speed is 1 25 the shutter angle is 360 degrees See page 31 for details on REC FORMAT setting b Notes When you press the ASSIGN button to w...

Page 74: ...he frame on the face are also output b Notes Only the time code zebra peaking and the frame on the face are output when MARKER is set to ON and a marker is displayed on the LCD screen VF COLOR TEMP VF LCD PANEL DISPLAY OUTPUT TC UB SET menu Time code settings TC PRESET UB PRESET TC FORMAT etc The default settings are marked with B See page 61 for details on selecting menu items You can select whet...

Page 75: ...time code of the previous recording FREE RUN Advances the time code regardless of operation of your camcorder b Notes Even if the time code advances in the REC RUN mode the time code may not be recorded sequentially in the following cases When the recording format is changed When the recording media is removed B PRESET Records the newly set time code on the recording media REGENERATE Reads the las...

Page 76: ...ess the SET button You can display the camcorder s MAC address The connection information that you registered in order to use CTRL W SMARTPHONE can be reset b Notes If the connection information has been reset it will be necessary to set up the smartphone again in order to connect it to the camcorder Screen items Functions 1 Switch character type Characters switch between alphabetical letters nume...

Page 77: ...language to be used on the LCD screen Press the MENU button t select OTHERS with the V v B b SET buttons ASSIGN BUTTON CLOCK SET AREA SET SUMMERTIME LANGUAGE B OFF Cancels the melody ON Activates a melody when you start stop recording or when you are warned with warning indicators etc B ON Turns on the recording lamp OFF Turns off the recording lamp z Tips You can assign this function to an ASSIGN...

Page 78: ... total hours of operation in 10 hour increments Displays the current version of your camcorder Be sure to check for firmware updates b Notes To perform an update use the AC Adaptor You can reset all settings including the clock setting to their default values b Notes The picture profile settings are not reset USB LUN SET OPERATION TIME VERSION DISPLAY INITIALIZE Press the MENU button t select OTHE...

Page 79: ...ces with built in USB hub card reader b Notes You may not be able to use external media devices with a code function Your camcorder works with both FAT and NTFS file systems External media formatted on another device needs to be formatted by a computer etc before use The format screen appears when an external media device is connected to your camcorder Make sure that important data has not previou...

Page 80: ...save scenes exceeding the following number The number of scenes may be smaller depending on the camcorder setting and the type of images recorded High definition image quality HD movies Max 3 999 When the camcorder is connected to the external media device the images saved in the external media device are displayed on the LCD screen of the camcorder The recording media icon on the thumbnail screen...

Page 81: ...d record it on the recording device For details refer to the instruction manuals supplied with the device to be connected 5 When copy is finished stop the recording device and then your camcorder b Notes Since copying is performed via analog data transfer the image quality may deteriorate You cannot copy images to recorders connected with an HDMI cable When you do not want to display the counter e...

Page 82: ...82 If the recorder has PIN jacks a BNC to PIN adapter is required Creating a standard definition image quality DV disc with a recorder etc Continued ...

Page 83: ...camcorder may get warmer while you use it This is not a malfunction The remaining battery indicator does not indicate the correct figure Ambient temperature is too high or too low or the battery pack has not been charged enough This is not a malfunction Fully charge the battery again If the problem persists the battery may be worn out Replace it with a new one p 17 98 The indicated figure may not ...

Page 84: ...t no more than 100 images to be deleted on the edit screen The images are protected Unprotect the images p 56 The recording does not start when you press the REC START STOP button The playback screen is displayed Finish playback operation p 50 There is no empty space on the recording media Replace the recording media with a new one delete unnecessary images p 58 or format the recording media p 59 ...

Page 85: ...movie is started or stopped actually On your camcorder there may be a slight time difference between the point where you press the REC START STOP button and the actual point that recording movie starts stops This is not a malfunction The aspect ratio 16 9 wide 4 3 cannot be changed When recording at a setting other than DV the aspect ratio of the movie cannot be changed Automatic focus does not fu...

Page 86: ...rded in sequence The time code may not be recorded sequentially if you change the settings of REC FORMAT Refer also to the Internal memory Memory card section p 84 The desired images cannot be found Images cannot be played back Select the recording media and image quality of the image you want to play back on the thumbnail screen p 48 Image data cannot be played back if you have modified file name...

Page 87: ... with the HDMI cable try disconnecting and connecting the HDMI cable or turn on your camcorder again The image appears distorted on the 4 3 TV This happens when viewing a movie recorded in the 16 9 wide mode on a 4 3 TV Select REC OUT SET t VIDEO OUT t DOWN CONVERT TYPE t the appropriate down conversion type p 68 Black zone appears at top and bottom of a 4 3 TV screen This happens when viewing a m...

Page 88: ...ect the cable from the computer then connect it again securely Disconnect the cable from your computer and camcorder Reboot your computer and connect your computer and camcorder following the steps in the correct order Movies cannot be viewed or copied to the computer Disconnect the cable from the computer then connect it again You need to install the dedicated application software p 16 to copy mo...

Page 89: ... may flash even if around 10 is displayed as the battery remaining figure Warning indicator pertaining to battery pack temperature The battery pack is too hot Replace the battery pack or remove the battery pack and put it in a cool place Warning indicator pertaining to battery level of video light The remaining battery level is low Warning indicator pertaining to memory cards Slow flashing Free sp...

Page 90: ...s When recording in the internal memory the memory card is full and free space of the internal memory is less than 5 minutes Media full caution fast flashing When the internal memory and memory card are full Warning indicator pertaining to memory card formatting The memory card is damaged The memory card is not formatted correctly p 59 Warning indicator pertaining to the external media device The ...

Page 91: ...fer overflow Writing to the media was not completed in time You have performed recording and erasing operations repeatedly or a memory card that has been formatted by other device is used Copy and take data backup to other device such as a computer and then Empty the memory card on the camcorder p 59 The size of the inserted memory card is not sufficient for copying the movie s Use the recommended...

Page 92: ... that if you format the external media device all the recorded movies and photos in it are deleted If the same warning message is displayed after formatting the external media device the device may be incompatible with your camcorder or damaged Replace it with a new one Unable to access external media Use the external media in a stable condition vibration free at room temperature etc Confirm that ...

Page 93: ...ording and playback time will be shorter depending on the conditions under which you use your camcorder Playing time unit minute Internal memory High definition image quality HD x When AVCHD AUDIO FORMAT is set to LINEAR PCM unit minute x When AVCHD AUDIO FORMAT is set to DOLBY DIGITAL unit minute Standard definition image quality DV unit minute b Notes The number in is the minimum recordable time...

Page 94: ... movie scenes that can be recorded is 3 999 in AVCHD and 9 999 in DV The maximum continuous recording time for a movie is approximately 13 hours Your camcorder uses the VBR Variable Bit Rate format to automatically adjust image quality to suit the recording scene This technology causes fluctuations in the recording time of the media Movies containing quickly moving and complex images are recorded ...

Page 95: ... Philippines the U S A Venezuela etc Countries regions that require PAL color system Argentina Australia Austria Belgium Brazil Bulgaria China Czech Republic Denmark Finland France Germany Guiana Holland Hong Kong Hungary Iran Iraq Italy Kuwait Malaysia Monaco New Zealand Norway Paraguay Poland Portugal Russia Singapore Slovak Republic Spain Sweden Switzerland Thailand Ukraine United Kingdom Urugu...

Page 96: ... files from being played back C DV movie management information folder This folder contains recording data of DV movie Do not try to open this folder or access the contents of this folder from a computer Doing so might damage image files or prevent image files from being played back Do not modify the files or folders on the camcorder from the computer The image files may be destroyed or may not be...

Page 97: ...ory card compliant product you use Damaged or lost image data will not be compensated for and may occur in the following cases If you eject the memory card turn the power off on your camcorder or remove the battery pack for replacement while your camcorder is reading or writing image files on the memory card while the access lamp is lit or flashing If you use the memory card near magnets or magnet...

Page 98: ...ions of your camcorder To charge the battery pack Be sure to charge the battery pack before you start using your camcorder We recommend charging the battery pack in an ambient temperature of from 10 C to 30 C 50 F to 86 F until the charge lamp of the camcorder turns off If you charge the battery pack outside of this temperature range you may not be able to charge it efficiently To use the battery ...

Page 99: ...bably time to replace it with a new one Each battery s life is governed by storage operating and environmental conditions About charging the battery pack Use the AC Adaptor supplied to charge the designated batteries only If you charge other types of batteries those batteries may leak heat up burst or give an electric shock resulting in burns or injury Remove the charged battery from the AC Adapto...

Page 100: ...you are not using your camcorder Do not wrap your camcorder with a towel for example and operate it Doing so might cause heat to build up inside When disconnecting the power cord mains lead pull it by the plug and not the lead Do not damage the power cord mains lead such as by placing anything heavy on it Keep metal contacts clean Keep the Wireless Remote Commander and button type battery out of c...

Page 101: ...t cloth Avoid the following to prevent damage to the finish Using chemicals such as thinner benzine alcohol chemical cloths repellent insecticide and sunscreen Handling with above substances on your hands Leaving the casing in contact with rubber or vinyl objects for a long period of time Care and storage of the lens Wipe the surface of the lens clean with a soft cloth in the following instances W...

Page 102: ...teed when using a card adaptor Specifications System Video signal NTSC color EIA standards HDTV 1080 60i 1080 60p 720 60p specification models with the NTSC color system PAL color CCIR standards HDTV 1080 50i 1080 50p 720 50p specification models with the PAL color system Video recording system HD image quality MPEG 4 AVC H 264 AVCHD format Ver 2 0 compatible SD image quality DV standard compatibl...

Page 103: ...Gain 33 dB PAL model Video light Maximum illumination Approx 800 lx lux 0 5 m Approx 200 lx lux 1 0 m Irradiation angle wide angle distribution Approx 30 Color temperature Approx 5 500 K Input output connectors VIDEO OUT jack BNC connector 1 Vp p 75 Ω ohms unbalanced sync negative AUDIO OUT jacks Pin connectors 10 dBu at load impedance 47 kΩ kilohms Output impedance with less than 2 2 kΩ kilohms 0...

Page 104: ...ure 0 C to 40 C 32 F to 104 F Storage temperature 20 C to 60 C 4 F to 140 F Dimensions approx 48 mm 29 mm 81 mm 1 15 16 in 1 3 16 in 3 1 4 in w h d excluding the projecting parts Mass approx 170 g 6 0 oz excluding the power cord mains lead See the label on the AC Adaptor for other specifications Wireless LAN Supported standard IEEE 802 11 b g n Frequency 2 4 GHz Supported security protocols WEP WP...

Page 105: ...U S and other countries iOS is a registered trademark or trademark of Cisco Systems Inc and or its affiliates in the United States and certain other countries The terms HDMI and HDMI High Definition Multimedia Interface and the HDMI Logo are trademarks or registered trademarks of HDMI Licensing LLC in the United States and other countries Intel Pentium and Intel Core are registered trademarks or t...

Page 106: ...opyright owners Based on requests by the owners of copyright of these software applications we have an obligation to inform you of the following Licenses in English are recorded in the internal memory of your camera Establish a Mass Storage connection between the camera and a computer to read licenses in the PMHOME LICENSE folder On GNU GPL LGPL applied software The software that is eligible for t...

Page 107: ...T DEVICE NAME 76 Eyecup 21 F FACE DETECTION 29 Focus 28 FOCUS DISPLAY 73 FOCUS MAG RATIO 72 Focus magnifier 29 FREE RUN 75 G Gain 34 GUIDEFRAME 72 H Handle record button 25 HDMI 68 HDMI TC OUTPUT 69 HISTOGRAM 70 I Image database file 60 InfoLITHIUM battery pack 98 INITIALIZE 78 IRIS 34 Items 63 L LANGUAGE 77 Last Scene Review 45 LCD BRIGHT 73 Lens 5 101 M Manual ring 33 MARKER 71 85 MEDIA FORMAT 5...

Page 108: ...speed 35 SIMUL RELAY REC 25 Simultaneous recording 25 SONY LOGO LAMP 77 Specifications 102 SSID PW RESET 76 STEADY SHOT 66 SUMMERTIME 77 Supplied accessories 16 T TC FORMAT 74 TC MAKE 75 TC PRESET 44 85 TC RUN 75 TC UB DISPLAY 74 TC UB SET menu 74 Telephoto 27 TONE 67 Trademark 105 Troubleshooting 83 TV 53 U UB PRESET 44 UB TIME REC 75 USB CONNECT 77 USB LUN SET 78 Using your camcorder abroad 95 V...

Page 109: ......

Page 110: ......

Page 111: ......

Page 112: ...http www sony net Printed in China 2014 Sony Corporation ...

Reviews: